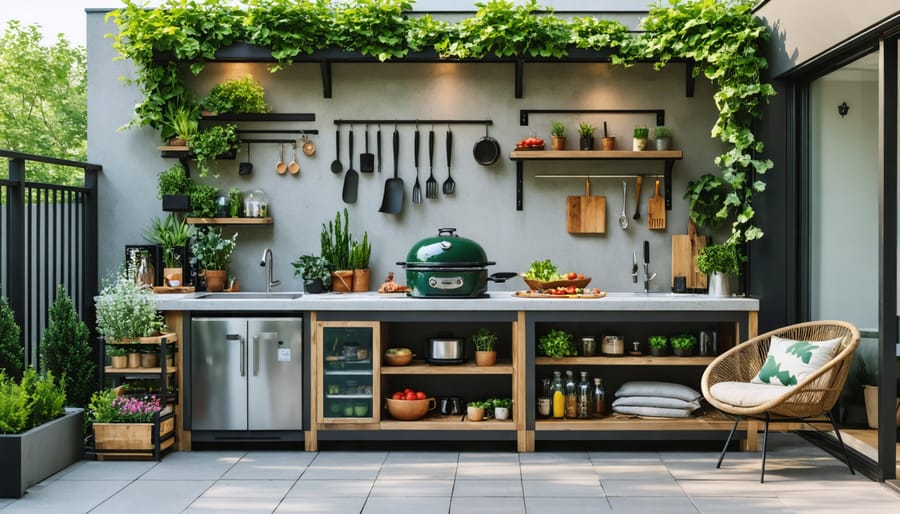
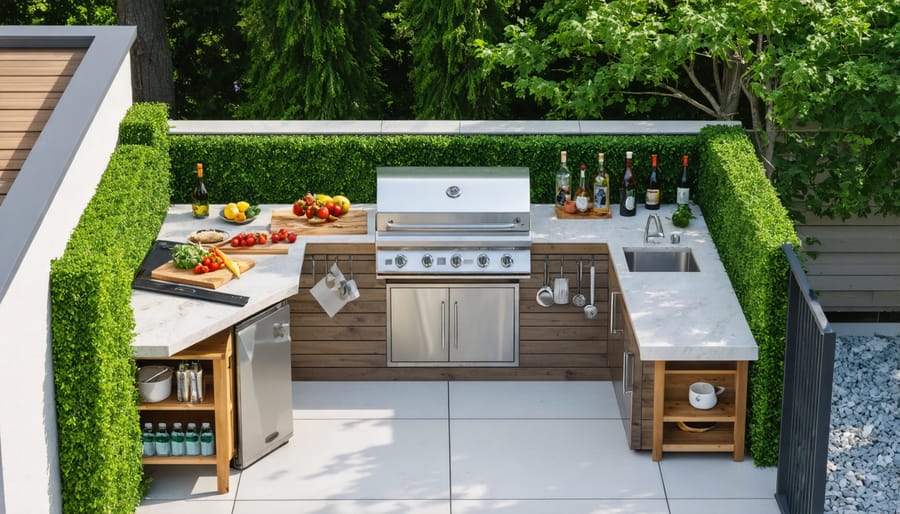
Transform your tiny outdoor space into a culinary haven by strategically planning every square inch of your compact cooking area. Starting with just 50 square feet, create a functional outdoor kitchen that combines a high-quality portable grill, weather-resistant prep station, and smart storage solutions. Position your cooking zone against an exterior wall to maximize space efficiency and tap into existing utilities while protecting the area from wind.
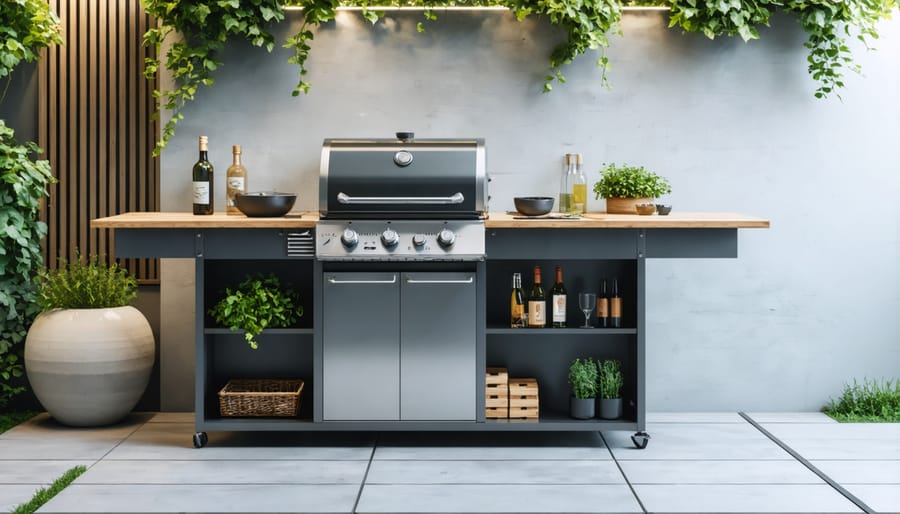
Space-saving innovations like fold-down countertops, wall-mounted utensil racks, and multi-functional furniture turn even the smallest patio or balcony into a sophisticated cooking destination. Consider a rolling cart with built-in storage that doubles as extra counter space when needed, yet tucks away neatly when not in use.
Whether you’re grilling weeknight dinners or hosting intimate gatherings, a well-designed small outdoor cooking area proves that limited space doesn’t mean limited possibilities. With careful planning and the right elements, your compact outdoor kitchen can deliver the same functionality and joy as its larger counterparts.
Smart Planning for Your Compact Cooking Space
Measuring and Mapping Your Space
Before diving into any construction or purchases, accurately measuring your available space is crucial to successful outdoor kitchen design principles. Start by clearing the intended area and using a measuring tape to document the exact dimensions, including length, width, and any height restrictions from overhead structures.
Create a rough sketch of your space on graph paper, using a scale of 1 inch = 1 foot for easy visualization. Mark fixed elements like doors, windows, or utility connections that can’t be moved. Don’t forget to note the direction of prevailing winds and sun exposure, as these factors will influence your layout decisions.
Consider traffic flow by leaving at least 36 inches of clearance for walkways. When planning your cooking zone, remember the “work triangle” concept – keeping your prep area, cooking surface, and storage within comfortable reach. Use painter’s tape to mark out your planned layout directly on the ground or patio surface. This temporary visualization helps you better understand how the space will function before making any permanent changes.
Weather and Positioning Considerations
When planning your small outdoor cooking area, strategic positioning is crucial for both comfort and functionality. Consider the prevailing wind direction to prevent smoke from blowing into your home or seating area. Ideally, position your cooking space downwind from your main outdoor living space.
Weather protection is equally important. If possible, choose a location with natural shelter, such as under an existing overhang or near a protective wall. For areas without natural coverage, consider installing a retractable awning or pergola to shield your cooking space from rain and intense sunlight.
Think about convenience factors too. Place your cooking area close enough to your indoor kitchen for easy access to supplies, but maintain proper ventilation clearance from windows and doors. Installing efficient outdoor lighting options will extend your cooking hours and enhance safety during evening meal prep.
Finally, consider seasonal sun patterns. In warmer climates, morning sun exposure with afternoon shade is ideal, while cooler regions might benefit from maximum sun exposure throughout the day.
Essential Elements for Your Mini Kitchen
Compact Cooking Equipment
When space is at a premium, choosing the right cooking equipment becomes crucial. Today’s market offers plenty of innovative cooking station solutions that pack impressive functionality into compact designs.
Consider a tabletop gas grill, which provides ample cooking space while remaining completely portable. These units typically offer between 150-200 square inches of grilling surface – perfect for preparing meals for 2-4 people. When not in use, they can be easily stored away or covered in place.
Portable electric grills are another excellent option, especially for balconies or areas where gas isn’t permitted. Many models feature non-stick surfaces and precise temperature controls, making them ideal for various cooking styles. Look for versions with folding legs or wall-mounting capabilities to maximize space efficiency.
For those who love smoking and slow-cooking, compact vertical smokers offer a space-saving alternative to traditional horizontal models. Standing just a few feet tall, these units can still accommodate multiple cooking racks while maintaining a minimal footprint.
Don’t overlook multipurpose cooking stations that combine different functions. Some modern units feature a grill top that can be swapped with a griddle or pizza stone, effectively giving you multiple cooking appliances in one compact package. Storage-smart designs often include built-in hooks for utensils and folding side tables for prep space, making the most of every inch.
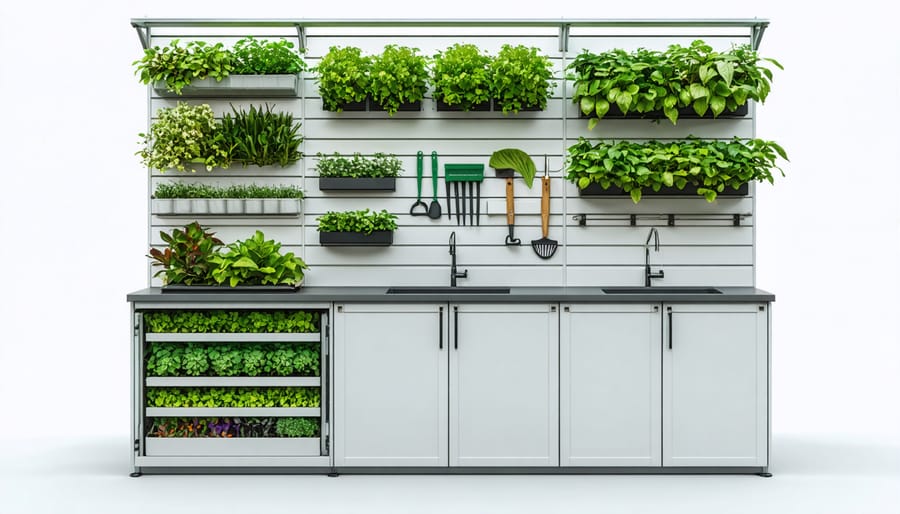
Smart Storage Solutions
Smart storage is essential when working with a small outdoor cooking area, and there are plenty of creative solutions to keep your space organized and clutter-free. Start by installing a wall-mounted magnetic strip for frequently used metal utensils – it’s both a space-saver and an attractive display element. Consider adding weather-resistant hooks beneath your prep counter or along nearby walls to hang grilling tools, oven mitts, and kitchen towels.
Make the most of vertical space with a multi-tiered rolling cart that can be tucked away when not in use. These carts are perfect for storing spices, marinades, and cooking supplies, while their mobility allows you to keep ingredients close at hand while cooking. For protection against the elements, opt for clear storage containers with tight-fitting lids to keep dry goods safe and visible.
Don’t overlook the potential of built-in storage solutions. Consider installing a small cabinet with pull-out drawers beneath your grill or prep area. Weather-resistant wicker baskets can be stored under benches or tables, providing both storage and style. For frequently used items, try mounting a pegboard on a nearby wall – it’s customizable and allows you to adjust the layout as your needs change.
Create designated zones for different items: cooking tools in one area, serving pieces in another, and cleaning supplies in a separate, easily accessible spot. This organization system helps maintain order in a compact space while ensuring everything you need is within reach.
Space-Maximizing Design Tips
Multi-functional Furniture
In a small outdoor cooking area, every piece of furniture should earn its keep by serving multiple functions. Consider a storage bench that provides both seating and a place to store grilling tools, charcoal, or outdoor cushions. Foldable tables with built-in shelving can act as prep stations while cooking and transform into serving surfaces during meals.
Look for modular furniture sets that can be configured in different ways depending on your needs. A rolling cart with a butcher block top serves as both additional counter space and mobile storage, perfect for bringing supplies outside or moving things around as needed. Wall-mounted tables that fold down when not in use are excellent space-savers, offering a dining surface that disappears when you need more floor space.
Consider ottomans with hidden storage compartments that can double as extra seating or side tables. Bar-height tables with storage shelves underneath maximize vertical space while creating a casual dining spot. For ultimate flexibility, invest in nesting tables or stackable stools that can be tucked away when not needed.
Remember to choose weather-resistant materials that can withstand outdoor conditions while remaining lightweight enough to move around easily.
Vertical Space Utilization
When space is limited horizontally, look up! Vertical space utilization is a game-changer for small outdoor cooking areas. Start by installing wall-mounted shelving units to store cooking utensils, spices, and smaller items. Consider using pegboards, which offer flexible storage options and can be easily reorganized as your needs change.
Magnetic knife strips mounted at eye level keep sharp tools safely accessible while saving precious counter space. Install hooks under shelves or on walls to hang frequently used items like tongs, spatulas, and oven mitts. A fold-down table or counter that can be mounted to the wall provides extra prep space when needed and can be tucked away when not in use.
Make use of corners by installing corner shelving units or hanging pot racks overhead. Vertical herb gardens not only maximize space but also provide fresh ingredients within arm’s reach. Consider installing a retractable awning or pergola above your cooking area for shade and weather protection without taking up ground space.
Don’t forget about lighting – wall-mounted sconces or string lights can provide necessary illumination without cluttering your cooking area. Remember to keep frequently used items at comfortable reaching height and less-used items higher up.
Budget-Friendly Solutions
Creating an outdoor cooking area doesn’t have to break the bank. With some creative thinking and smart shopping, you can build a functional space that fits your budget. Start by exploring secondhand marketplaces and yard sales for gently used grills or outdoor furniture – you’d be surprised at the quality items available at fraction of their original cost.
Consider using concrete pavers or gravel instead of expensive decking materials for your cooking area’s foundation. These alternatives are durable and cost-effective, typically running under $2 per square foot. For counter space, repurpose old kitchen cabinets with weather-resistant paint and a concrete countertop, or build a simple wooden prep station using pressure-treated lumber.
Dollar stores and discount retailers offer budget-friendly storage solutions like plastic bins and hooks for organizing your cooking tools. Look for end-of-season sales at home improvement stores to score deals on grills and outdoor accessories. For shelter, a simple pop-up canopy can provide protection from the elements at a much lower cost than permanent structures.
Get creative with seating by using weather-resistant cushions on concrete blocks or repurposed wooden crates. Plant herbs in affordable containers from discount stores to add both functionality and aesthetic appeal. Remember, you can always upgrade elements over time – start with the basics and expand your outdoor kitchen as your budget allows.
Simple solar-powered lights from discount stores can provide ambiance without the expense of electrical installation, making your budget-friendly cooking area enjoyable day and night.
Creating your perfect small outdoor cooking area doesn’t have to be overwhelming or expensive. With thoughtful planning and smart design choices, you can transform even the tiniest space into a functional and enjoyable cooking environment. Remember to start by assessing your available space, prioritizing essential elements, and choosing weather-resistant materials that suit your climate. Whether you opt for a simple grill station or a more elaborate setup with countertop space and storage, the key is maximizing functionality while maintaining comfort and style. Don’t let limited space hold you back – your dream outdoor cooking area is within reach. Start small, plan carefully, and watch as your outdoor space becomes the perfect spot for creating memorable meals and entertaining loved ones.