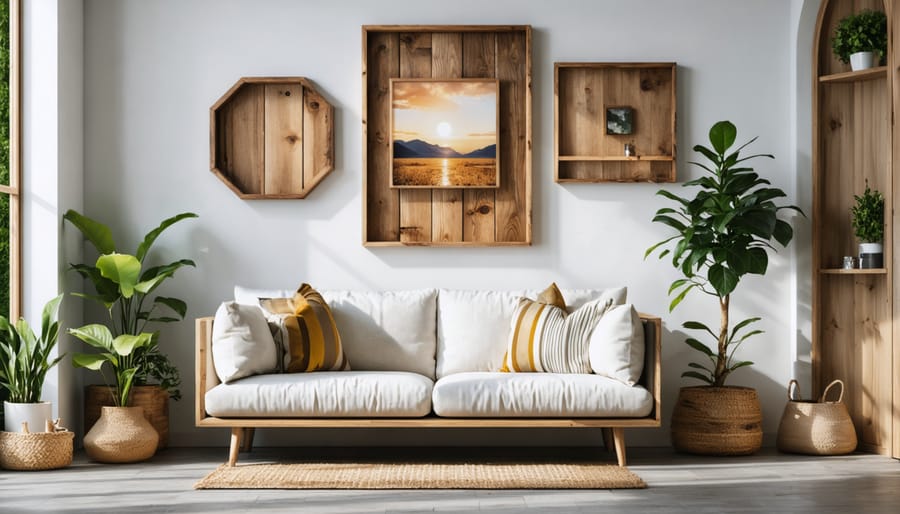
Transform ordinary pieces of wood into stunning home décor pieces even if you’re not handy. Start with simple geometric wall art using pine boards, a saw, and wood stain – perfect for beginners looking to create instant impact. Master basic joinery techniques like pocket holes and dowel joints to craft custom floating shelves that showcase both form and function. Build confidence through small projects like tea light holders and rustic picture frames, using basic tools you already own. Creative woodworking isn’t just about following plans – it’s about discovering your artistic voice through the timeless medium of wood, one project at a time. Whether you’re drawn to the clean lines of modern design or the character of reclaimed materials, DIY woodworking opens up endless possibilities for personalizing your space with pieces that tell your story.
Focus Points:
– Begin with small, achievable projects that build essential skills
– Use readily available materials and basic tools
– Embrace imperfections as unique design elements
– Combine different wood types and finishes for visual interest
Essential Tools for Beginner Woodworking Projects
Must-Have Hand Tools
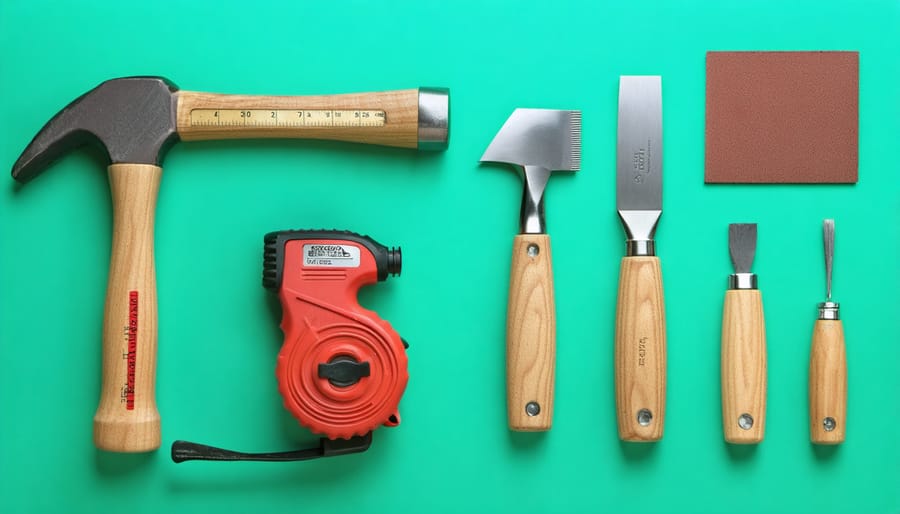
Starting your woodworking journey doesn’t require a workshop full of expensive tools. With just a few well-chosen hand tools, you can tackle many creative projects while practicing smart budgeting for DIY projects. Here’s your essential toolkit:
First, invest in a quality measuring and marking set: a tape measure, pencils, and a combination square. These tools ensure accurate cuts and proper alignment. A sturdy hammer and a set of screwdrivers (both Phillips and flathead) are absolute must-haves for basic assembly work.
For cutting, start with a handsaw – specifically a crosscut saw for straight cuts across the grain. Add a coping saw for curved cuts and detailed work. Don’t forget chisels in various sizes; they’re perfect for cleaning up joints and creating decorative details.
Finally, grab some quality sandpaper in different grits (80, 120, and 220) and a simple block plane for smoothing surfaces. Remember, it’s better to start with fewer high-quality tools than many cheap ones that might break or cause frustration during your projects.
Optional Power Tools That Make Life Easier
While a basic toolset will get you started, certain power tools can significantly enhance your woodworking experience. A cordless drill is perhaps the most versatile investment, making quick work of assembly and perfect holes. Consider adding a jigsaw (around $50-$80) for curved cuts and intricate designs – perfect for creating budget-friendly decor ideas with character.
A random orbital sander ($40-60) will save you countless hours of hand sanding and ensure professional-looking results. If your budget allows, a compact miter saw ($150-200) is fantastic for precise angle cuts and trim work. Don’t feel pressured to buy everything at once – quality hand tools can substitute while you build your collection.
Budget-conscious alternatives include using a manual hand saw instead of a miter saw, or sanding blocks in place of power sanders. Remember, many home improvement stores rent power tools for one-off projects, making it easier to tackle ambitious builds without the upfront investment.
Simple Yet Stunning Woodworking Projects
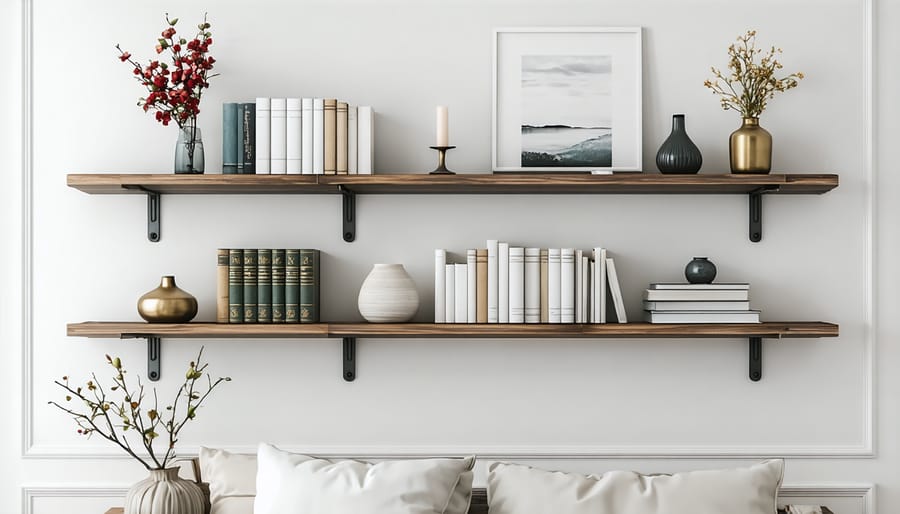
Floating Shelves With Hidden Brackets
Ready to transform your room with DIY decor? These sleek floating shelves are the perfect weekend project to add a modern touch to any space. Let’s create beautiful shelves that appear to float effortlessly on your wall, hiding all mounting hardware for a clean, professional look.
Start by gathering your materials: a piece of high-quality hardwood or plywood (cut to your desired shelf dimensions), mounting brackets, a drill, level, stud finder, wood screws, and wood finish of your choice. For this project, we’ll create a hollow shelf that conceals the brackets inside.
First, cut your wood into three pieces: the top, bottom, and front face. The side pieces will be cut slightly shorter to allow the front piece to cover them completely. Sand all pieces thoroughly before assembly.
Create a pocket in the bottom piece by cutting grooves that will accommodate your brackets. These grooves should be slightly wider than your brackets to allow for easy mounting. Next, assemble your shelf by gluing and nailing the pieces together, creating a hollow box with one open side that will sit against the wall.
Now for mounting: Use your stud finder to locate and mark wall studs. Position your brackets on the wall, ensuring they’re level, and secure them firmly into the studs. Slide your hollow shelf over the mounted brackets, making sure it fits snugly. The grooves you created should align perfectly with the brackets.
Once positioned, secure the shelf to the brackets using small screws from the bottom – these will be practically invisible when the shelf is at eye level or above. Finally, apply your chosen finish to protect the wood and enhance its natural beauty.
Pro tip: Make a paper template of your bracket positions before mounting to ensure perfect alignment. This simple step can save you from unwanted wall holes and frustration.
Rustic Picture Frames
Transform ordinary photos into stunning wall art with these DIY rustic picture frames. This project lets you create custom-sized frames with that sought-after weathered look, all while keeping your budget intact.
Start by selecting your lumber – pine works wonderfully for this project and takes distressing beautifully. For a standard 8×10 photo, cut two pieces at 12 inches and two at 14 inches, allowing for overlap at the corners. Make sure your cuts are at precise 45-degree angles for seamless corners.
Before assembly, use a router or chisel to create a rabbet (groove) along the inner edge of each piece. This will hold your glass, photo, and backing. Sand all pieces thoroughly, starting with 80-grit sandpaper and working your way up to 220-grit for a smooth finish.
To achieve that rustic charm, try these weathering techniques:
– Hit the wood with chains or hammers for natural-looking dents
– Brush on vinegar and steel wool solution for an aged appearance
– Use wire brushes to expose the wood grain
– Apply dark stain, then partially sand it off for a time-worn look
Once you’ve achieved your desired weathered effect, assemble the frame using wood glue and corner clamps. Reinforce each corner with small finishing nails or a brad nailer. Let the glue dry completely before handling.
For mounting hardware, attach a sawtooth hanger or picture wire between two D-rings on the back. Remember to pre-drill holes to prevent splitting the wood.
Pro tip: Make a paper template of your frame before cutting the wood to ensure your proportions look right on your wall. This saves time and materials by helping you visualize the final result.
Add character to your frame by incorporating elements like twine wrapping, vintage buttons, or rustic metal corners. These personal touches make each frame unique and truly yours.
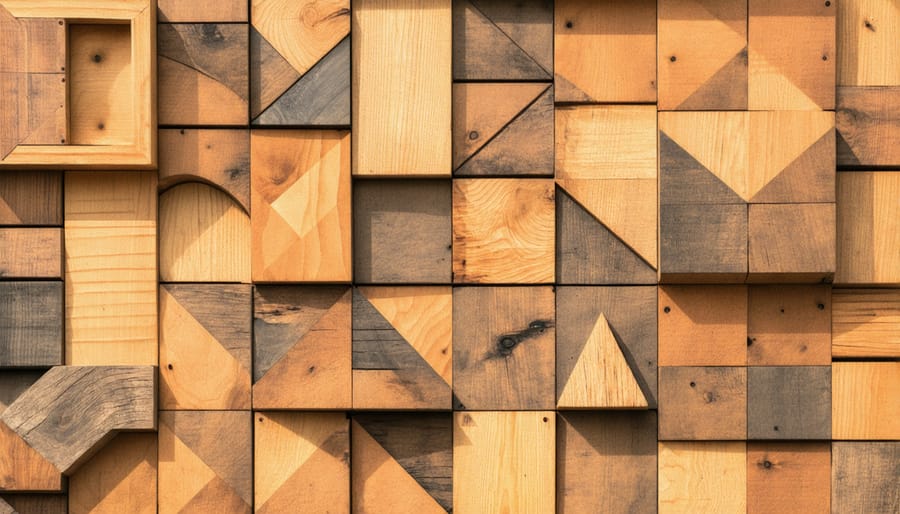
Modern Geometric Wall Art
Transform your living space with a stunning piece of geometric wall art that combines modern design with the warmth of natural wood. This project lets you create custom wall art designs that look professional while being surprisingly simple to make.
To get started, you’ll need:
– 1×4 pine boards
– Wood stain in your chosen colors
– Wood glue
– Miter saw or hand saw
– Measuring tape
– Pencil
– Sandpaper
– Level
– Picture hanging hardware
Begin by sketching your geometric design on paper. Simple patterns like diamonds, hexagons, or triangles work beautifully for beginners. Cut your boards at various angles (typically 30, 45, or 60 degrees) using your saw. Sand each piece smooth before staining them in your selected colors.
Pro tip: Create a practice layout on the floor before committing to the final design. This helps you visualize the finished piece and make adjustments easily.
Once you’re happy with the arrangement, start assembling your design. Apply wood glue between connecting pieces, ensuring they’re perfectly aligned. Use painter’s tape to hold pieces together while the glue dries. Work in small sections to maintain control over the design.
For extra stability, consider adding a simple frame around your piece using straight cuts of the same wood. Once everything is dry, attach picture hanging hardware to the back. Use a level when mounting to ensure your artwork hangs perfectly straight.
This project typically takes a weekend to complete and costs around $30-50 in materials. The result is a conversation-starting piece that adds personality and sophistication to any room. Remember, imperfections add character – embrace them as part of your handcrafted creation!
Minimalist Plant Stands
Create a stunning home for your indoor plants with these modern, minimalist plant stands that combine form and function. This project is perfect for beginners and requires just a few basic materials and tools to achieve professional-looking results.
Materials needed:
– 1×4 pine or cedar boards
– 1×2 boards for legs
– Wood glue
– Wood screws (1¼-inch)
– Sandpaper (120 and 220-grit)
– Wood stain or paint (optional)
Essential tools:
– Miter saw or handsaw
– Drill with screwdriver bits
– Measuring tape
– Pencil
– Level
– Safety glasses and dust mask
Start by cutting your 1×4 boards into three squares of equal size – these will form your platforms. For a balanced look, we recommend 8-inch squares for small to medium plants. Next, cut four legs from the 1×2 boards at your desired height. Consider making them different lengths (12, 18, and 24 inches) for visual interest if you’re creating multiple stands.
Sand all pieces thoroughly, starting with 120-grit sandpaper and finishing with 220-grit for a smooth surface. This step is crucial for achieving that polished, professional look.
To assemble, position the legs at each corner of your platforms, ensuring they’re perfectly square. Pre-drill holes to prevent splitting, then secure with wood glue and screws. Use your level to check that each platform is perfectly horizontal.
Pro tip: Add small rubber feet to the bottom of each leg to protect your floors and ensure stability.
For finishing, you can either leave the natural wood exposed for a Scandinavian feel or apply your chosen stain or paint. Light colors work beautifully for a modern aesthetic, while dark stains create drama and sophistication.
These versatile stands can be arranged individually or grouped to create an eye-catching display of your favorite plants at varying heights. Their clean lines and simple design make them perfect for any room, from minimalist living spaces to cozy reading nooks.
Wood Selection and Finishing Tips
Best Woods for Beginners
Starting your woodworking journey doesn’t have to be intimidating, especially when you choose the right materials. Pine is often considered the perfect beginner’s wood, thanks to its affordability and widespread availability. It’s soft enough to work with basic tools yet sturdy enough for most projects. Plus, its light color makes it ideal for practicing different staining techniques.
Poplar is another excellent choice for newcomers. While slightly more expensive than pine, it’s still budget-friendly and offers better stability. It’s particularly great for indoor projects and painted pieces, as it takes paint beautifully and has minimal grain patterns that might show through.
Cedar deserves a spot on your starter list too. It’s naturally resistant to decay and insects, making it perfect for outdoor projects. Its distinctive aroma and rich color add charm to any creation, and it’s relatively easy to cut and shape.
For those ready to step up their game a bit, oak is worth considering. Though it’s harder and more expensive than the previous options, it’s incredibly durable and showcases beautiful grain patterns. Start with red oak, which is more affordable and easier to work with than its white oak cousin.
Remember to look for straight boards without knots when possible, and always check for warping before purchasing. These woods will help you build confidence while creating beautiful pieces that last.
Simple Finishing Techniques
Achieving a professional finish doesn’t have to be complicated. Start by thoroughly sanding your piece with progressively finer grits (120, 180, then 220) until the surface feels silky smooth. Remember to always sand in the direction of the wood grain to avoid scratches.
For a natural look, apply wood stain using a lint-free cloth or foam brush. Work in small sections, wiping off excess stain after a few minutes to ensure even coverage. Light woods like pine may need pre-stain wood conditioner to prevent blotchiness. Allow the stain to dry completely according to the manufacturer’s instructions – usually 24-48 hours.
Protect your finished piece with a clear topcoat. Polyurethane is popular for its durability and comes in both water-based and oil-based options. Water-based finishes dry quickly and have less odor, while oil-based provide superior protection and a warmer appearance. Apply thin coats using a quality brush, lightly sand between coats with 320-grit paper, and wipe clean with a tack cloth.
For a more rustic look, try rubbing paste wax over bare or stained wood. This creates a subtle sheen and offers basic protection. Danish oil is another beginner-friendly option that combines stain and sealer in one product, perfect for smaller projects where simplicity is key.
As you embark on your woodworking journey, remember that every master craftsperson started exactly where you are today. The projects and techniques we’ve explored are just the beginning of what you can achieve with dedication, patience, and creativity. Don’t be afraid to make mistakes – they’re valuable learning opportunities that will help you grow and improve.
Start with simple projects and gradually work your way up to more complex ones as your confidence grows. Join online woodworking communities, attend local workshops, or connect with fellow DIY enthusiasts to share experiences and learn from each other. The woodworking community is incredibly supportive and always eager to help newcomers.
Keep your workspace organized, maintain your tools properly, and always prioritize safety. Remember to celebrate your successes, no matter how small they might seem. That first perfectly cut joint or beautifully finished piece is something to be proud of.
Consider documenting your progress through photos or a project journal. Looking back at where you started will be incredibly rewarding as your skills develop. And don’t forget – every piece of furniture or decor in your home that you’ve crafted yourself tells a unique story and adds personal value that store-bought items simply can’t match.
Ready to get started? Gather your basic tools, select your first project from our guide, and take that exciting first step into the world of creative woodworking. Your journey to becoming a skilled woodworker begins now, and we can’t wait to see what you’ll create.