Transform your home into a self-sustaining powerhouse by mastering the core principles of zero energy homes. Integrate passive solar design by positioning large, south-facing windows to capture winter sun while using deep roof overhangs to block summer heat. Install a highly efficient building envelope with R-60 ceiling insulation and R-40 wall insulation to minimize energy loss. Maximize natural ventilation through strategic window placement and thermal chimney effects to reduce cooling costs by up to 50%. Power your home with renewable energy systems, combining rooftop solar panels with smart energy storage solutions to achieve true energy independence.
These proven design strategies not only eliminate monthly energy bills but also create a more comfortable, resilient living space that maintains consistent temperatures year-round. Whether retrofitting an existing structure or planning new construction, these foundational elements of zero-energy design deliver immediate and lasting benefits while significantly reducing your carbon footprint.
Now more accessible than ever, zero-energy design principles can be implemented gradually, allowing homeowners to transition toward complete energy independence at their own pace and budget. The initial investment in these systems typically pays for itself within 5-10 years through eliminated energy costs and increased property value.
The Building Blocks of Zero Energy Design
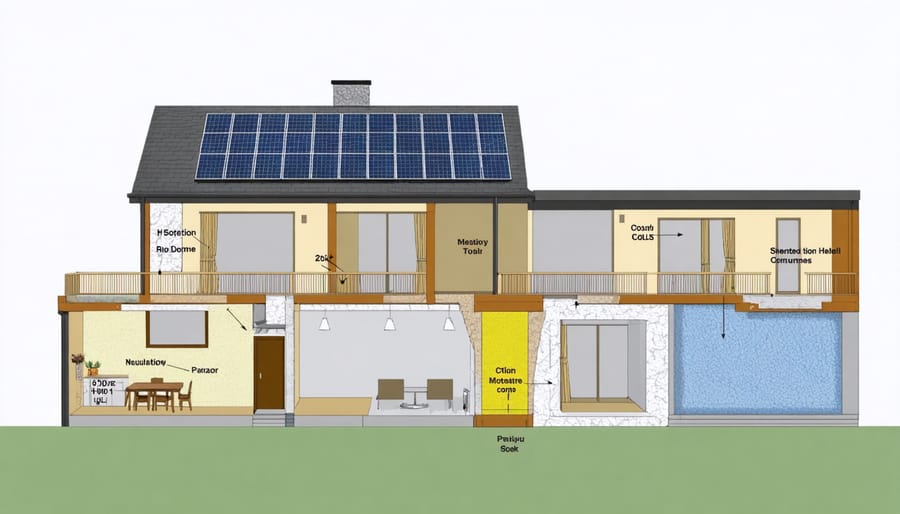
Smart Passive Solar Design
Smart passive solar design is like giving your home a natural thermostat, and it all starts with proper positioning. By orienting your home with the majority of windows facing south (in the Northern Hemisphere), you can maximize solar heat gain during winter while minimizing it during summer. Think of your windows as solar collectors – they’re doing the heavy lifting in this design strategy.
Strategic window placement is crucial. Large, south-facing windows should make up about 8-12% of your home’s total floor area for optimal heat gain. These windows work best when paired with materials that absorb and store heat, like concrete floors or dark-colored tile. During winter, the low sun angle allows warmth to penetrate deep into your home, while roof overhangs block the high summer sun to prevent overheating.
To enhance this natural heating and cooling system, consider installing thermal mass features like stone walls or water features near south-facing windows. These elements absorb heat during the day and release it slowly at night, helping maintain comfortable temperatures. Don’t forget about the east and west sides of your home – minimize windows here to prevent unwanted heat gain during summer mornings and afternoons.
The beauty of passive solar design lies in its simplicity – once properly implemented, it works automatically, requiring no mechanical systems or energy input. Just remember to complement these design elements with proper insulation and weatherization for maximum effectiveness.
Superior Insulation Strategies
Proper insulation is the cornerstone of any zero-energy home design, acting as your first line of defense against energy waste. Today’s eco-friendly insulation solutions offer impressive performance while keeping environmental impact to a minimum.
Start with your walls by implementing a continuous insulation system that eliminates thermal bridges. Modern spray foam insulation creates an airtight seal and offers R-values up to R-7 per inch, while recycled denim or cellulose options provide excellent sustainability credentials. Don’t forget about double-stud wall construction, which creates deeper wall cavities for enhanced insulation depth.
Your roof and attic deserve special attention since they’re responsible for significant heat loss in winter and heat gain in summer. Consider using a combination of rigid foam boards and blown-in insulation to achieve R-values of 49 or higher. For foundations, exterior rigid foam insulation prevents heat loss through the concrete while protecting against moisture.
Windows are often the weak link in your insulation strategy. Opt for triple-pane windows with low-E coatings and insulated frames. These might cost more upfront but can reduce heat loss by up to 50% compared to standard double-pane windows.
Remember to seal all gaps and cracks with high-quality caulk or foam sealant – even small air leaks can significantly impact your home’s energy performance. Consider getting a professional energy audit to identify potential weak spots in your insulation system.
DIY Energy Generation Systems
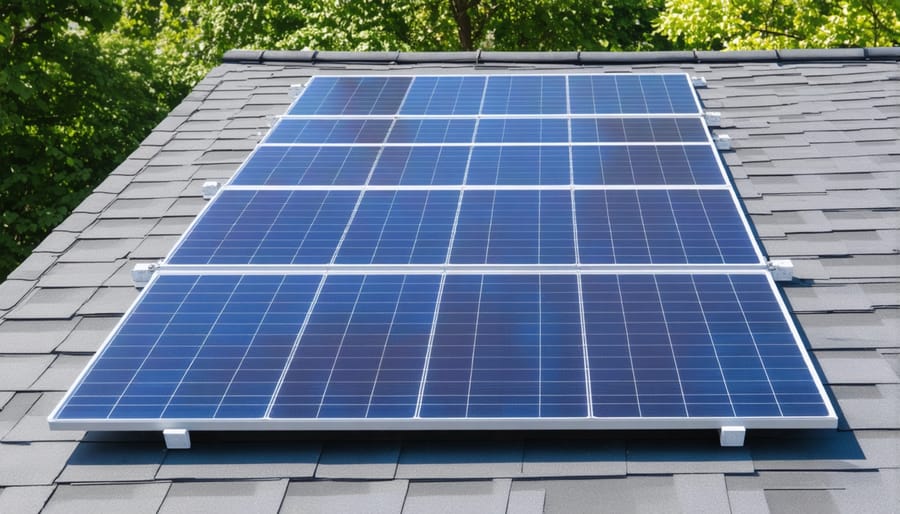
Solar Panel Installation Basics
Installing solar panels is a crucial step toward achieving a zero-energy home, and with proper planning, it’s more achievable than you might think. While professional installation is recommended for complex setups, understanding the basics of solar and wind power installation can help you make informed decisions.
Start by assessing your roof’s orientation and condition. South-facing roofs in the Northern Hemisphere receive the most sunlight, ideally at a 30-45 degree angle. Ensure your roof is in good condition and can support the added weight of solar panels – about 2-4 pounds per square foot.
Next, calculate your energy needs by reviewing past electricity bills. This helps determine how many panels you’ll need. A typical home usually requires 20-24 panels to offset its energy usage completely, but this varies based on your location and energy consumption.
Before installation, obtain necessary permits from your local authorities. Many municipalities have specific requirements for solar panel installations, including setback distances and electrical codes.
The basic installation process includes:
1. Installing mounting hardware on your roof
2. Securing the rails that will hold the panels
3. Placing the solar panels on the rails
4. Connecting the electrical wiring
5. Installing the inverter and battery storage system
6. Final inspection and grid connection
Remember to position panels away from shade-causing obstacles and leave adequate space for maintenance access. It’s also crucial to install proper safety equipment, including roof anchors and electrical disconnects.
Consider starting with a smaller system that you can expand later. This approach allows you to learn about solar energy while managing costs effectively. Many homeowners begin with enough panels to offset 30-50% of their energy usage and add more as needed.
Small-Scale Wind Energy Solutions
When it comes to harnessing wind power at home, small-scale wind energy solutions offer an exciting opportunity to generate your own clean electricity. These systems can be particularly effective if you live in an area with average wind speeds of at least 10 mph, making them a smart addition to your zero-energy home strategy.
The most common residential wind solution is the vertical axis wind turbine (VAWT), which works well in urban and suburban settings. Unlike their larger commercial cousins, these compact turbines can be installed on rooftops or in backyards, typically standing between 20 to 45 feet tall. They’re designed to catch wind from any direction, making them ideal for areas with variable wind patterns.
Before installing a wind system, start with a wind resource assessment of your property. You can do this by:
– Consulting local wind maps
– Using an anemometer for at least 3 months
– Checking with nearby weather stations for historical data
– Observing local vegetation patterns for signs of consistent wind
For optimal performance, position your turbine:
– Above nearby obstacles like trees and buildings
– At least 30 feet higher than anything within 300 feet
– Away from turbulent air zones
– Where local zoning laws permit
The typical residential wind system includes:
– The turbine itself
– A tower or mounting system
– An inverter to convert DC to AC power
– Battery storage (optional but recommended)
– A charge controller
– Safety disconnect switches
Maintenance is relatively straightforward, requiring annual inspections of:
– Blade condition
– Bolt tightness
– Cable connections
– Generator bearings
– Tower stability
While professional installation is recommended for larger systems, some smaller wind turbines come in DIY-friendly kits. Remember to check local building codes and obtain necessary permits before installation. Many areas offer tax incentives and rebates for wind energy systems, making them more financially accessible for homeowners.
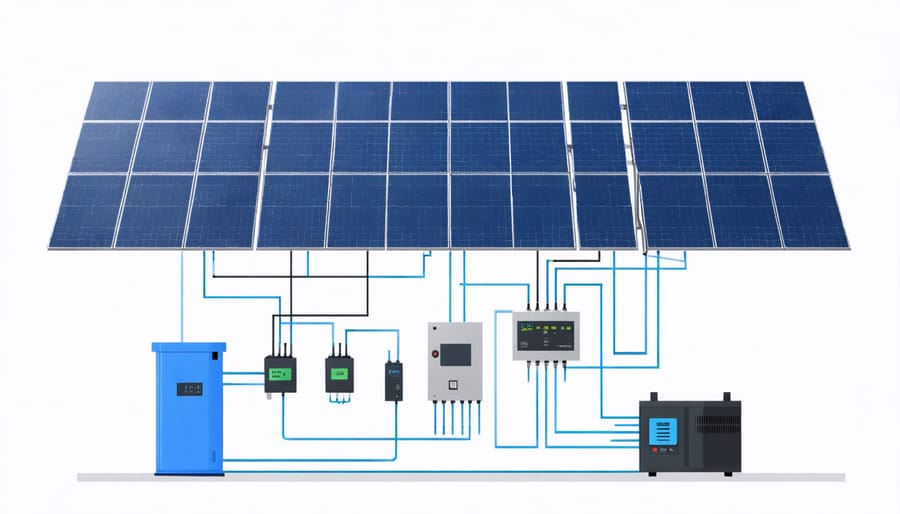
Smart Energy Storage Solutions
Battery Systems for Your Home
Modern battery systems are revolutionizing how we store and use energy in our homes. The most popular option today is lithium-ion batteries, which offer excellent efficiency and a compact footprint. These systems typically last 10-15 years and can power your home during outages while storing excess solar energy for nighttime use.
For those just starting out, a 10-14 kWh battery system usually suffices for basic backup power. Larger homes or those seeking complete energy independence might need 20+ kWh capacity. Tesla Powerwall, LG Chem, and Enphase Encharge are leading choices that combine reliability with smart features.
When installing a battery system, placement is crucial. Your garage or utility room makes an ideal location, provided it’s temperature-controlled and well-ventilated. Most systems require about 4 square feet of wall space and should be installed by certified professionals to ensure safety and warranty coverage.
Consider these practical tips:
– Install your battery system close to your electrical panel
– Ensure proper ventilation and temperature control
– Check local building codes and obtain necessary permits
– Plan for future expansion by leaving additional wall space
– Include a battery monitoring system for optimal performance
While battery systems represent a significant investment, many homeowners find the combination of energy independence, lower utility bills, and backup power well worth the initial cost. Federal tax incentives and local rebates can help offset the installation expenses.
Thermal Storage Techniques
Storing thermal energy is like having a heat savings account for your home, and it’s simpler than you might think! The most common technique uses water tanks, which can hold heat from your solar panels or other sources for later use. These tanks work particularly well in basements or utility rooms where they can maintain temperature efficiently.
Another popular method is using phase change materials (PCMs), which store and release heat as they change between solid and liquid states. Think of them as high-tech ice packs that work in reverse! You can incorporate PCMs into your walls or ceiling tiles for passive temperature regulation throughout your home.
Thermal mass materials like concrete, brick, and stone are natural heat batteries. When strategically placed in your home (think: a concrete floor that gets direct sunlight), these materials absorb heat during the day and release it slowly at night. This natural cycle helps maintain comfortable temperatures without using additional energy.
Underground thermal storage is gaining popularity too. By burying insulated pipes or tanks in your yard, you can take advantage of the earth’s constant temperature to store heat seasonally. While this requires more initial setup, it’s incredibly efficient for long-term energy storage.
For DIY enthusiasts, starting with simple solutions like water tanks or adding thermal mass to your living space can make a significant difference in your home’s energy efficiency.
Energy Management Systems
Smart Home Integration
Integrating smart home technology with your zero energy design isn’t just about convenience – it’s a game-changer for optimizing your home’s energy performance. By implementing smart home energy upgrades, you can create a system that automatically manages power consumption while maintaining comfort.
Start with a smart thermostat that learns your schedule and adjusts temperatures accordingly. Connect it to your HVAC system and solar panels to optimize heating and cooling based on real-time energy production. Install smart blinds that automatically adjust throughout the day, maximizing natural light and passive solar heating while reducing the need for artificial lighting and temperature control.
Energy monitoring systems with smartphone apps let you track consumption patterns and make informed decisions. Set up automated routines that turn off unused appliances during peak hours and schedule energy-intensive tasks for times when solar production is highest.
Consider smart LED lighting that adjusts brightness based on natural light levels and occupancy sensors that ensure lights aren’t left on in empty rooms. Connect your water heater to a smart controller to heat water only when needed, and use smart plugs to eliminate phantom energy drain from devices on standby.
For best results, choose devices that work with major platforms like HomeKit, Google Home, or Alexa, ensuring seamless integration and easy control through a single interface. Remember to regularly update your system’s software to maintain security and efficiency.
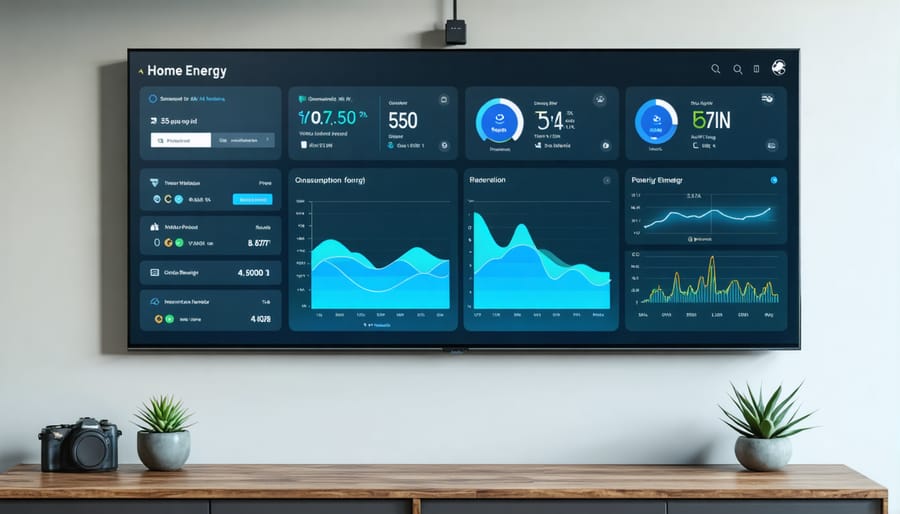
Monitoring and Optimization
Keeping track of your zero-energy home’s performance is crucial for maintaining optimal efficiency. Start by installing a smart home energy monitoring system, which provides real-time data about your energy consumption and production patterns. These user-friendly devices can help you identify areas where you might be using more energy than necessary and suggest energy-saving strategies to improve your home’s performance.
Consider using a combination of monitoring tools:
– Smart meters to track overall energy usage
– Individual appliance monitors to identify energy-hungry devices
– Solar production monitors for photovoltaic systems
– Temperature and humidity sensors for climate control optimization
Many of these tools come with user-friendly apps that make it easy to view your data and receive customized recommendations. Set up monthly performance reviews to analyze your energy patterns and make necessary adjustments. Look for seasonal variations in energy use and production, and adjust your habits accordingly.
Don’t forget to regularly maintain your systems:
– Clean solar panels every 3-6 months
– Check and replace air filters monthly
– Inspect weather stripping and seals twice yearly
– Update system software when available
Remember, optimization is an ongoing process. Small adjustments based on your monitoring data can lead to significant improvements in your home’s energy performance over time. Keep a log of changes you make and their impact on your energy usage to help fine-tune your system.
Embarking on your zero energy journey is an exciting step toward a more sustainable and cost-effective future. Throughout this guide, we’ve explored the fundamental principles of zero energy design, from passive solar strategies to advanced renewable energy systems. Remember, achieving a zero energy home doesn’t have to happen overnight – it’s perfectly fine to implement changes gradually as your budget and circumstances allow.
Start with the basics: improve your home’s insulation, seal air leaks, and upgrade to energy-efficient appliances. These simple steps create a solid foundation for more advanced zero energy features. Consider incorporating passive solar design elements during your next renovation, and explore renewable energy options like solar panels when you’re ready to take the next big step.
The benefits of zero energy design extend far beyond utility bill savings. You’ll enjoy improved comfort, increased property value, and the satisfaction of knowing you’re contributing to a healthier planet. Plus, with various tax incentives and rebates available, the financial investment often pays for itself faster than you might expect.
Whether you’re planning a new construction project or retrofitting your existing home, every step toward zero energy living makes a difference. Don’t be afraid to start small and scale up your efforts over time. Connect with local sustainability groups, consult with energy professionals, and share your experiences with others in the zero energy community.
Remember, the path to zero energy living is a journey, not a destination. By taking action today, you’re investing in a more sustainable tomorrow for yourself and future generations. Start your zero energy transformation now – your wallet and the planet will thank you.