Fix your kitchen plumbing issues confidently with proven DIY solutions that save hundreds in repair costs. From leaky faucets to clogged drains, mastering these essential home repair skills transforms frustrating plumbing problems into manageable tasks. Armed with basic tools and the right knowledge, you can diagnose common issues, perform routine maintenance, and know exactly when to call a professional. This guide walks you through the most frequent kitchen plumbing repairs, safety precautions, and money-saving fixes that every homeowner should understand. Whether you’re dealing with a dripping sink or slow-draining disposal, we’ll help you tackle these repairs with confidence while protecting your home’s plumbing system.
Essential Tools for Kitchen Plumbing Repairs
Must-Have Basic Tools
Before tackling basic plumbing repairs, you’ll need to stock your toolbox with essential items. A pair of adjustable pliers (also known as channel-locks) is crucial for gripping pipes and fittings. Add a pipe wrench to your collection for handling larger pipes and stubborn connections. A basin wrench is indispensable for reaching those tricky faucet nuts under the sink.
Don’t forget about the basics: a quality set of screwdrivers (both flathead and Phillips), plumber’s tape for sealing threads, and a plunger specifically for sinks. A drain snake or auger will be your best friend when dealing with stubborn clogs. Keep a bucket handy for catching water and a flashlight for illuminating dark spaces under the sink.
For safety and convenience, include some plumber’s putty, a small hand mirror for checking underneath fixtures, and clean rags for wiping up spills. Having these tools readily available will make your kitchen plumbing repairs much smoother and more efficient. Remember to store them in a dry place to prevent rust and ensure they’re ready when needed.

Specialized Plumbing Tools Worth Investing In
While basic tools are essential, investing in specialized plumbing tools can make kitchen repairs faster and more professional. A basin wrench is invaluable for reaching those awkward spots under the sink when replacing or tightening faucets. Consider adding a pipe inspection camera to your toolkit – it’s perfect for identifying blockages deep within pipes without dismantling everything.
A faucet handle puller is another game-changer, making stubborn handle removal a breeze while preventing damage to the fixture’s finish. For dealing with disposals, a disposal wrench will save you countless headaches, and a mini hacksaw is perfect for tight spaces where standard tools won’t fit.
Don’t forget about a proper plumber’s tape measure (which can flex around pipes) and a mini plunger specifically designed for sink clogs. A set of specialty pliers, including channel-locks and slip-joint pliers in various sizes, will help you tackle different pipe diameters with confidence.
Remember, quality tools might cost more initially but will save you time and frustration in the long run. Store them in a dedicated toolbox to keep them organized and protected from moisture.
Fixing Common Sink Drain Problems
Clearing Stubborn Clogs
When faced with a stubborn kitchen drain clog, start with natural solutions before moving to mechanical methods. Begin by pouring boiling water down the drain, which can often dissolve grease and soap buildup. If that doesn’t work, try the tried-and-true combination of baking soda and vinegar: pour half a cup of baking soda down the drain, followed by half a cup of white vinegar. Cover the drain immediately and let it fizz for 15 minutes before flushing with hot water.
For tougher clogs, a plunger designed specifically for sinks can be highly effective. Create a tight seal by filling the sink with a few inches of water and covering any overflow holes. Plunge vigorously for 30 seconds, then check if the water drains properly.
A plumber’s snake or auger can tackle particularly stubborn blockages. Feed the snake into the drain until you meet resistance, then turn the handle to break up the clog. Be gentle to avoid damaging your pipes. For kitchen sinks with garbage disposals, always check and reset the disposal first before trying any unclogging methods.
Avoid using chemical drain cleaners as they can damage pipes and create hazardous fumes. Instead, prevent future clogs by installing a drain strainer and regularly maintaining your drains with monthly treatments of baking soda and vinegar. If these methods don’t resolve the issue, or if you notice multiple drains clogging simultaneously, it’s time to call a professional plumber, as this could indicate a more serious plumbing problem.

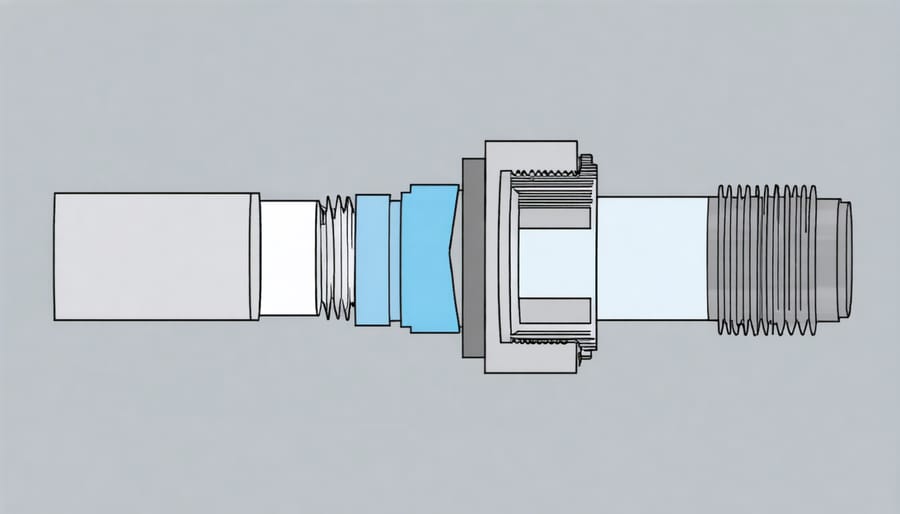
Replacing P-Traps and Drain Parts
P-traps and drain components are essential parts of your kitchen sink’s plumbing system that occasionally need replacement. The good news is that this is a fairly straightforward DIY project that can save you money on professional services.
Before starting, gather your supplies: adjustable pliers, a bucket, replacement P-trap assembly, and plumber’s tape. Place the bucket under the P-trap to catch any water, then loosen the slip nuts at both ends of the P-trap using your pliers. Be gentle to avoid damaging the connections.
Once loosened, carefully remove the old P-trap and clean the area. If you notice any corrosion or damage on connecting pipes, now’s the perfect time to replace those as well. When installing the new P-trap, ensure it maintains the proper slope – about ¼ inch per foot toward the drain – for effective water flow.
Pro tip: Apply plumber’s tape to the threads before connecting the new parts. This helps create a better seal and prevents leaks. Hand-tighten the slip nuts first, then give them a quarter turn with pliers – but don’t overtighten, as this can crack the plastic components.
For drain parts like strainers or flanges, remove the old part by loosening the locknut under the sink. Clean the sink surface thoroughly before installing the new component. Apply plumber’s putty around the rim of new strainers to create a watertight seal.
After installation, run water through the system and check for leaks. If you spot any drips, slightly tighten the connections until the leaking stops. Keep your original tools handy for a day or two – sometimes connections need minor adjustments after initial installation.
Faucet Repair and Maintenance
Stopping Drips and Leaks
A dripping faucet isn’t just annoying – it can waste hundreds of gallons of water and increase your utility bills. The good news is that most faucet leaks are fairly simple to fix once you identify the cause.
The most common culprit behind a leaky faucet is worn-out rubber washers or O-rings. These small components create watertight seals, but they naturally deteriorate over time. To replace them, turn off the water supply under your sink, remove the faucet handle and stem, and swap out the old washers with matching new ones.
If you notice water pooling around the base of your faucet, the issue likely stems from a damaged cartridge or corroded valve seat. For cartridge faucets, remove the decorative cap, unscrew the handle, and pull out the old cartridge. Take it to your local hardware store to find an exact replacement. With valve seat issues, you’ll need a seat wrench to remove and replace the damaged component.
Loose parts can also cause leaks. Check if the packing nut under the handle needs tightening or if the base of the spout is secure. Just be careful not to overtighten, as this can cause damage.
For compression faucets that drip from the spout, the stem screw may need replacing. This requires disassembling the handle and stem assembly to access the screw. Always remember to wrap plumber’s tape around threaded connections when reassembling to ensure a proper seal.
If these fixes don’t solve the problem, or if you encounter significant corrosion or damage to the faucet body itself, it might be time to replace the entire faucet assembly.
Cartridge and Washer Replacement
When your faucet starts dripping or the handle feels loose, replacing the cartridge and washers can often solve the problem. Before starting, turn off the water supply under your sink and place a small towel in the drain to prevent losing small parts.
For cartridge replacement, begin by removing the faucet handle. You’ll usually find a decorative cap hiding a screw – pry this off gently with a flathead screwdriver. Remove the screw and lift off the handle. Next, use a wrench to loosen the cartridge nut and pull the old cartridge straight up. Take it to your local hardware store to find an exact match, as cartridges vary by brand and model.
To replace washers, you’ll need to disassemble the faucet stem. Once you’ve removed the handle and cartridge, you’ll find rubber washers at the base. These can become worn or brittle over time. Simply pull off the old washers and replace them with new ones of the same size.
Before reassembling everything, clean all parts thoroughly and apply a small amount of plumber’s grease to help prevent future sticking. Replace components in reverse order, taking care not to overtighten any parts. Turn the water back on and test the faucet for proper operation and any leaks.
Pro tip: Take photos with your phone during disassembly to help remember how everything fits back together.
Garbage Disposal Troubleshooting
Quick Fixes for Jams and Clogs
When facing a clogged disposal or drain, there’s no need to panic. Here are several safe and effective methods to clear common kitchen blockages without causing damage to your plumbing system.
First, turn off the disposal’s power at the electrical switch or circuit breaker for safety. Using a flashlight, check for visible obstructions in the disposal. If you spot any obvious items, remove them with tongs or pliers – never your hands.
For general clogs, try this simple solution: Fill the sink with a few inches of hot water and add a cup of baking soda followed by white vinegar. Wait 15 minutes, then flush with more hot water while running the disposal.
If the clog persists, use a sink plunger specifically designed for kitchen sinks. Fill the sink partially with water, cover any overflow holes, and plunge vigorously several times. For double sinks, seal the other drain with a wet cloth to create better suction.
For disposal jams, locate the hex-shaped hole on the bottom of the unit. Insert an Allen wrench and turn it back and forth to free the grinding plate. Once loosened, press the reset button (usually red) on the bottom of the disposal.
Remember to run cold water while operating your disposal and avoid putting fibrous foods, coffee grounds, or grease down the drain. If these methods don’t work, it’s time to call a professional plumber.
Maintenance Tips for Longer Life
Keeping your kitchen plumbing in top shape doesn’t have to be complicated. Follow these kitchen maintenance tips to prevent clogs and extend the life of your disposal system. Start by running cold water before, during, and after using your disposal to help flush food particles through the pipes. Always avoid putting fibrous materials like celery strings, corn husks, or artichoke leaves down the disposal, as these can wrap around the blades and cause jams.
Keep your disposal fresh by grinding ice cubes and citrus peels occasionally – this helps clean the blades and eliminate odors naturally. Remember to never pour grease or oil down your drain, as these substances solidify and create stubborn blockages. Instead, collect them in a container and dispose of them in your regular trash.
Make it a habit to clean your sink strainer regularly and run your disposal daily, even if you haven’t used it much. This prevents rust and keeps parts moving freely. A monthly cleaning with a mixture of baking soda and vinegar can help prevent buildup and maintain proper drainage. Finally, always use plenty of water when operating your disposal – it’s your disposal’s best friend and helps prevent most common issues.
Following these simple practices will help you avoid costly repairs and keep your kitchen plumbing running smoothly for years to come.
When to Call a Professional
While it’s great to save money on repairs, some kitchen plumbing issues require professional expertise. Here are clear signs it’s time to call a plumber:
Persistent low water pressure that affects multiple fixtures could indicate serious pipe problems or main line issues. If you’ve tried basic fixes and the pressure remains poor, it’s time for professional diagnosis.
When you spot water damage on walls, floors, or cabinets near plumbing fixtures, don’t wait. These signs often point to hidden leaks that could cause structural damage if left unchecked.
Multiple clogged drains or recurring backups suggest problems in your main sewer line. This requires specialized equipment and expertise that most homeowners don’t have.
If you smell sewage or notice gurgling sounds coming from your drains, these are warning signs of potential ventilation issues or blocked pipes that need immediate professional attention.
Call a plumber immediately if you encounter:
– Frozen or burst pipes
– Major leaks you can’t control
– Hot water issues affecting the entire house
– Failed garbage disposal that’s causing electrical problems
– Complex installations or repairs involving gas lines
– Persistent foul odors from drains
Remember, attempting complex repairs without proper knowledge can lead to costly mistakes and potential safety hazards. When in doubt, it’s better to invest in professional help than risk making the problem worse.
Kitchen plumbing repairs can be both rewarding and challenging for DIY enthusiasts. By following proper safety guidelines and understanding your skill limitations, you can tackle many common issues successfully. Remember to always shut off water supplies before starting any repair, keep essential tools handy, and maintain a systematic approach to troubleshooting. While many cost-effective home repairs can be handled independently, don’t hesitate to call a professional for complex issues involving main lines or when you’re unsure about the repair process. Regular maintenance and prompt attention to minor problems can prevent major plumbing disasters and save you money in the long run. With patience, the right tools, and careful attention to detail, you can maintain your kitchen plumbing system effectively and safely.