Transform your cluttered spaces into organized havens using materials you already have at home. Turn empty cereal boxes into stylish drawer dividers with decorative paper, create custom storage solutions from mason jars and wooden crates, or craft hanging organizers from old picture frames and wire mesh. These budget-friendly organization projects combine form and function, helping you reclaim control over chaotic spaces while adding personality to your home. Whether you’re tackling a messy craft room, overwhelmed closet, or disorganized kitchen, these DIY organization solutions offer the perfect blend of creativity and practicality. Best of all, most projects can be completed in an afternoon, requiring only basic crafting skills and common household tools to achieve professional-looking results that rival expensive store-bought organizers.
Transform Your Kitchen with Upcycled Storage
Mason Jar Magic
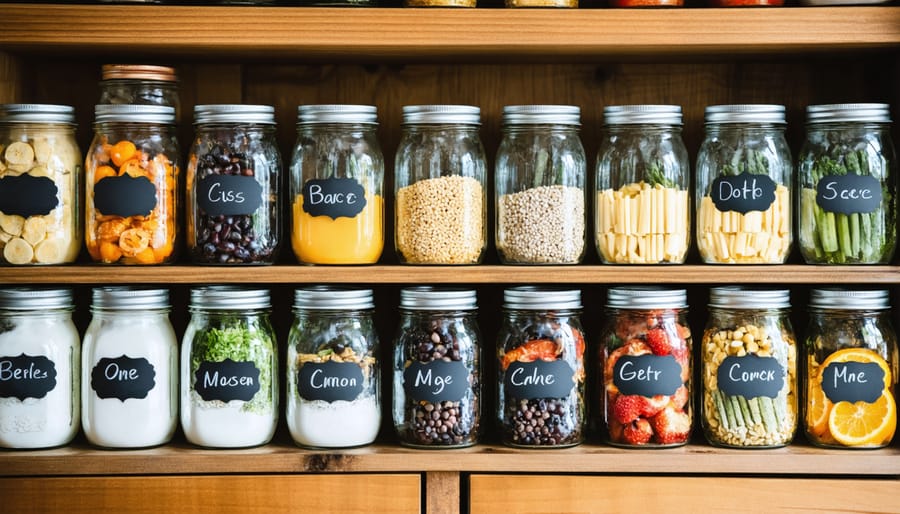
Mason jars are the unsung heroes of home organization, offering endless possibilities for creating beautiful and functional storage solutions. These versatile glass containers can transform your pantry and countertops from cluttered chaos to Pinterest-worthy perfection.
For pantry organization, start by thoroughly cleaning and drying your mason jars. Remove labels using warm, soapy water or a mixture of baking soda and oil for stubborn adhesive. Sort your dry goods like pasta, rice, beans, and baking ingredients into appropriately sized jars. Pro tip: Use wide-mouth jars for items you’ll need to scoop, and regular-mouth jars for ingredients you can pour.
Create custom labels using chalkboard paint strips, adhesive labels, or paint markers. Include the item name and expiration date for easy reference. For an extra touch of organization, arrange similar items together and consider using different jar sizes to create visual harmony on your shelves.
On your countertops, mason jars shine as practical storage for frequently used kitchen tools. Create a cooking utensil holder by placing wooden spoons, whisks, and spatulas in a large jar. For smaller items, use medium-sized jars to store cooking twine, measuring spoons, or even fresh herbs in water.
Take your mason jar organization to the next level by adding functional modifications. Attach soap dispenser pumps to jar lids for dish soap or hand soap. Paint jar lids to match your kitchen decor, or add rope handles for easier carrying. For coffee stations, store coffee beans, tea bags, or sugar in matching jars with scoop-friendly lids.
Remember to periodically clean and refresh your mason jar storage system to maintain its effectiveness and appeal. With proper care, these timeless containers will keep your space organized for years to come.

Cardboard Box Drawer Organizers
Transform your cluttered drawers into organized spaces using materials you already have at home. Those empty cereal boxes and product packaging you usually toss out can become custom drawer organizers that rival expensive store-bought solutions.
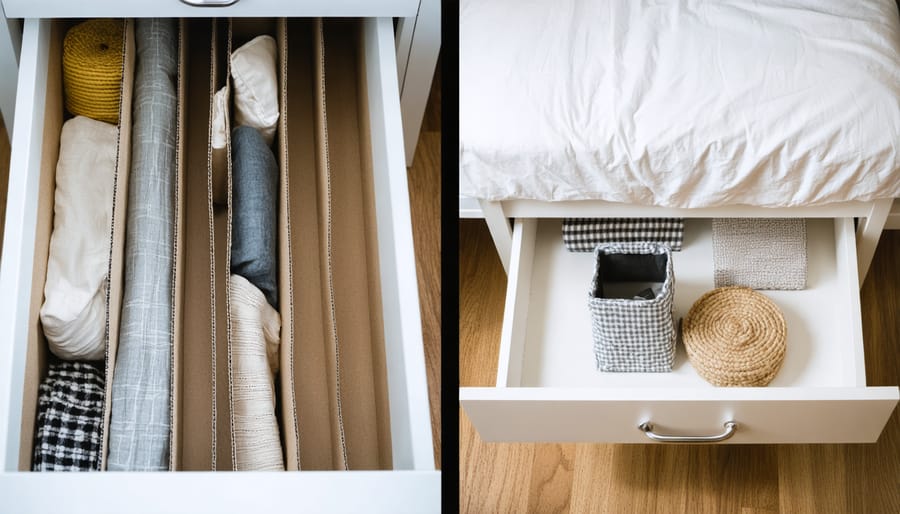
Start by collecting sturdy cardboard boxes and measuring your drawer’s dimensions. Cut the boxes to your desired height – typically 2-3 inches works well for most drawers. Create dividers by cutting rectangular sections from the boxes, making sure they’re slightly shorter than your drawer’s depth for easy removal.
To make your organizers more durable and attractive, cover them with decorative paper, contact paper, or washi tape. This not only extends their lifespan but also creates a cohesive look. Pro tip: Use spray adhesive for a smooth, bubble-free finish when applying paper.
Arrange your dividers to create compartments of various sizes based on what you’ll store. For office supplies, make narrow slots for pens and wider sections for notepads. In kitchen drawers, create spaces that accommodate different utensils and tools. The beauty of DIY dividers is their customization potential – you can make them exactly the right size for your items.
Consider creating a template first using paper to test your layout before cutting the cardboard. This helps avoid waste and ensures your design works perfectly for your needs. Remember to reinforce corners with strong tape for added durability.
Keep your organizers clean by wiping them with a slightly damp cloth when needed. With proper care, these cardboard organizers can last for months while keeping your drawers tidy and organized.
Bedroom Storage Crafts That Look Store-Bought
Fabric Storage Boxes
Transform ordinary cardboard boxes into stylish storage solutions with this simple fabric upcycling project. These professional-looking DIY solutions are perfect for organizing closets, shelves, or office spaces while adding a decorative touch to your room.
Materials needed:
– Sturdy cardboard boxes
– Fabric of your choice
– Scissors
– Ruler
– Pencil
– Hot glue gun
– Iron (optional)
– Spray adhesive (optional)
Step-by-Step Instructions:
1. Clean and prepare your cardboard box by removing any labels or tape. Make sure all sides are secure and corners are intact.
2. Measure your box dimensions, adding 2 inches to each measurement to allow for overlap. Cut your fabric accordingly, creating separate pieces for the inside and outside.
3. If using patterned fabric, iron it first to remove any wrinkles. This ensures a smooth, professional finish.
4. Start with the outer covering. Apply hot glue along one edge of the box and carefully press the fabric into place. Work your way around, pulling the fabric taut as you go.
5. For corners, create neat folds like you’re wrapping a present. Secure with hot glue, trimming excess fabric if needed.
6. Fold the excess fabric over the top edges of the box, securing with glue. For a cleaner finish, create mitered corners.
7. Line the inside of the box using the same technique, hiding any raw edges under the top fold.
Pro Tips:
– Choose medium-weight fabrics that won’t sag or stretch
– Coordinate patterns and colors with your room’s decor
– Add extra stability by reinforcing box corners with tape before covering
– Consider using coordinating ribbons or trim to hide seams
– Label your boxes using decorative tags or embroidered patches
These fabric storage boxes are perfect for organizing everything from craft supplies to seasonal decorations, and they can be easily customized to match any decor style.

Jewelry Organization Station
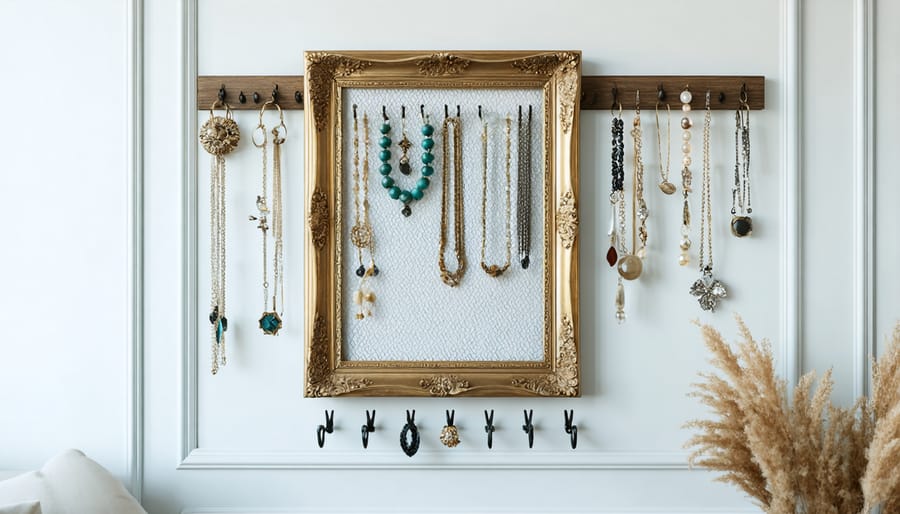
Transform your cluttered jewelry collection into an organized, visually appealing display with this elegant DIY jewelry organization station. Using a thrifted or unused picture frame as your base, you can create a stunning solution that keeps your accessories tangle-free and easily accessible.
Start by selecting a medium to large picture frame – wooden frames work best as they’re sturdy and can be painted to match your decor. Remove the glass and backing, then give the frame a fresh coat of paint in your desired color. While it dries, gather your materials: decorative mesh or chicken wire, small hooks, decorative knobs, and a piece of cork board or foam board that fits your frame.
For necklaces and bracelets, attach the mesh or chicken wire to the back of the frame using a staple gun. The grid pattern creates perfect spots to hang items without tangling. Add small hooks along the bottom of the frame for shorter necklaces or bracelets that need extra support.
Create a designated earring section by incorporating a small piece of cork board or foam board in one corner. Cover it with fabric for a polished look, then secure it to the frame. This provides an ideal surface for posting stud earrings and smaller pieces.
For added functionality, install 3-4 decorative knobs along the bottom edge of the frame. These work wonderfully for hanging delicate chains or special pieces you wear frequently. Consider adding a small shelf at the bottom for rings and other small items.
Mount your finished piece on the wall using sturdy hardware, ensuring it’s secure. For extra organization, group similar items together and consider color coordination for a more aesthetically pleasing display. This project not only keeps your jewelry organized but also creates a beautiful wall piece that showcases your collection as functional art.
Pro tip: Place this organizer in your bedroom or closet area where you typically get ready, making it easy to see all your options when accessorizing your outfits.

Bathroom Organization on a Budget
Over-the-Door Storage System
Transform the space behind your door into a versatile storage solution with this clever DIY project that’s both functional and stylish. Using just a few basic materials – a sturdy tension rod, shower curtain rings, and fabric pockets – you can create a custom organization system that maximizes vertical space without damaging your walls.
Start by measuring the width of your door and purchase a tension rod that fits securely. Next, create fabric pockets using durable cotton or canvas material – you’ll want these to last! Cut rectangles approximately 12 inches wide by 24 inches long, then fold and sew the sides to create pockets with a 2-inch loop at the top for hanging.
Pro tip: Reinforce the top loop with double stitching to prevent tearing under weight. For added structure, insert cardboard at the bottom of each pocket before sewing them closed.
Hang the tension rod about 6-8 inches below the top of your door frame. Attach shower curtain rings at even intervals along the rod – these will hold your fabric pockets. The beauty of this system is its flexibility; you can easily slide pockets along the rod or add and remove them as needed.
These pockets are perfect for storing everything from shoes and accessories to cleaning supplies and craft materials. Label each pocket using fabric markers or cute tags to keep everything organized. Consider creating pockets in different sizes for various storage needs – smaller ones for socks and accessories, larger ones for sweaters or towels.
For best results, avoid overloading the pockets, and periodically check that the tension rod remains secure. This clever storage solution works particularly well in bedrooms, bathrooms, or craft rooms where space is at a premium.
Magnetic Makeup Organization
Transform your makeup collection into an organized masterpiece with this clever magnetic storage solution using everyday items. All you need is a few cookie tins, decorative paper, adhesive magnets, and basic crafting supplies to create a stylish, space-saving makeup organizer.
Start by thoroughly cleaning your cookie tins and removing any labels. Choose decorative paper that matches your bathroom or vanity decor – think metallic finishes, floral patterns, or modern geometric designs. Measure and cut the paper to fit both the inside and outside of your tins, then carefully apply it using craft adhesive or mod podge.
Next, attach small adhesive magnets to the back of your makeup items. These work particularly well for eyeshadow palettes, compacts, and other flat cosmetics. For the tin’s interior, apply a magnetic sheet or several strong magnets to create a solid magnetic surface. This ensures your makeup items will stay securely in place.
For added organization, consider creating different tins for various makeup categories – one for eye products, another for face products, and so on. You can stack the tins when not in use or display them side by side on your vanity. The magnetic system allows you to see all your products at once and easily grab what you need.
Pro tip: Add small rubber feet to the bottom of your tins to prevent scratching on your vanity surface. You can also label the sides of each tin using metallic markers or decorative tags for quick identification. This project not only keeps your makeup organized but also adds a personalized touch to your beauty routine while maximizing vertical storage space.
Home Office Organization Projects
Desktop Paper Management
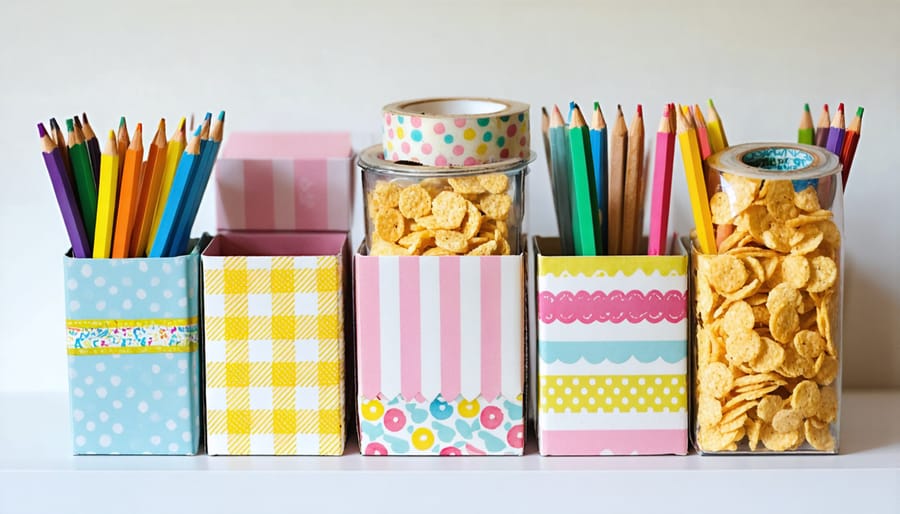
Transform your cluttered desk into an organized workspace with this stylish DIY paper management system. Using empty cereal boxes and decorative paper, you can create professional-looking desktop organizers that perfectly match your decor while keeping everything tidy.
Start by selecting two or three cereal boxes of different sizes. Cut them diagonally at varying heights (between 6 to 12 inches) to create angled organizers perfect for storing papers, magazines, and folders. Remove any printing on the boxes by peeling off the outer layer or covering it with plain paper.
Choose coordinating decorative papers that complement your space – think modern geometric patterns, classic florals, or sophisticated solid colors. Measure and cut your chosen paper to size, leaving an extra inch on all sides for folding. Apply a thin layer of craft glue to the cereal box, carefully wrap the paper around it, and fold the excess over the edges for a clean finish.
For extra durability, seal the paper with clear Mod Podge or a similar decoupage medium. This protective layer will help your organizers withstand daily use while maintaining their appearance. Create dividers within larger organizers by cutting and inserting cardboard pieces covered in coordinating paper.
Pro tip: Label each section with pretty washi tape or decorative labels to maintain organization. Consider making a matching set of smaller containers for items like paper clips, sticky notes, and other desk essentials using the cut-off box portions.
This eco-friendly project not only helps declutter your workspace but also gives new life to items that would otherwise end up in the recycling bin. The result is a custom organization system that looks store-bought but costs just a fraction of retail prices.

Cable Management Solutions
Tired of tangled cords cluttering your workspace? Transform ordinary toilet paper rolls into stylish cable organizers with this budget-friendly solution. Start by collecting empty toilet paper rolls – you’ll want one for each group of cables you plan to organize.
Clean the rolls thoroughly and trim them to your desired height. For a decorative touch, wrap each roll with washi tape in patterns and colors that complement your space. Choose coordinating or contrasting designs to create visual interest while maintaining a cohesive look.
To use your new organizers, simply thread your cables through the rolls, grouping similar types together. For example, keep charging cables in one roll and computer peripherals in another. Label each roll using decorative tags or write directly on the washi tape with a fine-tip marker for easy identification.
For extra stability, attach the rolls to the back of your desk or inside a drawer using double-sided tape or adhesive velcro strips. Create a complete cable management station by arranging multiple rolls in a box or drawer organizer.
Pro tip: For thicker cables or multiple cords, use paper towel rolls instead, as they provide more space. You can also cut small notches at the top of each roll to prevent cables from slipping out when not in use.
This simple yet effective organization hack not only keeps your cables tidy but also adds a touch of personality to your workspace. Plus, it’s an eco-friendly way to repurpose materials you’d otherwise throw away.
Remember to periodically check your cable organizers and adjust them as needed, especially when adding or removing devices from your setup.
As we’ve explored throughout this article, DIY organization crafts offer an incredible opportunity to transform your living spaces while expressing your creativity. These budget-friendly organization solutions not only help you maintain a clutter-free environment but also add personality and charm to your home.
By creating your own organization systems, you’re not just saving money – you’re crafting pieces that perfectly match your needs and aesthetic preferences. Whether you’ve tackled the simple mason jar organizers for your bathroom or ventured into building a complex rotating closet system, each project contributes to a more organized and peaceful living space.
Remember, the beauty of DIY organization crafts lies in their flexibility and customization potential. You can start small with basic projects and gradually work your way up to more ambitious ones as your confidence grows. Don’t be afraid to experiment with different materials, colors, and designs to create solutions that truly work for your lifestyle.
We encourage you to take that first step today. Choose a project that speaks to you, gather your materials, and start creating. The satisfaction of completing your own organization crafts, combined with the practical benefits they bring to your daily life, makes every minute spent on these projects worthwhile. Your perfectly organized, personally crafted space awaits!
