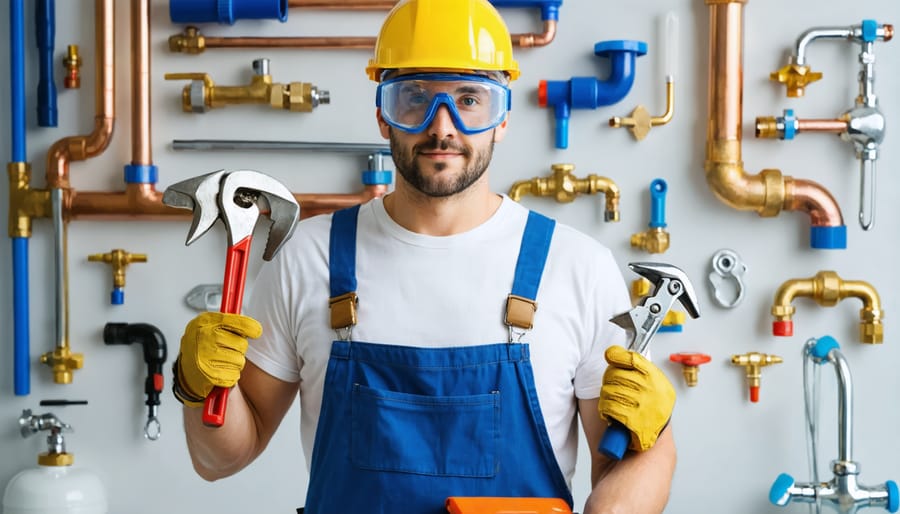
Master the basics of DIY plumbing and join the growing community of confident homeowners who handle their own repairs. From fixing leaky faucets to unclogging stubborn drains, developing these essential home repair skills can save you thousands in professional service calls while empowering you to maintain your home’s plumbing system effectively.
Before diving into any plumbing project, equip yourself with fundamental knowledge about your home’s water system, gather the right tools (including a quality plunger, pipe wrench, and plumber’s tape), and understand which repairs are DIY-appropriate versus when to call professionals. This guide walks you through common plumbing challenges with proven solutions that even beginners can tackle confidently, helping you avoid costly mistakes while building valuable home maintenance expertise.
Remember: proper preparation and safety awareness are just as important as technical know-how when it comes to successful DIY plumbing repairs. Let’s explore practical solutions that will help you handle everyday plumbing issues with confidence and precision.
Essential Tools for DIY Plumbing Success
Basic Hand Tools
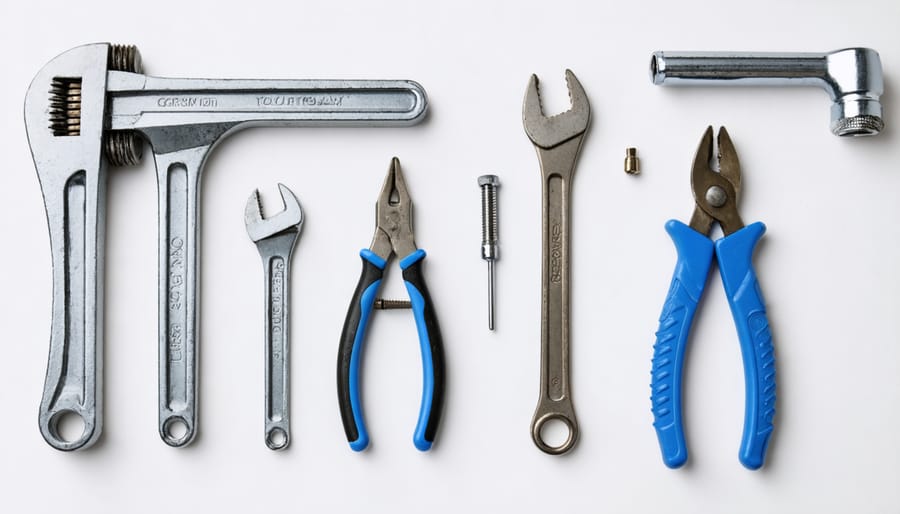
Every successful DIY plumber needs a well-stocked toolbox. If you’re ready to tackle beginner-friendly repair techniques, start by gathering these essential hand tools.
First, invest in a quality adjustable wrench and pipe wrench. These are your go-to tools for loosening and tightening nuts, bolts, and pipes. A basin wrench is particularly useful for reaching those tricky spots under sinks.
Channel-lock pliers are versatile heroes in plumbing work, perfect for gripping and turning pipes and fittings. Keep both needle-nose and tongue-and-groove pliers handy for manipulating smaller parts and accessing tight spaces.
Don’t forget about your trusty plunger – both a cup style for sinks and a flange type for toilets. A plumber’s tape (also called Teflon tape) and a good set of screwdrivers (both flathead and Phillips) are absolute must-haves.
Finally, add a utility knife and a pipe cutter to your collection. These will help you tackle various materials and make clean cuts when needed. Store all these tools in a dedicated toolbox to keep them organized and readily available for your next project.
Specialized Plumbing Tools
Having the right tools makes any plumbing job easier and safer. A basic pipe wrench is essential for gripping and turning pipes, while an adjustable wrench helps with nuts and fittings. Don’t forget about the plumber’s tape (also called Teflon tape) for creating watertight seals on threaded connections.
For clearing clogs, invest in a good plunger and a plumber’s snake (or auger). The plunger works great for simple toilet and sink clogs, while the snake can reach deeper blockages in your pipes. A basin wrench is invaluable for working in tight spaces under sinks, especially when dealing with faucet nuts.
Keep a set of slip-joint pliers handy for grabbing and holding smaller items, and get yourself a pipe cutter if you’re working with copper pipes. For leak detection, a flashlight and inspection mirror can help you spot problems in hard-to-reach areas.
Remember to store these tools in a dry place to prevent rust, and always clean them after use. While these tools represent an initial investment, they’ll save you money on professional calls for simple repairs in the long run.
Quick Fixes for Dripping Faucets
Identifying the Leak Source
When dealing with a leaky faucet, the first step is identifying exactly where the water is coming from. For most kitchen sink repairs and bathroom faucets, leaks typically occur in one of four places.
Start by examining the spout itself. If water drips from the spout when the handle is off, you likely have worn-out internal components like washers or O-rings. Look for water around the base of the spout where it meets the sink – this usually indicates a failing seal underneath.
Next, check the handle area. Water appearing around the handle when you turn it suggests worn-out packing or a damaged stem. You might notice moisture collecting around the handle’s base even when it’s not in use.
Don’t forget to inspect underneath the sink. Look at the supply lines and connections while the water is running. Any drips or moisture here point to loose connections or damaged supply lines. Run your hand along the pipes to feel for unexpected dampness.
Finally, check the drain flange and pipes below. If you spot water pooling around the base of the faucet or underneath the sink when draining, you might have a failing drain seal or loose connections in the drain assembly.
Remember to dry all areas thoroughly before testing, as this makes new leaks easier to spot. Use good lighting and a flashlight to help identify subtle drips or moisture.
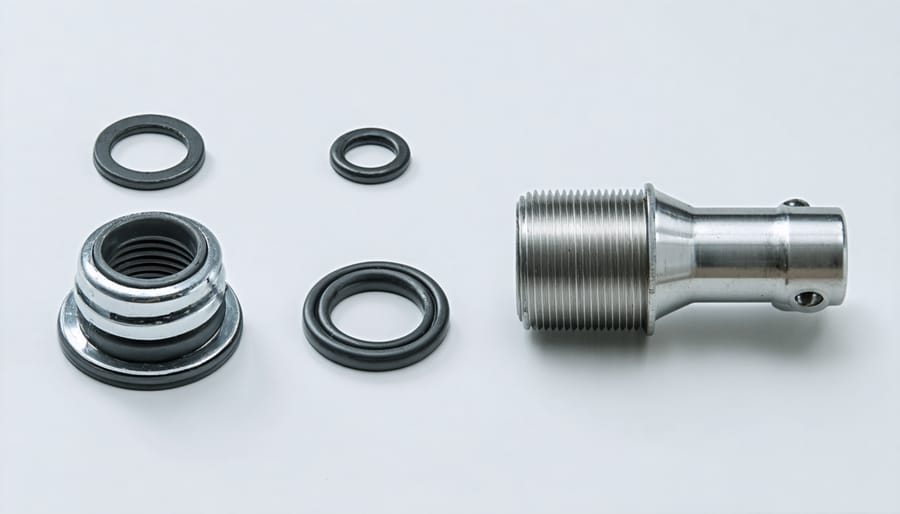
Replacing Washers and O-rings
Leaky faucets and connections are often caused by worn washers and O-rings, but replacing these small components is a simple fix that can save you money. Before starting, turn off the water supply and gather your supplies: replacement washers and O-rings, adjustable wrench, screwdriver, and pliers.
For faucet washers, start by removing the faucet handle (usually secured by a decorative cap and screw). Remove the stem assembly and locate the worn washer at the bottom. Simply pop out the old washer and replace it with a new one of the same size. Pro tip: Take the old washer to your hardware store to ensure an exact match.
O-rings are typically found in faucet stems and pipe connections. To replace one, carefully remove the old O-ring using needle-nose pliers. Clean the groove where it sits, then roll the new O-ring into place. Avoid stretching it too much, as this can cause premature wear. Apply a small amount of plumber’s grease to help create a better seal.
Remember to reassemble everything in reverse order and turn the water back on slowly. Check for leaks by running the faucet at different pressures. If you notice any drips, tighten connections slightly until the leak stops. This simple maintenance can extend the life of your plumbing fixtures and prevent water waste.
Unclog Drains Like a Professional
Natural Cleaning Solutions
Before reaching for harsh chemical cleaners, consider these natural, eco-friendly plumbing solutions that are both effective and safe for your pipes. Start with the classic baking soda and vinegar method: pour half a cup of baking soda down the drain, followed by half a cup of white vinegar. Cover the drain and let it fizz for 15 minutes, then flush with hot water.
For shower and sink clogs caused by hair and soap buildup, try a mixture of one cup of salt, one cup of baking soda, and a quarter cup of cream of tartar. Pour this mixture down the drain, followed by two cups of boiling water. Let it sit for at least an hour before running hot tap water.
Enzyme-based cleaners are another gentle yet powerful option. These natural cleaners use beneficial bacteria to break down organic matter like food particles and grease. While they work more slowly than chemical alternatives, they’re much safer for your plumbing system and the environment.
For regular maintenance, pour a kettle of boiling water down your drains weekly. This simple practice helps prevent buildup and keeps minor clogs from forming. Remember to place strainers in all drains to catch debris before it becomes a problem, reducing the need for any cleaners altogether.
Using Plumbing Snakes and Augers
When dealing with stubborn clogs, a plumbing snake or auger can be your best friend. Before using these tools, always start by wearing protective gloves and laying down old towels to catch any water splashes.
For sink clogs, begin with a manual drain snake, which is perfect for most household needs. Insert the cable into the drain opening and slowly turn the handle clockwise. You’ll feel some resistance when you hit the clog – that’s normal! Continue turning while applying gentle pressure. When you feel the blockage break up, run hot water to flush the drain.
For tougher clogs or toilet issues, a power auger might be necessary. These motorized tools require extra care, but they’re incredibly effective. Feed the cable slowly into the drain while the motor runs, and don’t force it if you meet resistance. Instead, try pulling back slightly before advancing again.
Pro tip: Always clean your snake or auger thoroughly after each use to prevent rust and maintain hygiene. If you encounter multiple bends in the pipe or the clog won’t budge after 15-20 minutes of trying, it’s time to call a professional plumber.
Remember: Never use excessive force, as this could damage your pipes. And if you’re dealing with a second-floor bathroom or main sewer line, it’s best to leave those jobs to the experts.
Toilet Trouble? Fix It Yourself
Running Toilet Repairs
A running toilet isn’t just annoying – it can waste hundreds of gallons of water and increase your utility bills. Fortunately, this common problem is usually simple to fix yourself. Start by removing the tank lid and observing the components inside. In most cases, the issue stems from either a faulty flapper or an improperly adjusted fill valve.
To check the flapper, flush the toilet and watch how it moves. If it doesn’t seal properly or appears worn, you’ll need to replace it. Turn off the water supply, flush to empty the tank, and disconnect the old flapper. Take it to your local hardware store to find an exact match, then install the new one following the package instructions.
If the flapper isn’t the culprit, examine the fill valve. The water level should be about an inch below the top of the overflow tube. If it’s too high, water continuously flows into the overflow tube. Adjust the float by turning the adjustment screw or gently bending the arm until the water stops about an inch below the tube’s top.
For toilets with a fill valve issue, you might need to replace the entire assembly. While this sounds daunting, modern kits come with clear instructions and typically only require basic tools. Just remember to turn off the water supply first!
If these fixes don’t solve the problem, or if you encounter any complications, it’s best to contact a professional plumber.
Fixing Weak Flush Issues
A weak flush can be frustrating, but don’t worry – it’s often a fixable issue without calling a plumber. Start by checking the water level in your tank. If it’s below the top of the overflow tube, adjust the float arm or fill valve to raise it slightly. This simple fix often resolves weak flush problems immediately.
If water level isn’t the issue, inspect the flush chain. Make sure it has the right amount of slack – about half an inch – and isn’t tangled or disconnected. A chain that’s too loose or too tight can prevent the flapper from opening fully, resulting in a weak flush.
Another common culprit is mineral buildup in the rim jets around the bowl’s edge. These small holes can become clogged over time, reducing flush power. Clean them by using a wire hanger or mineral removal product. For stubborn buildup, try covering the jets with vinegar-soaked paper towels and letting them sit overnight.
Check the flapper next – it should be flexible and create a proper seal. If it’s rigid or warped, replace it. This is an inexpensive fix that can make a significant difference in flush performance.
If these steps don’t solve the problem, look for partial clogs in the trap or drain line. A plunger or auger can often clear these obstructions. Remember, if you’ve tried these solutions and still have issues, it might be time to consult a professional, especially if your toilet is old or the problem seems complex.
Preventive Maintenance Tips
Regular maintenance is the key to avoiding major plumbing headaches and expensive repairs down the line. By implementing these simple preventive measures, you can keep your plumbing system running smoothly and perform cost-effective DIY repairs when needed.
Start by inspecting your faucets and pipes monthly for any signs of leaks or drips. Even a small leak can waste hundreds of gallons of water and lead to bigger problems if left unchecked. Place your hand around pipe joints and connections to feel for moisture, and check under sinks for water stains or dampness.
Keep your drains flowing freely by using strainers in all sinks and tubs to catch hair, food particles, and debris. Once a month, pour a mixture of baking soda and vinegar down each drain, followed by hot water after 15 minutes. This natural solution helps prevent clogs and eliminates odors.
Don’t forget about your water heater! Flush it annually to remove sediment buildup, which can reduce efficiency and shorten its lifespan. Test the pressure relief valve twice a year and check for any signs of corrosion or leaks around the tank.
For toilets, perform a simple dye test every six months: add a few drops of food coloring to the tank and wait 30 minutes without flushing. If the bowl water changes color, you have a leak that needs attention. Also, avoid using chemical drain cleaners regularly, as they can damage your pipes over time.
During winter, insulate exposed pipes in unheated areas to prevent freezing. Know the location of your main water shut-off valve and test it periodically to ensure it works when needed. Finally, maintain a regular schedule for cleaning your gutters and downspouts to prevent water damage to your home’s foundation and plumbing system.
While DIY plumbing repairs can save money and provide satisfaction, remember to approach each project with proper preparation and safety in mind. Keep essential tools handy, always shut off water before starting repairs, and maintain awareness of your skill level. Simple tasks like unclogging drains, fixing leaky faucets, or replacing basic fixtures are typically safe for DIY enthusiasts. However, don’t hesitate to call a licensed plumber for complex issues involving main water lines, gas lines, major installations, or when you’re unsure about the repair. Your safety and your home’s integrity should always come first. With the right knowledge and tools, you can tackle many common plumbing problems while knowing when to step back and let professionals handle the bigger challenges.