Transform ordinary household items into designer-worthy pieces through strategic budget-friendly home improvements that rival high-end boutique offerings. Master the art of gold leafing to elevate thrift store finds into luxurious statement pieces, or reimagine vintage furniture with chalk paint techniques and custom hardware for that coveted designer look. Create bespoke wall art using large-scale canvas prints and metallic overlay treatments that capture the essence of gallery-worthy pieces at a fraction of the cost. By combining premium materials with professional finishing techniques, these upscale DIY projects deliver sophisticated results while saving thousands on designer alternatives. Whether you’re updating a tired console table or crafting custom built-ins, these high-end transformations prove that luxury doesn’t always require a premium price tag – just creativity, attention to detail, and the right techniques.
Transform Basic Materials into Designer-Looking Pieces
Gold Leaf Applications and Metallic Finishes
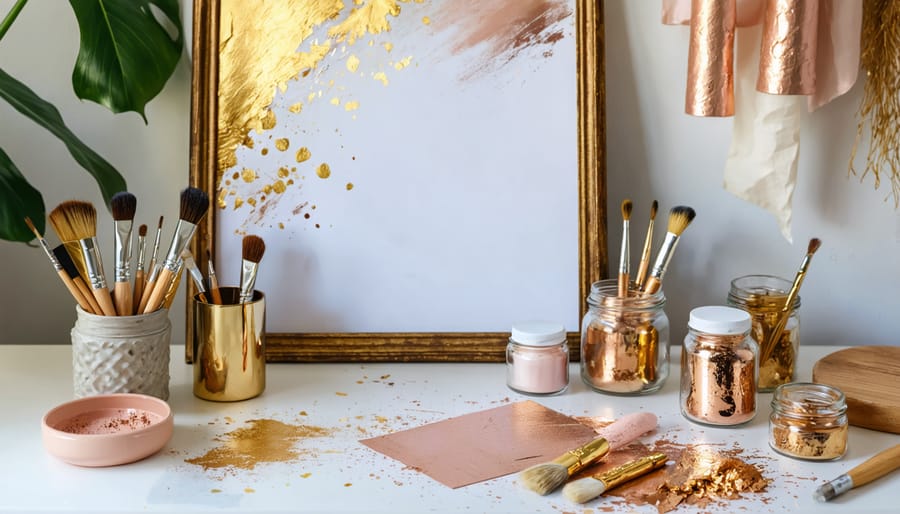
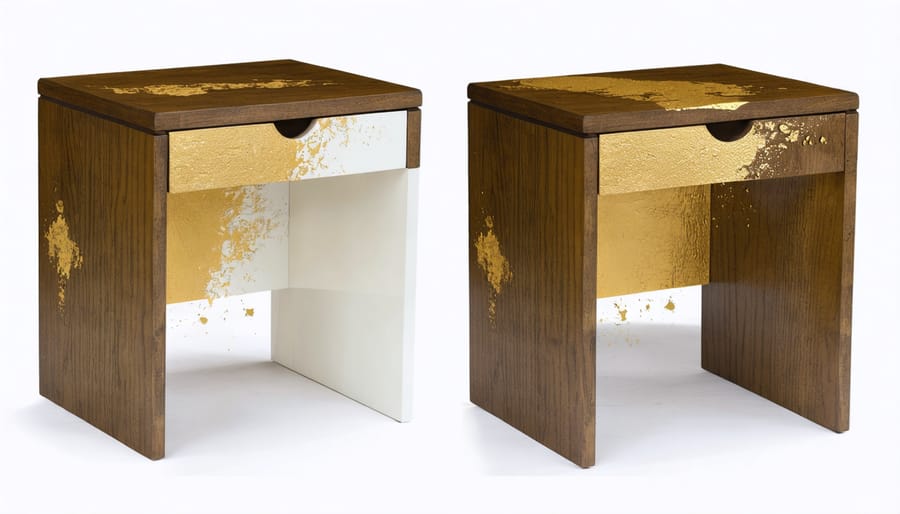
Transform ordinary items into luxurious showpieces with the timeless elegance of gold leaf and metallic finishes. Start by gathering your materials: gold leaf sheets, adhesive size, a soft brush, and sealer. For best results, ensure your surface is clean, smooth, and primed.
Begin by applying the adhesive size in thin, even strokes to your chosen area. Wait until it becomes tacky – usually about 15-30 minutes. Carefully lift the gold leaf with your brush and gently place it onto the tacky surface. Pat it down softly, working from the center outward to avoid wrinkles. Use your brush to smooth away excess leaf, saving these pieces for touch-ups.
For a more modern look, try metallic foils or paints. These alternatives are more forgiving and come in various finishes like rose gold, copper, and bronze. Apply them with a foam brush for smooth coverage, or create interesting patterns using stencils and tape for geometric designs.
Pro tip: Create an aged effect by gently rubbing areas with fine steel wool after sealing, or apply a dark glaze and quickly wipe it away, leaving depth in the crevices. For maximum durability, always finish with two coats of clear sealer, allowing proper drying time between applications.
These techniques work beautifully on picture frames, furniture details, decorative boxes, and even architectural elements like crown molding.
Custom Art and Wall Installations
Transform your living space with sophisticated custom wall art ideas that look high-end but won’t break the bank. One stunning option is creating an oversized abstract canvas using acrylic paint pouring techniques. Mix metallic paints with fluid medium for a luxurious marble effect that catches the light beautifully.
For a more architectural approach, try crafting a geometric wall installation using wooden dowels or brass rods arranged in a contemporary pattern. Paint them in rich metallic finishes or leave them natural for an organic modern look. The key is precise measurement and clean lines to achieve that gallery-worthy appearance.
Another elegant option is creating a series of floating frames filled with textured materials like grasscloth, silk, or handmade paper. Layer different textures and colors to add depth and visual interest. You can also experiment with large-scale photography prints divided across multiple frames for a striking gallery wall.
Consider crafting a statement piece using mirror fragments arranged in a mosaic pattern. This not only creates visual drama but also helps reflect light throughout your space. Pro tip: Use mirror-grade adhesive and wear protective gloves while handling the pieces.
Remember to plan your composition before starting and work in a well-ventilated area. These projects typically cost a fraction of store-bought art while delivering the same upscale impact that elevates your home’s aesthetic.
Statement Furniture Makeovers
Upholstered Headboards and Seating
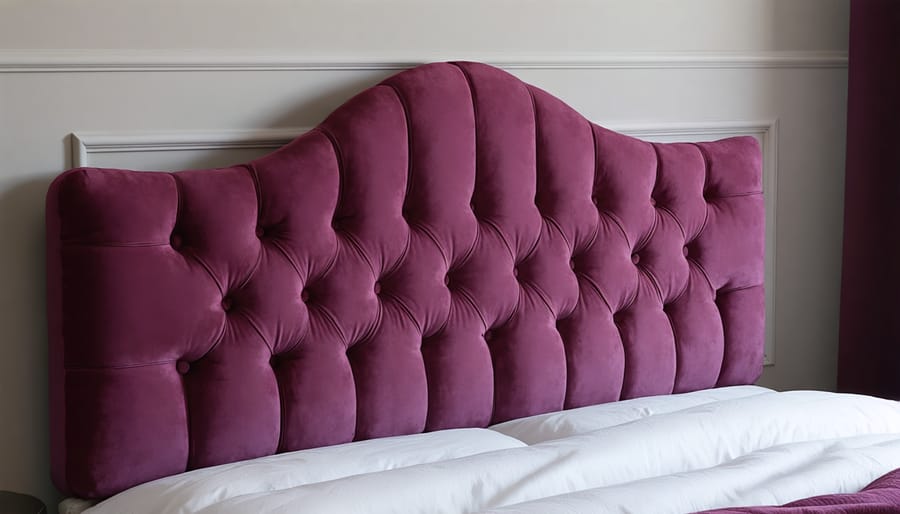
Transform your bedroom or living space with custom upholstered pieces that rival designer options at a fraction of the cost. Creating your own upholstered headboard or seating isn’t just budget-friendly – it’s an opportunity to express your unique style and ensure a perfect match with your decor.
Start with your headboard by selecting a piece of 3/4-inch plywood cut to your desired dimensions. For a luxurious look, add a layer of 2-inch foam, wrapping it around the edges for that plush, professional finish. Cover the foam with a layer of batting to smooth any imperfections and create that cloud-like softness.
Choose your fabric carefully – velvet, linen, or performance fabrics work beautifully and hold up well over time. When measuring your fabric, add an extra 4 inches on all sides to allow for proper wrapping. For an extra upscale touch, consider adding tufting before securing your fabric. Create a grid pattern for button placement, drill small holes through your board, and use waxed button thread to create deep, elegant tufts.
For seating projects, like dining chairs or benches, begin by removing the existing fabric and saving it as a pattern. Clean and sand any exposed wood, and consider painting or staining it for a complete transformation. Layer your materials just as with the headboard: foam, batting, and fabric. Work from the center outward when stapling to avoid wrinkles, and pay special attention to corners for a crisp, professional look.
Pro tip: Invest in quality tools like an electric staple gun, sharp scissors, and upholstery pins. They’ll make the process smoother and yield better results. For pattern-heavy fabrics, take time to center and align your design – this attention to detail separates amateur work from professional-looking pieces.
Remember to double-check all measurements and do a dry layout before making any permanent attachments. This extra step can save you from costly mistakes and ensure your finished piece looks truly upscale.
High-End Wood Refinishing Techniques
Transform ordinary wooden furniture into stunning showpieces with these professional wood finishing techniques that rival custom pieces. Start by thoroughly cleaning your piece with mineral spirits and assessing any repairs needed. For deep scratches, use wood filler that matches your intended finish color, and sand progressively with 120-, 180-, and 220-grit sandpaper for an ultra-smooth surface.
For a rich, luxurious finish, consider using a pre-stain wood conditioner to ensure even absorption, especially on woods like pine or maple. Apply your chosen stain in thin, even coats using a high-quality natural bristle brush or lint-free cloth, always working in the direction of the wood grain. For an antiqued look, layer different stain colors, starting with darker tones in the recesses and lighter ones on raised areas.
The secret to achieving that coveted hand-rubbed finish lies in multiple thin coats of clear finish. Apply 3-4 layers of water-based polyurethane, lightly sanding with 320-grit paper between coats. For extra sophistication, try French polishing – a technique using shellac and oil applied with a special rubber pad. This creates an incredibly deep, mirror-like shine that’s particularly stunning on tabletops and accent pieces.
Don’t forget about special effects like cerusing (white-washing the grain) or adding gilt details to edges and carved areas. These professional touches can elevate a simple piece to statement status. For the final coat, consider using paste wax applied with #0000 steel wool, then buffed to a subtle sheen with a soft cloth. This protective layer adds depth while maintaining a natural, authentic look that improves with age.
Remember, patience is key – allow proper drying time between coats and work in a dust-free environment for best results. These techniques may take more time, but the professional-quality outcome is worth the extra effort.
Architectural Elements and Built-Ins
Crown Molding and Wainscoting
Adding crown molding and wainscoting to your home is one of the most impactful ways to transform your space and create that coveted high-end look. While these architectural details might seem intimidating at first, they’re surprisingly achievable DIY projects with the right approach and tools.
For crown molding, start by selecting a style that complements your home’s architecture. Traditional profiles work well in classic homes, while sleek, simple designs suit modern spaces. You’ll need a miter saw, measuring tape, level, and nail gun. Pro tip: Paint your molding before installation to save time and achieve cleaner lines. When measuring, remember the old saying “measure twice, cut once” – this is especially crucial for those tricky corner angles.
Wainscoting adds instant charm and sophistication to any room. The most beginner-friendly approach is to use pre-made panels, though creating a custom board-and-batten look is also achievable. Start by determining your desired height – traditionally, wainscoting reaches about one-third up the wall. Mark your lines carefully using a level, and don’t forget to account for electrical outlets in your planning.
For both projects, attention to detail makes all the difference. Fill nail holes with wood putty, caulk all seams, and sand smooth before painting. When choosing paint, opt for semi-gloss finish – it’s both practical and visually appealing. Consider painting the wainscoting and crown molding the same color as your trim for a cohesive look, or go bold with contrasting colors to create drama.
Remember to work with the natural lines of your room and maintain consistent spacing in your design. These finishing touches can increase your home’s value while creating that custom, upscale feel you’re after – all at a fraction of the cost of professional installation.
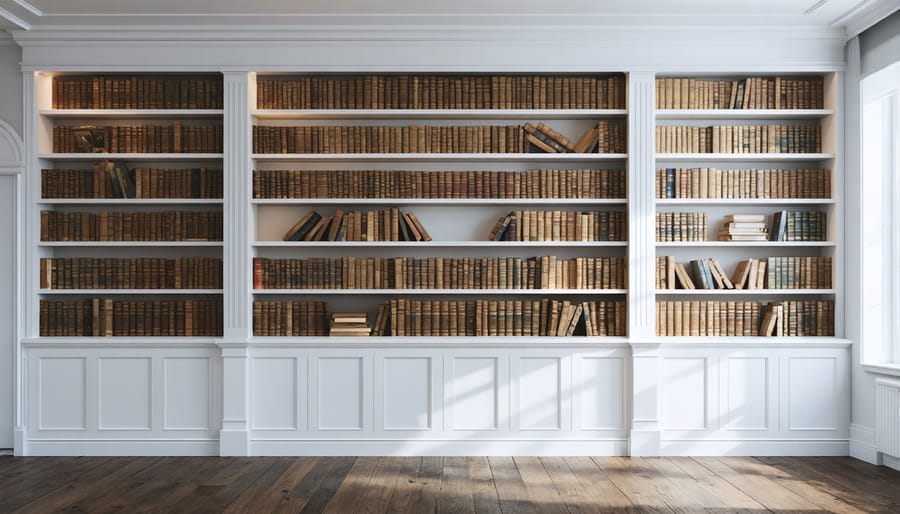
Custom Shelving and Storage Solutions
Custom storage solutions can transform any space from ordinary to extraordinary, and building your own high-end shelving systems is easier than you might think. With careful planning and attention to detail, you can create built-ins that look like they were professionally installed at a fraction of the cost.
Start by measuring your space carefully and creating a detailed plan. Consider incorporating features like adjustable shelving, hidden storage compartments, and decorative molding to elevate the final look. For materials, opt for high-quality plywood or MDF for the main structure, and add solid wood trim pieces for a more upscale appearance.
One professional trick is to use a combination of closed storage below and open shelving above. This arrangement provides versatility while maintaining a clean, organized look. Install soft-close hinges and premium drawer slides for that luxurious feel every time you open a cabinet.
To achieve a built-in look, extend your shelving unit from floor to ceiling and ensure it fits wall-to-wall. Use crown molding at the top and baseboards at the bottom to seamlessly integrate the unit with your existing architecture. Paint everything in a single color, preferably matching your trim, to create a cohesive, custom appearance.
Consider adding special features like integrated lighting, sliding ladder rails, or glass-front cabinet doors to enhance functionality and style. Wire management solutions can be incorporated to hide electronics and their cords, maintaining a clean aesthetic.
For a truly professional finish, use a paint sprayer rather than brushes or rollers. This technique provides a smooth, factory-like finish that elevates the entire project. Don’t forget to add adjustable shelf pins and reinforced supports for heavy items to ensure your storage solution is as practical as it is beautiful.
Remember to plan your organization system around your specific needs. Whether it’s displaying collectibles, storing books, or hiding office supplies, customizing the dimensions and features to your requirements will result in a truly bespoke storage solution that adds both value and functionality to your home.
Lighting and Fixture Upgrades
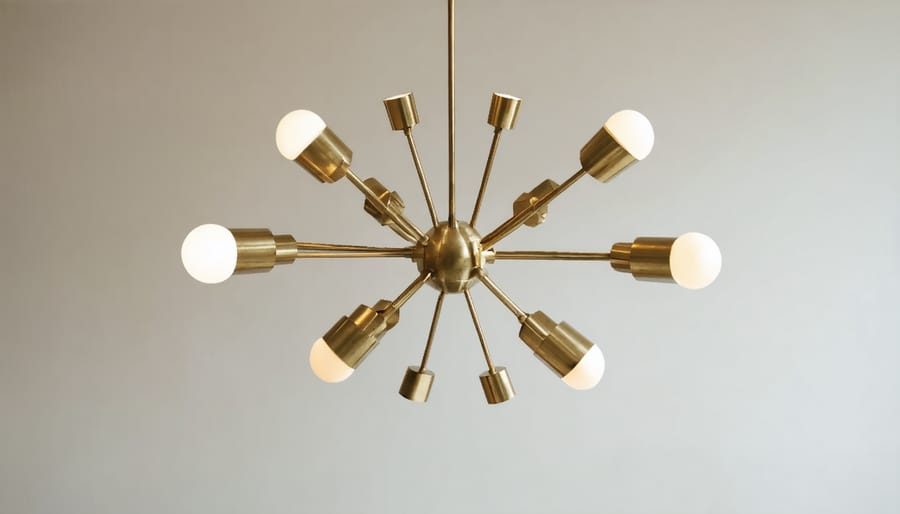
Statement Chandelier Projects
Transform your space with a stunning statement chandelier that looks like it belongs in a luxury boutique hotel. This DIY project combines modern aesthetics with classic elegance, all while saving you hundreds of dollars compared to designer fixtures.
Start by gathering your materials: a large metal hoop (available at craft stores), crystal beads or prisms, fishing line, and a basic pendant light kit. Create your design by sketching out the pattern you want your crystals to follow – cascading waves and geometric patterns work beautifully.
Thread your fishing line through the metal hoop at evenly spaced intervals, creating vertical drops of varying lengths. Attach your crystal beads in your planned pattern, securing each one with small knots. Pro tip: mix different sizes and shapes of crystals for added visual interest and light refraction.
Install the pendant light kit according to package instructions, ensuring it’s properly secured to your ceiling. Carefully attach your crystal creation to the base of the light fixture, double-checking all connections for security.
For a modern twist, consider using metallic beads or colored crystals. You can also experiment with multiple tiers or asymmetrical designs. Remember to balance the weight distribution evenly to maintain stability.
When lit, your DIY chandelier will cast beautiful light patterns across your room, creating an upscale ambiance that rivals designer pieces. Total cost typically ranges from $75-150, compared to similar store-bought versions that can cost $500 or more.
Modern Sconce and Pendant Creations
Transform your space with these stunning DIY lighting projects that look straight out of a designer showroom. Let’s start with a modern geometric pendant light that you can create using brass rods and frosted glass panels. The key is to measure and cut your brass pieces precisely, creating clean angles that form a sophisticated polyhedron shape.
For a more organic look, try crafting a woven rattan sconce. Using natural rattan strips, create an intricate pattern around a basic wall light fixture. The warm glow filtering through the weave creates beautiful shadow patterns that add depth to any room. Pro tip: Soak the rattan in warm water for 30 minutes before weaving to make it more pliable.
Another show-stopping option is the concrete pendant light. Using a silicone mold and quick-setting concrete, you can cast sleek cylindrical or angular shapes. Once cured, sand the surface to achieve that coveted smooth, industrial finish. Add metallic paint to the interior for an unexpected gleam when lit.
For those who love minimalist design, try the copper pipe sconce. With just a few lengths of copper pipe and elegant joints, you can create a sculptural wall light that rivals high-end fixtures. The natural patina that develops over time only adds to its charm.
Remember to always work with UL-listed electrical components and follow local building codes when installing your custom lighting.
As we’ve explored throughout this guide, creating upscale DIY projects doesn’t require professional expertise or a hefty budget – just creativity, attention to detail, and the right techniques. From mastering the art of faux finishes to transforming thrift store finds into designer-worthy pieces, these skills can help you achieve that high-end look you’ve been dreaming of.
Remember that success in upscale DIY comes down to three key principles: proper preparation, quality materials (even if budget-friendly), and patience with the process. Whether you’re starting with quick decor updates or tackling larger transformation projects, taking time to plan and execute each step carefully will ensure professional-looking results.
Don’t be afraid to start small and gradually work your way up to more complex projects. Practice techniques like color washing, antiquing, or reupholstering on less visible pieces first. As your confidence grows, so will your ability to take on more ambitious makeovers.
Most importantly, remember that creating upscale pieces yourself isn’t just about saving money – it’s about developing a skill set that allows you to customize your space exactly as you envision it. Each project you complete adds to your DIY repertoire and brings you closer to mastering the art of high-end home decor on a budget.
So gather your supplies, set up your workspace, and start transforming ordinary items into extraordinary pieces. With the techniques and tips we’ve shared, you’re well-equipped to begin your journey into the world of upscale DIY. Your home’s next designer-worthy accent piece is just a project away!