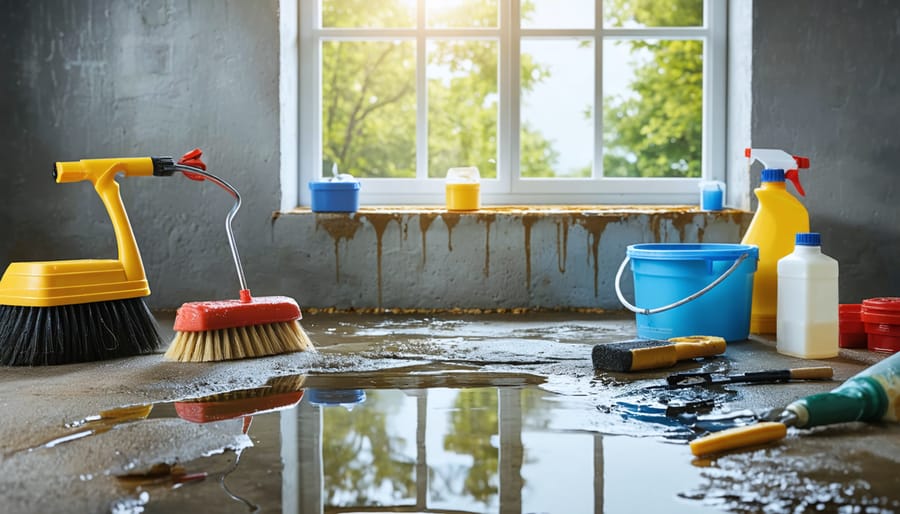
Transform your damp basement into a dry, livable space with proven DIY waterproofing techniques that belong in every homeowner’s essential home repair skills. Start by thoroughly inspecting your foundation walls for cracks and applying hydraulic cement to seal visible gaps. Direct water away from your home’s foundation by grading the soil, extending downspouts at least 6 feet from walls, and installing a properly functioning gutter system. Apply a high-quality waterproof coating to interior basement walls using a masonry brush, working from floor to ceiling in manageable sections.
For severe moisture problems, install a French drain system along the perimeter of your foundation, lined with gravel and perforated pipe to channel water away from your home. While professional basement waterproofing can cost thousands, these DIY solutions typically require $500-1,500 in materials and a weekend of dedicated work. Most homeowners can successfully tackle this project with basic tools and careful preparation, transforming their basement from a damp liability into a dry, usable space.
Before You Start: Essential Preparation Steps
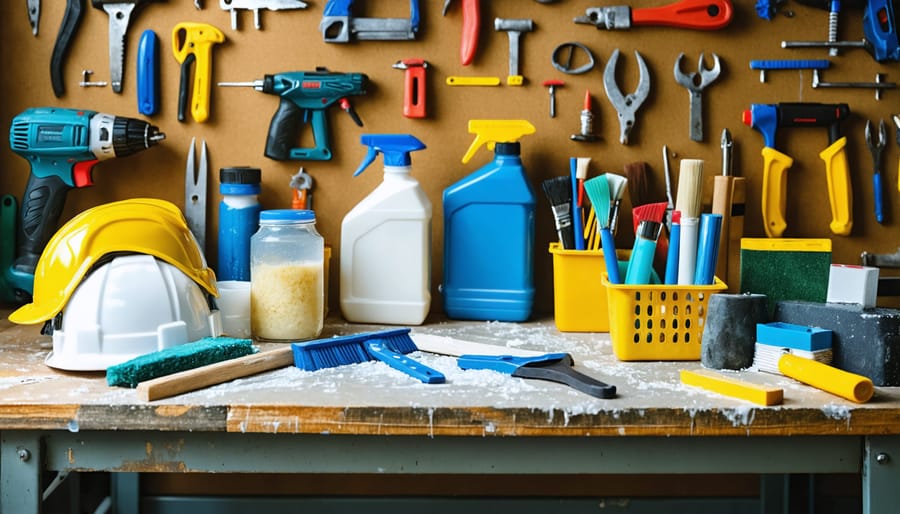
Required Tools and Materials
Before diving into our beginner-friendly repair techniques, let’s gather everything you’ll need for this project. While waterproofing your basement might seem daunting, having the right tools and materials ready will make this one of the most cost-effective repair solutions you can tackle.
Essential Tools (estimated costs):
– Heavy-duty wire brush ($8-15)
– Paint roller and extension pole ($20-30)
– 2-inch paintbrush ($5-10)
– Mixing bucket ($5-10)
– Power drill with mixing paddle ($30-40)
– Safety goggles ($5-10)
– Rubber gloves ($5-10)
– Dust mask ($10-15)
– Putty knife ($5-10)
Required Materials:
– Hydraulic cement ($15-25 per 10lb bucket)
– Waterproof masonry coating ($30-40 per gallon)
– Concrete patch compound ($20-30)
– Masonry cleaner ($15-20)
– Waterproof tape for cracks ($10-15)
– Plastic sheeting for floor protection ($10-15)
– Clean rags or towels ($5-10)
Optional but Recommended:
– Dehumidifier ($150-200)
– Shop vacuum ($50-100)
– Moisture meter ($20-30)
Total estimated cost: $250-400, depending on basement size and chosen materials. Remember to measure your space carefully to purchase adequate amounts of coating materials.
Safety First: Precautions and Equipment
Before diving into your basement waterproofing project, let’s make safety your top priority. Working in basements involves potential hazards, but with the right precautions and equipment, you can tackle this project safely and confidently.
First, ensure proper ventilation by setting up fans and opening windows if possible. Basement spaces can trap harmful fumes from waterproofing products, so good air circulation is essential. Consider using a respirator mask rated for chemical vapors to protect your lungs.
Your safety gear checklist should include:
– Chemical-resistant gloves
– Safety goggles
– Steel-toed boots
– Long-sleeve clothing and pants
– Knee pads for comfort during floor work
– A hard hat if working near low pipes or beams
Before starting, check for potential electrical hazards and shut off power to the work area if necessary. Keep a working flashlight and first aid kit nearby. If you encounter any mold during the process, wear an N-95 mask and consider consulting a professional for proper remediation.
Test the products you’ll be using in a small area first to ensure proper ventilation and to familiarize yourself with their application. Always read and follow manufacturer safety guidelines carefully, and keep emergency contact numbers handy.
Remember, if you feel uncomfortable or encounter serious structural issues, there’s no shame in calling a professional. Your safety comes first!
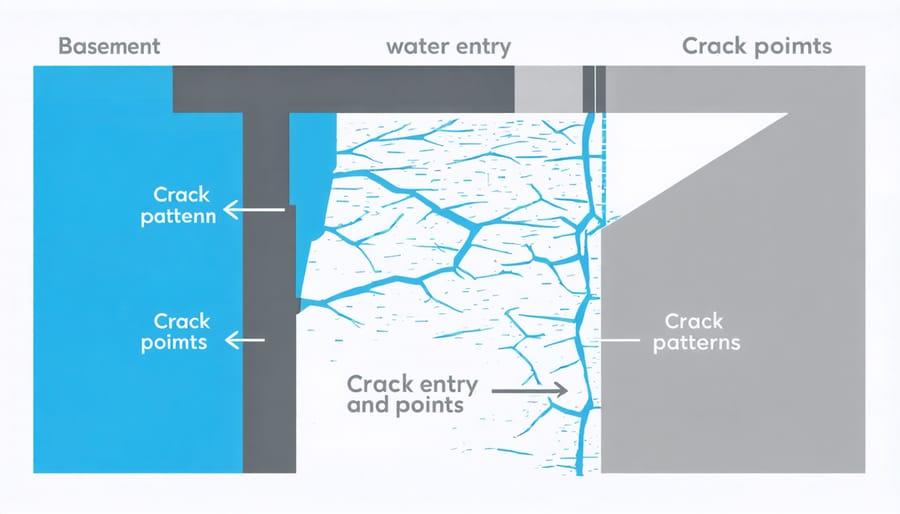
Identifying and Fixing Water Entry Points
Common Problem Areas
Before diving into waterproofing solutions, it’s crucial to identify where water is entering your basement. The most common problem areas typically include cracks in foundation walls, which often appear as horizontal or vertical lines and can range from hairline fractures to more substantial gaps. Keep an eye on where these cracks are located, as their position can indicate different types of foundation stress.
Floor-wall joints, also known as cove joints, are another frequent culprit. These joints where your basement floor meets the wall are natural weak points where water can seep through. During heavy rains, you might notice water pooling along these areas first.
Window wells are particularly vulnerable spots, especially if they’re not properly installed or maintained. Look for staining or dampness around window frames and check if your window wells have adequate drainage and covers.
Pay special attention to pipe penetrations where utility lines enter your home. These areas often develop leaks over time as the house settles and the seals around pipes deteriorate. Similarly, basement egress doors and their frames can be problematic if not properly sealed.
Tell-tale signs of water damage include white, chalky deposits on walls (efflorescence), peeling paint, musty odors, and visible mold growth. Dark spots or discoloration on walls and floors, especially after rain, indicate active water infiltration. Even small symptoms like these can point to larger underlying issues that need addressing.
Remember to inspect your basement during or immediately after heavy rainfall, as this is when water problems are most visible and easily identifiable.
Crack Repair Techniques
Repairing foundation cracks is a crucial step in waterproofing your basement. Start by thoroughly cleaning the crack area using a wire brush to remove loose debris and dirt. Once clean, use a shop vacuum to remove any remaining dust particles.
For hairline cracks (less than 1/8 inch), apply hydraulic cement using a putty knife, pressing firmly to ensure the material fills the entire crack. For wider cracks, you’ll need a two-part epoxy injection system, which provides a more permanent solution.
When using an epoxy injection system:
1. Install injection ports along the crack, spacing them about 12 inches apart
2. Seal the surface of the crack with epoxy paste
3. Once the surface seal has cured, inject the liquid epoxy through the ports
4. Start at the lowest port and work your way up
5. Continue until epoxy begins flowing from the port above
6. Seal each port as you complete it
For actively leaking cracks, use expanding polyurethane foam, which reacts with water to create a watertight seal. Simply inject the foam into the crack and allow it to expand and cure.
Pro tip: Always wear protective gear, including safety glasses and gloves, when working with repair materials. Also, monitor repaired areas for at least 24 hours to ensure the fix is holding properly.
Remember that some larger cracks might indicate structural issues. If you encounter cracks wider than 1/4 inch or notice the crack growing over time, consult a professional foundation expert before attempting repairs yourself.
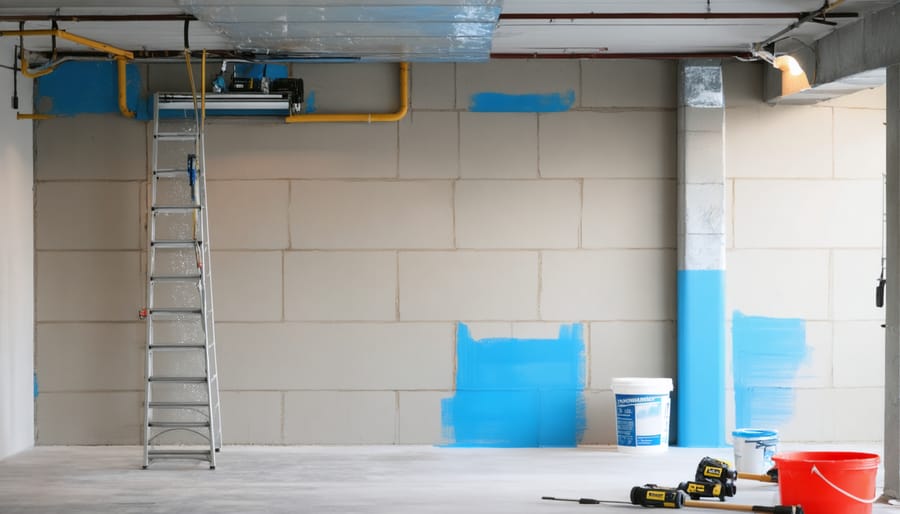
Interior Waterproofing Methods
Wall Preparation
Before applying any waterproofing materials, proper wall preparation is crucial for ensuring long-lasting results. Start by thoroughly inspecting your basement walls for existing damage, cracks, or areas of concern. Use a wire brush to remove any loose paint, efflorescence (white mineral deposits), or deteriorating concrete.
Next, clean the walls using a heavy-duty cleaner and water mixture. A pressure washer can be effective for stubborn dirt, but be careful not to damage the surface. Allow the walls to dry completely – this typically takes 24-48 hours, depending on humidity levels.
Fill any cracks wider than 1/8 inch with hydraulic cement, following the manufacturer’s instructions. For hairline cracks, use a quality crack filler designed for concrete surfaces. Allow all repairs to cure fully before proceeding.
Test the walls for active water seepage by taping a 1-foot square piece of plastic sheeting to the surface. If condensation forms under the plastic after 24 hours, you’ll need to address external drainage issues before waterproofing.
Finally, check the wall’s pH level using a test strip – most waterproofing products require a slightly alkaline surface (pH 6-8) for proper adhesion. If needed, etch the surface with muriatic acid solution, following all safety precautions and manufacturer guidelines. Rinse thoroughly and allow to dry completely before moving on to the waterproofing application.
Applying Waterproof Coatings
Now that your surface is properly prepared, let’s dive into applying the waterproof coating. This crucial step, when done correctly, creates a reliable moisture barrier that will keep your basement dry. For those looking to tackle this project while keeping costs in check, check out our budget-friendly renovation tips.
Start by thoroughly mixing your waterproofing compound according to the manufacturer’s instructions. Using a wide brush or roller, apply the first coat in broad, even strokes from the bottom up. Work in manageable sections of about 3-4 feet at a time to maintain consistent coverage.
Allow the first coat to dry for the recommended time (usually 2-4 hours) before applying the second coat. For the second application, work in the opposite direction of your first coat – if you applied horizontally before, go vertical this time. This ensures complete coverage and helps eliminate any missed spots.
Pay special attention to corners, joints, and areas around pipes. Use a smaller brush to work the coating into these tight spaces, ensuring no gaps are left untreated. For extra protection in these vulnerable areas, consider applying an additional coat.
Most basements will need two to three coats for optimal protection. Wait at least 24 hours after the final coat before exposing the surface to any moisture. During this time, maintain good ventilation in your basement to help the coating cure properly.
Remember to clean your tools immediately after use, as dried waterproofing compounds can be challenging to remove. Store any leftover product according to the manufacturer’s instructions for future touch-ups.
Floor Sealing Techniques
Sealing your basement floor is a crucial step in creating a water-resistant space. Start by thoroughly cleaning the floor and repairing any visible cracks with hydraulic cement. Once the surface is prepared, apply a quality concrete sealer using a roller or brush, working in small sections to ensure even coverage.
For maximum protection, consider using a two-part epoxy sealer, which creates a durable, waterproof barrier. Apply the first coat in long, overlapping strokes, and allow it to dry completely (usually 24 hours) before adding a second coat. Pay special attention to the areas where the floor meets the walls, as these joints are common entry points for moisture.
Another effective option is crystalline waterproofing, which penetrates the concrete and forms water-resistant crystals within the pores. Simply mix the crystalline compound according to manufacturer instructions and apply it with a stiff brush, ensuring complete coverage.
Remember to maintain proper ventilation during application and wear appropriate safety gear, including rubber gloves and a respirator. Allow the sealer to cure fully before moving items back into your basement.
External Moisture Prevention
Proper Drainage Solutions
A well-designed drainage system is your basement’s first line of defense against water damage. Start by installing a properly functioning gutter system that directs water at least 6 feet away from your foundation. Clean your gutters regularly and consider installing gutter guards to prevent debris buildup.
Around your home’s perimeter, grade the soil to slope away from the foundation at a rate of about 1 inch per foot. This natural drainage solution works with your other energy-efficient home improvements to keep your basement dry and comfortable.
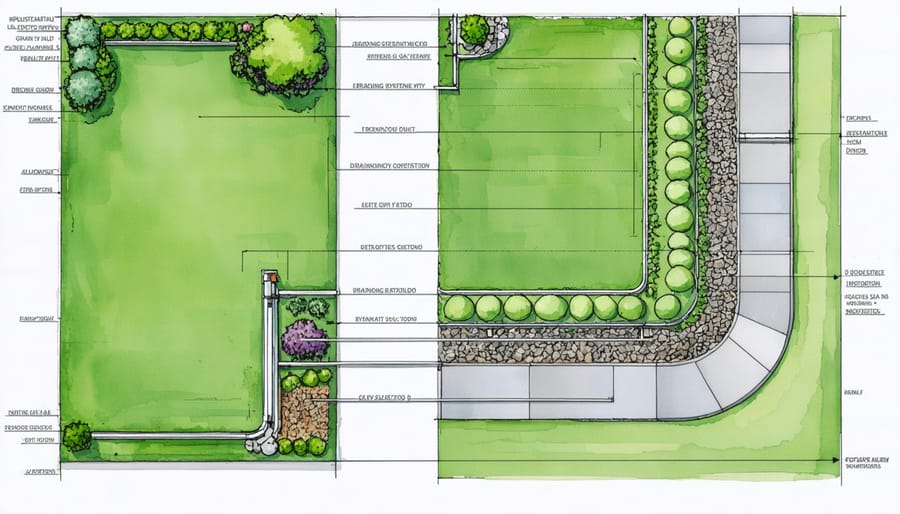
For more robust protection, install a French drain system. Here’s how:
1. Dig a trench around your foundation, sloping it away from the house
2. Line the trench with landscape fabric to prevent soil infiltration
3. Add 2-3 inches of gravel at the bottom
4. Place a perforated drain pipe in the trench
5. Cover with more gravel and wrap the fabric over the top
6. Fill the remaining space with soil
Consider installing a sump pump in the lowest part of your basement. This mechanical solution automatically removes accumulated water before it becomes a problem. Place the sump basin in a corner where water naturally collects, and ensure it has a reliable backup power source for when storms knock out electricity.
For maximum effectiveness, combine these drainage solutions with proper maintenance. Regularly inspect your systems, especially after heavy rains, and address any issues promptly to prevent water damage before it starts.
Grading and Landscaping Tips
Proper grading and landscaping around your home’s foundation is crucial for effective basement waterproofing. The goal is to ensure water flows away from your house rather than toward it. Start by examining your yard’s slope – it should drop at least 6 inches over the first 10 feet extending from your foundation walls.
To adjust the grade, add clean fill dirt around your foundation, compacting it in layers to prevent settling. Create a gentle slope that directs water away from your house. Be careful not to pile soil higher than your foundation’s top edge, as this could lead to wood rot in your home’s structure.
When it comes to vegetation, position plants at least 2 feet away from your foundation. Choose species with non-invasive root systems to prevent foundation damage. Consider installing rain gardens or swales in low areas of your yard to collect and redirect water naturally.
Your gutters and downspouts play a vital role in yard drainage. Ensure downspouts extend at least 6 feet from your foundation and discharge onto splash blocks. For better water distribution, consider installing underground drainage pipes connected to your downspouts.
Creating a gravel border around your foundation can also help. Use clean, crushed stone in a 2-foot wide strip to prevent soil erosion and provide quick drainage. Remember to maintain these landscaping features regularly – clear debris from drainage paths, repair eroded areas promptly, and adjust grading as needed to keep water flowing away from your home.
Successfully waterproofing your basement is a rewarding DIY project that can protect your home and increase its value for years to come. By following the methods we’ve discussed – from proper surface preparation to applying sealants and installing drainage systems – you can create a dry, healthy basement environment that stands the test of time.
Remember that maintenance is crucial for long-term success. Regularly inspect your basement walls and floors for new cracks or signs of moisture, especially after heavy rains. Keep your gutters clean and properly maintained, and ensure downspouts direct water at least 6 feet away from your foundation. Check your interior drainage systems quarterly, and clean any debris from floor drains or sump pumps.
To preserve your waterproofing work, maintain proper grading around your home’s exterior, keeping the soil sloped away from the foundation. Consider installing a dehumidifier in your basement to regulate moisture levels, particularly during humid months. Monitor your basement’s humidity levels regularly – aim to keep them between 30-50% for optimal results.
If you notice any issues during your regular inspections, address them promptly. Small problems can quickly escalate into major concerns if left unchecked. While DIY waterproofing can be highly effective, don’t hesitate to consult a professional if you encounter challenges beyond your expertise.
With proper maintenance and periodic checks, your DIY waterproofing efforts can provide lasting protection for your basement, creating a dry, usable space that enhances your home’s functionality and value. Stay vigilant, act promptly when issues arise, and enjoy the benefits of your well-protected basement for years to come.