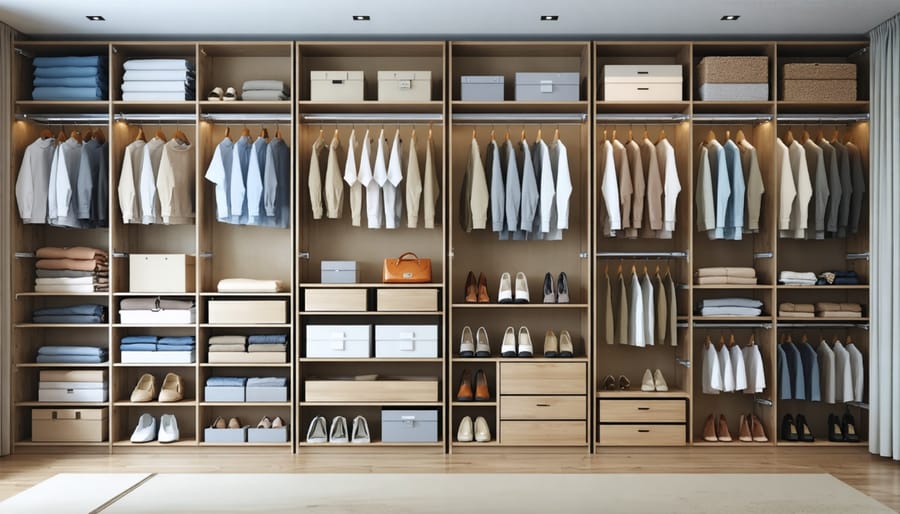
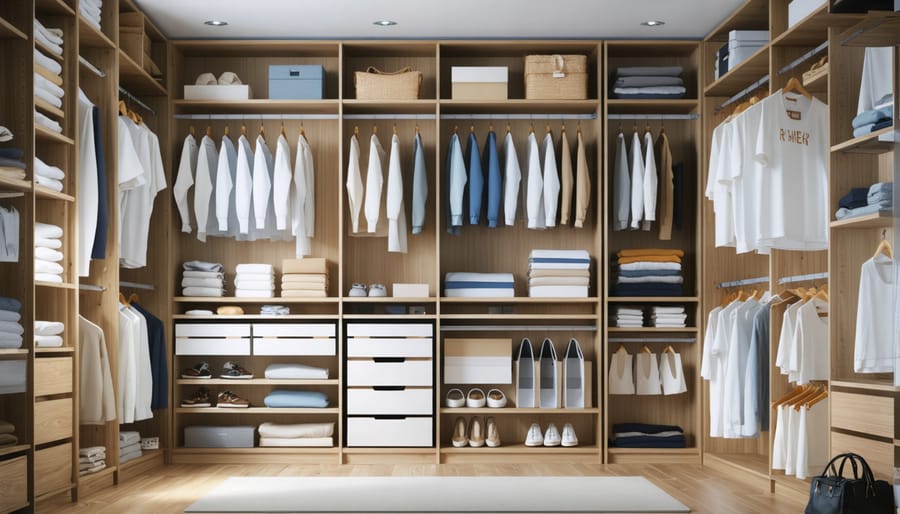
Transform any closet into a custom storage sanctuary without breaking the bank. Modern DIY closet systems offer professional-looking results at a fraction of typical closet system costs. Whether you’re maximizing a walk-in wardrobe or organizing a reach-in closet, today’s modular components and adjustable designs make custom organization achievable for any skill level. From sleek wire systems that start at $100 to premium wood solutions around $500, this guide breaks down the best DIY closet systems for every budget and space. We’ll explore top-rated brands, share expert installation tips, and help you create a designer-worthy closet that perfectly fits your storage needs and style preferences – all while saving hundreds on professional installation.
Popular DIY Closet System Brands Worth Your Money
Rubbermaid FastTrack Systems
Rubbermaid’s FastTrack system stands out as a reliable and budget-friendly choice for DIY closet organization. The system’s backbone is its steel rail mounting system, which provides exceptional stability while remaining easy to install. What makes this system particularly appealing is its versatility – you can customize it with various components like adjustable shelving, hanging rods, and accessories to suit your specific storage needs.
The FastTrack rails can hold up to 1,000 pounds when properly mounted, making them sturdy enough for even the heaviest winter coats and shoe collections. The system includes essential pieces like wire shelving, brackets, and hanging rods, all featuring a clean white finish that brightens up any closet space.
One of the system’s biggest advantages is its expandability. You can start with a basic configuration and add more components as your needs change. Installation is straightforward, requiring just basic tools and about 2-3 hours for a standard closet. The included instructions are clear, and most components snap together without complicated hardware.
While not as sleek as some high-end alternatives, the FastTrack system offers excellent value for DIY enthusiasts seeking a practical, durable solution for closet organization.
ClosetMaid Configurations
ClosetMaid stands out as a go-to choice for DIY enthusiasts, offering a perfect balance of affordability and versatility. Their configurations come in both wire and laminate options, letting you choose based on your style preferences and budget. The wire systems are particularly popular for their durability and air circulation benefits, while the laminate versions provide a more polished, furniture-like appearance.
What makes ClosetMaid especially appealing is their mix-and-match capability. You can start with a basic starter kit and gradually expand your storage solution as needed. Their systems typically include adjustable shelving, hanging rods, and drawer options, with most components requiring just basic tools for installation.
A standout feature is their online design tool, which helps you visualize your space and create a custom layout before making any purchases. While the wire systems might not look as premium as some high-end alternatives, they offer excellent value for money and can transform any closet into an organized space. For best results, consider combining different ClosetMaid lines – perhaps using wire shelving for less visible areas and laminate pieces for showcase sections.
IKEA ALGOT/BOAXEL Systems
IKEA’s ALGOT and its successor BOAXEL offer fantastic budget-friendly solutions for DIY closet organization. These Swedish-designed systems feature a versatile wall-mounted design that’s surprisingly sturdy and adaptable to various spaces. The metal frame construction provides reliable support while remaining lightweight enough for easy installation.
What makes these systems particularly appealing is their modular nature – you can start small and expand over time. Components include hanging rods, shelves, mesh baskets, and drawer units that easily click into place. The BOAXEL system, which replaced ALGOT in 2020, features improved functionality and a more contemporary aesthetic while maintaining the same user-friendly installation process.
The systems’ affordability doesn’t compromise quality, making them perfect for both temporary rentals and permanent homes. Most configurations can be assembled with basic tools, though you’ll want to ensure proper wall anchoring for safety. Pro tip: always measure your space twice and use IKEA’s online planning tool before purchasing components.
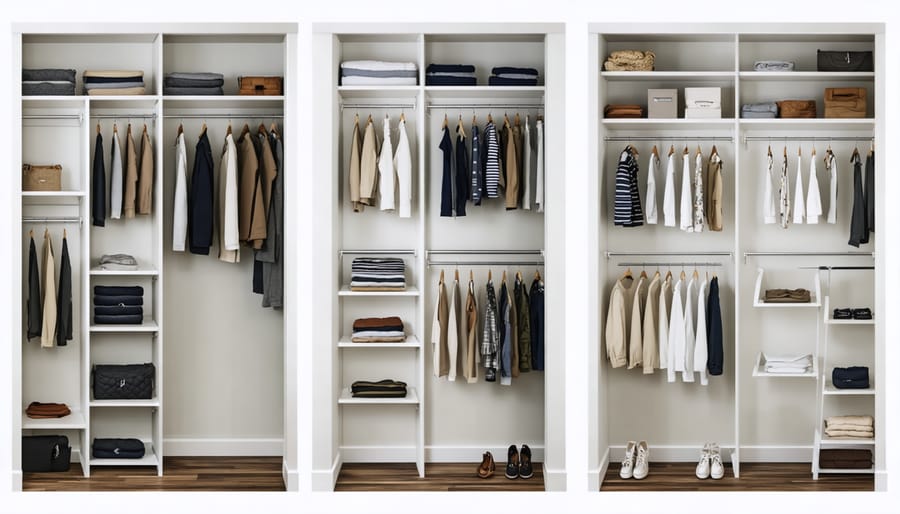
Essential Components for a Functional DIY Closet System
Hanging Rods and Brackets
Choosing the right hanging rods and brackets is crucial for creating a functional DIY closet system. The most popular option is the adjustable tension rod, perfect for renters or temporary solutions since it requires no drilling. For a more permanent setup, consider fixed-mount rods in chrome, brushed nickel, or oil-rubbed bronze – these can support heavier loads and won’t sag over time.
Double-hanging rods are a game-changer for maximizing vertical space, especially for shirts and pants. Install the top rod at about 80 inches and the lower rod at 40 inches for optimal accessibility. For single hanging areas (dresses and long coats), position the rod at 66 inches from the floor.
Heavy-duty brackets should be installed into wall studs whenever possible, using wall anchors as backup only when necessary. Look for brackets with a weight capacity of at least 100 pounds per pair. Pro tip: add an extra bracket in the middle for rods longer than 48 inches to prevent sagging.
Consider using valet rods – these pull-out extensions are perfect for outfit planning or temporary hanging while you organize.
Shelving and Storage Cubes
When it comes to maximizing closet space, shelving and storage cubes offer incredible versatility and functionality. Open shelving provides easy access to folded clothes and accessories, while enclosed cubes keep items dust-free and visually organized. To ensure long-lasting results, opt for durable shelf materials that can handle daily use without sagging.
Fixed shelving works best for heavier items like sweaters and jeans, while adjustable shelves allow you to customize heights as your storage needs change. Wire shelving offers excellent ventilation and lightweight durability, making it perfect for seasonal clothing storage. Solid wood or laminate shelves provide a more polished look and better support for displaying accessories or storing folded garments.
Storage cubes are game-changers for organizing smaller items. Available in various sizes, they’re perfect for storing accessories, handbags, and shoes. Consider fabric cubes for flexible storage – they’re lightweight, affordable, and can be easily labeled. For a more permanent solution, wooden or metal cube systems offer stability and a sleek appearance.
Pro tip: Before installing any shelving, map out your storage needs and measure your items to determine ideal shelf spacing. This prevents wasted space and ensures your system works efficiently for your specific wardrobe.
Drawers and Bins
Drawers and bins are essential components of any well-organized closet system, providing dedicated spaces for smaller items that might otherwise end up in a jumbled mess. For folded items like socks, underwear, and accessories, drawer units with smooth-gliding mechanisms offer both accessibility and protection from dust. Consider installing a combination of shallow drawers for jewelry and accessories, and deeper ones for bulkier items like sweaters and workout gear.
Clear plastic bins are perfect for seasonal storage and items you don’t need daily access to. They allow you to see the contents without opening them and stack efficiently to maximize vertical space. For frequently used items, opt for open-top fabric bins or baskets that slide easily onto shelves – these work particularly well for storing scarves, belts, and rolled-up ties.
When planning your drawer layout, remember to leave some breathing room between units for easy access. A good rule of thumb is to dedicate about 20-25% of your closet space to drawer storage. Label everything clearly, and consider using drawer dividers or small organizing boxes within larger drawers to keep items separated and tidy. This system makes it much easier to maintain organization long-term and quickly find what you need during your morning routine.
Step-by-Step Installation Process
Planning and Measuring
Before diving into building your dream closet, accurate measurements and thoughtful planning are absolutely essential. Start by emptying your closet completely and grab your measuring tape. Measure the width, height, and depth of your closet space, being sure to note any obstacles like doors, light switches, or baseboards.
Create a rough sketch of your closet layout on graph paper, marking one square as one foot for easy scaling. Don’t forget to measure the height from floor to ceiling at multiple points – older homes especially can have subtle variations that might affect your design.
Consider your storage needs by taking inventory of your belongings. Count how many long-hanging items (dresses, coats) and short-hanging items (shirts, skirts) you have. Make note of shoes, accessories, and folded clothes that will need shelf space. This inventory will help you determine the right mix of hanging rods, shelves, and drawers.
Pro tip: Leave at least 24 inches of depth for hanging clothes, 12 inches for shelves, and ensure hanging rods are mounted at appropriate heights (around 42 inches for shirts and 72 inches for long items). Add a few extra inches of clearance around doors and corners for smooth operation.
Remember to plan your layout in zones based on how frequently you use different items. Keep everyday essentials at eye level and seasonal items in higher or lower spaces.
Wall Mounting and Track Installation
Before diving into installation, gather your tools: a stud finder, level, drill, measuring tape, pencil, and the mounting hardware that came with your system. Safety should always come first, so don’t skip wearing protective eyewear and a dust mask.
Start by locating and marking wall studs – these are crucial for a secure installation. Use your stud finder to mark each stud location with a pencil, typically spaced 16 inches apart. For drywall installations, you’ll want to hit these studs whenever possible.
When mounting your wall track, begin by establishing a level line at your desired height. Most closet systems start about 84 inches from the floor, but adjust this based on your ceiling height and needs. Use a long level or laser level for accuracy – even a slight tilt can affect the entire system.
Pre-drill your holes into the studs using a drill bit slightly smaller than your mounting screws. This prevents wood splitting and ensures a tight fit. When installing tracks between studs, use appropriate wall anchors rated for the weight of your system.
Work methodically, securing one section at a time and double-checking level as you go. Don’t fully tighten screws until all pieces are in place – this allows for minor adjustments. Once everything is positioned correctly, go back and ensure all hardware is firmly secured.
Remember to check your work periodically with a level throughout the installation process. Taking your time during this crucial phase will ensure your closet system remains stable and secure for years to come.
Component Assembly and Customization
Assembling your DIY closet system doesn’t have to be intimidating. Start by laying out all components on the floor and double-checking that you have all necessary parts and tools. A helper can make the process much smoother, especially when handling larger panels or mounting rails.
Begin with the vertical panels or mounting rails, ensuring they’re perfectly level – this is crucial for proper functionality. Use a stud finder and mark your wall studs clearly; these will be your anchor points. When mounting rails, leave enough space at the bottom for baseboards and any floor clearance your system requires.
Customize your system by adjusting shelf heights and rod positions before final assembly. Most systems use pin-and-hole arrangements or notched rails, making adjustments simple. Consider your specific needs: longer hanging spaces for dresses, double-hanging sections for shirts, or extra shelving for folded items.
Don’t forget to personalize with accessories. Add pull-out baskets, drawer organizers, or specialized racks for accessories. Pro tip: install drawers from bottom to top to maintain better balance during assembly. For a polished look, use trim pieces to cover exposed edges and wall gaps.
If cutting components to size, always measure twice and cut once. Use masking tape along cut lines to prevent splintering, and sand any rough edges for a professional finish. Remember to account for the thickness of edge banding if you’re customizing melamine or laminate boards.
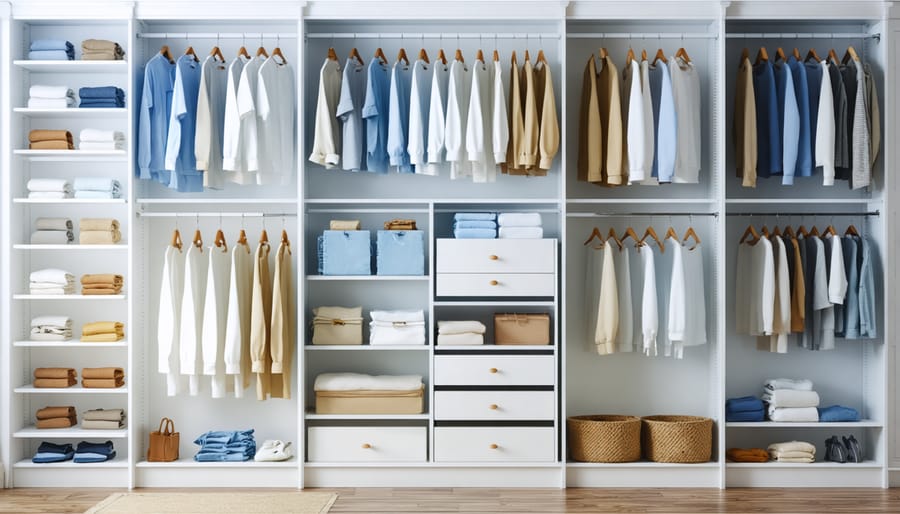
Smart Storage Solutions and Organization Tips
Seasonal Storage Strategies
Managing your wardrobe through the seasons doesn’t have to be a headache with the right storage strategy. Start by dividing your closet into “active” and “storage” zones. Your active zone should contain current season items, while storage areas can house off-season clothing and accessories.
For summer-to-winter transitions, invest in clear storage bins with secure lids to protect lighter fabrics from dust and moisture. Vacuum storage bags are perfect for bulky winter coats and sweaters during warmer months, saving up to 75% of space. Label everything clearly with contents and season to avoid the frustration of searching through multiple containers.
Create a seasonal rotation schedule that works with your climate. Generally, plan to swap your wardrobe about two weeks before the weather changes. Before storing, always clean your clothes thoroughly – even minor stains can set permanently during storage. Add cedar blocks or lavender sachets to naturally repel moths and keep items fresh.
Make use of vertical space by installing high shelving for off-season storage bins. If you’re tight on closet space, consider under-bed storage solutions or overhead garage shelving for rarely-used items. Keep a small selection of transitional pieces accessible year-round for unexpected weather changes.
Remember to maintain proper airflow in storage areas and avoid plastic dry-cleaning bags, which can trap moisture and lead to mildew. Instead, use breathable cotton garment bags for delicate items.
Maximizing Vertical Space
When it comes to maximizing your closet space, the secret lies in looking up! Most closets have untapped vertical potential that’s just waiting to be utilized. Start by measuring your closet’s full height and installing adjustable track systems that extend from floor to ceiling. These versatile systems allow you to modify shelf and rod heights as your storage needs change.
Consider double-hanging rods for shorter items like shirts and pants, effectively doubling your hanging space. For those awkward high spaces near the ceiling, install pull-down rods or retractable hooks that bring elevated storage within easy reach. These are perfect for seasonal items or occasional wear garments.
Don’t overlook the back of your closet door – it’s prime real estate for vertical storage. Mount over-the-door organizers or install hook systems for accessories, shoes, or cleaning supplies. Clear shoe organizers work wonderfully here and can store more than just footwear.
Adding vertical drawer units in corners or unused wall space provides organized storage for smaller items while maximizing floor space. Consider using slim rolling carts that can be pulled out when needed – they’re perfect for accessing items stored in deep corners.
For ultimate vertical organization, install adjustable shelf brackets with multiple height options. This allows you to create custom configurations that work for items of varying heights, from tall boots to small accessories, ensuring no vertical space goes to waste.
Common Mistakes to Avoid
When tackling a DIY closet system project, being aware of common mistakes can save you time, money, and frustration. One of the biggest errors is skipping the planning phase and jumping straight into installation. Take time to measure your space accurately and create a detailed plan, including marking your wall studs.
Another frequent mistake is underestimating weight capacity. Don’t assume all walls and hanging rods can support heavy loads. Always use appropriate wall anchors and verify weight limits for shelving and hanging rods before loading them with clothes and accessories.
Poor spacing is a common pitfall that can make your closet less functional. Avoid installing shelves too close together – remember to account for hanging clothes length and leave enough space for accessing items easily. For double-hang sections, ensure there’s adequate clearance between rods.
Many DIYers make the mistake of not considering all their storage needs. Think beyond just hanging space – incorporate drawers, shelves, and specialized organizers for accessories, shoes, and folded items. Additionally, don’t forget to plan for seasonal clothing rotation and future storage needs.
Installation-related errors often stem from using incorrect tools or hardware. Invest in proper tools and use level markers throughout the installation process. Avoid mixing hardware from different systems, as this can compromise stability and functionality.
Lastly, don’t overlook lighting and accessibility. Installing a closet system in poor lighting conditions can lead to misaligned components. Consider adding battery-operated lights if needed, and ensure all areas of your closet will be easily accessible once completed.
Taking on a DIY closet system project may seem daunting at first, but with the right planning, materials, and approach, you can create a beautifully organized space that meets your specific needs and budget. Remember that the best closet system for you depends on your storage requirements, available space, and lifestyle. Whether you choose a wire-based system for its affordability and simplicity, or opt for a more robust wood or laminate solution, the key is to start with a solid plan and take accurate measurements.
Don’t be afraid to mix and match components or adapt your design as you go along. The beauty of DIY closet systems is their flexibility and customization potential. Start small if you’re feeling uncertain – perhaps begin with a single wall or section and expand your system as your confidence grows.
With the knowledge and insights we’ve shared, you’re well-equipped to tackle your closet organization project. Take your time, follow the installation instructions carefully, and soon you’ll have a professionally organized closet that you can proudly say you built yourself. Your future self will thank you for investing the time and effort into creating an efficient, organized space that makes getting ready each day a pleasure rather than a chore.