Transform old t-shirts into stunning recycled materials home decor with these creative upcycling techniques. Cut t-shirts into continuous strips to create chunky yarn for weaving plush bathroom mats, modern wall hangings, or cozy throw pillows. Convert graphic tees into memorable memory quilts by cutting uniform squares and stitching them together with simple straight lines – perfect for preserving cherished concert shirts or team uniforms. For no-sew options, braid t-shirt strips into sturdy storage baskets or twist them into decorative plant hangers that add personality to any room. These sustainable transformations not only reduce textile waste but also create unique, personality-filled pieces that tell your story through thoughtful design. Whether you’re a crafting novice or seasoned DIY enthusiast, your forgotten drawer of t-shirts holds unlimited potential for beautiful, functional home accessories.
Essential Tools and Materials for T-Shirt Upcycling
Basic Equipment
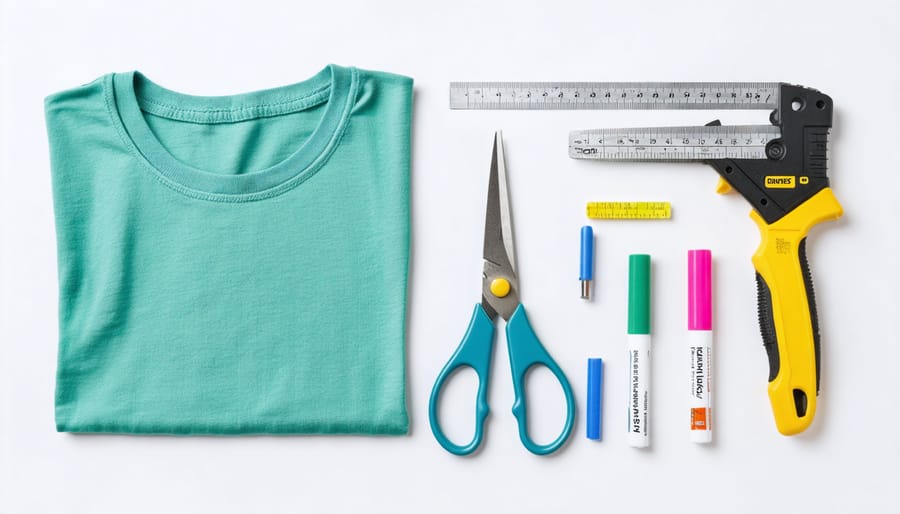
Before diving into your t-shirt transformation projects, gather these essential tools that you probably already have at home. You’ll need a good pair of sharp scissors (fabric scissors work best), a ruler or measuring tape, and a marker or fabric chalk for marking your cutting lines. A cutting mat can be helpful but isn’t necessary – a clean, flat surface will do just fine.
For no-sew projects, keep rubber bands, safety pins, and a hot glue gun handy. If you’re planning to sew, you’ll want basic sewing supplies like needles, straight pins, and coordinating thread. An iron and ironing board are useful for creating crisp edges and removing wrinkles before you start.
Don’t forget about embellishments! Consider keeping decorative elements like buttons, ribbons, or fabric paint nearby to add personal touches to your projects. A spray bottle with water can also come in handy for certain techniques, especially when working with stretchy jersey material.

Optional Supplies
While basic t-shirt upcycling projects require minimal supplies, having these additional materials on hand can expand your creative possibilities. Consider investing in fabric scissors for clean, precise cuts and fabric markers for planning your designs. Embellishments like buttons, ribbons, and decorative patches can add personality to your projects. For more intricate designs, keep elastic bands, fabric glue, and safety pins nearby.
If you’re ready to tackle sewing projects, you’ll want a basic sewing kit with needles, coordinating thread colors, and straight pins. A cutting mat and rotary cutter can make precise cuts easier, while measuring tape ensures accurate dimensions. Optional but helpful tools include a seam ripper for corrections, fabric chalk for marking, and iron-on interfacing for added structure.
For textile paint projects, grab some stencils, fabric paint, and brushes. Don’t forget protective materials like newspaper or a drop cloth to keep your work surface clean.
No-Sew T-Shirt Projects
Braided T-Shirt Rugs
Transform your old t-shirts into a cozy, eco-friendly floor rug with this simple braiding technique. Like many creative upcycling projects, this one helps reduce textile waste while creating something beautiful for your home.
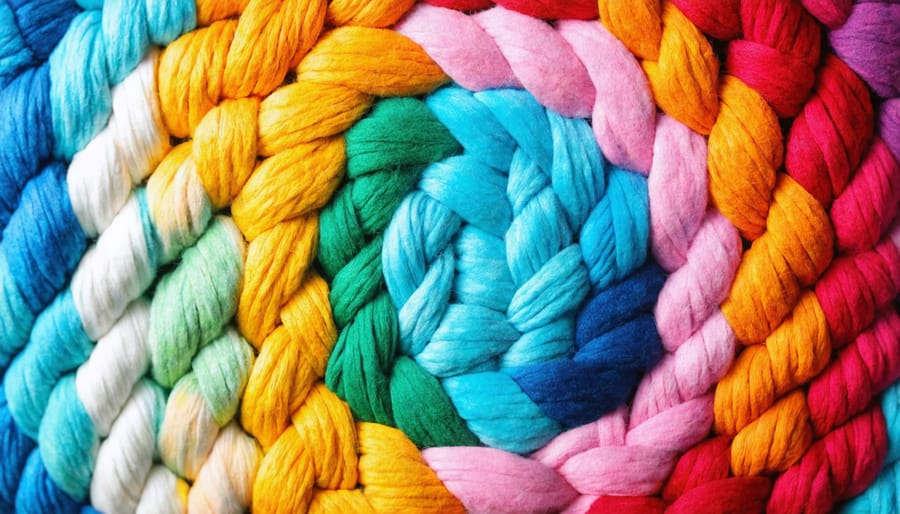
Start by gathering 15-20 t-shirts and cutting them into 1-inch strips, stretching each strip to create yarn-like material that curls at the edges. Sort your strips by color to plan your design.
To begin braiding, tie three strips together at one end and secure them to a flat surface. Braid the strips tightly, adding new strips when needed by overlapping the ends and continuing the braid. When you have a long braid, start coiling it into a circular shape.
Use a sturdy thread and large needle to sew the coils together, keeping the stitches hidden between the braids. Continue adding braided sections until you reach your desired rug size. For stability, sew a non-slip backing to the underside of your rug.
Pro tip: Choose t-shirts of similar weight and stretch for consistent braiding. For a coordinated look, select shirts in complementary colors or stick to a monochromatic scheme. Your finished rug will be machine washable, making it perfect for high-traffic areas like entryways or bathrooms.

T-Shirt Wall Art
Transform your cherished old t-shirts into eye-catching wall art with this simple yet stylish project. Start by selecting t-shirts with meaningful designs, vibrant colors, or sentimental value. For a basic display, stretch your t-shirt over a canvas frame and secure it tightly at the back using a staple gun. Make sure to pull the fabric evenly to avoid wrinkles.
For a more dynamic arrangement, create a collection of different-sized pieces. Cut out your favorite t-shirt designs in circles, squares, or other shapes, then mount them on embroidery hoops or lightweight frames. Arrange them in a gallery wall style for maximum impact.
Want something more innovative? Try weaving strips of t-shirt material into a unique tapestry, or create a quilted wall hanging by combining multiple shirt designs. For added dimension, consider incorporating embellishments like buttons, beads, or embroidery to enhance the designs.
Remember to choose a wall space that won’t receive direct sunlight to prevent fading. Group similar colors or themes together for a cohesive look, or mix and match for an eclectic vibe that tells your personal story through fabric.
Knotted Throw Pillows
Transform your old t-shirts into cozy, decorative throw pillows without touching a needle and thread! This no-sew project is perfect for beginners and creates unique, textured accent pieces for your home.
Start by laying your t-shirt flat and cutting off the bottom hem. Next, cut the shirt into a square shape, making sure both the front and back pieces are the same size. Add an extra 2-3 inches all around to account for the knots.
Cut 3-inch strips along all four sides of both squares, spacing them about 1 inch apart. Be careful not to cut too far into the center – leave at least 4 inches of uncut fabric in the middle.
Layer your squares with right sides facing out. Match up the strips and start tying them together using simple double knots. Work your way around three sides, then stuff your pillow with fiberfill or an old pillow insert before knotting the final side.
Pro tip: Use contrasting t-shirt colors or combine patterns with solids to create eye-catching designs. For extra visual interest, try alternating between regular knots and braided sections.
Sewing-Required Projects
Patchwork Throw Blankets
Transform your collection of old t-shirts into a cozy, memory-filled throw blanket that’s perfect for snuggling up on chilly evenings. This project requires about 12-16 t-shirts, depending on your desired blanket size, and basic sewing skills.
Start by washing and ironing all your t-shirts to ensure they’re clean and wrinkle-free. Cut each shirt into equal-sized squares, approximately 12×12 inches, removing any damaged areas. You’ll want to include the most interesting parts of your shirts, such as logos, graphics, or meaningful text.
Lay out your squares in a pattern you like, mixing colors and designs for visual interest. Remember to consider the overall balance of your design. Once satisfied with the arrangement, take a photo for reference before moving the pieces.
Pin adjacent squares together, right sides facing each other. Sew each row using a 1/2-inch seam allowance, then press the seams open. Next, sew the rows together, matching the seams carefully. For added durability, consider adding a soft flannel backing to your blanket.
Expert tip: Use a walking foot on your sewing machine to prevent stretchy t-shirt material from bunching up. For extra warmth, add a layer of lightweight batting between your t-shirt top and backing.
Finally, bind the edges with bias tape or create a simple folded hem. Your unique patchwork throw will be both a practical blanket and a collection of cherished memories.
Storage Solutions
Transform your old t-shirts into practical storage solutions that add both function and style to your home. One of the simplest projects is creating no-sew t-shirt baskets – perfect for organizing everything from bathroom essentials to craft supplies. Start by cutting your t-shirt into one continuous strip, about 1-inch wide, using a spiral cutting technique from bottom to top. Roll these strips into a tight coil and hot glue the center to form the basket base. Continue wrapping and gluing the strips in a circular pattern, building up the sides to your desired height.
For a sturdier storage option, try making a t-shirt yarn basket. Cut your shirts into strips as before, but this time, stretch the strips to create “yarn.” Using a large crochet hook (size N or P), work in rounds to form a solid base, then build up the sides. This technique creates a more durable basket perfect for storing heavier items like toys or magazines.
Don’t forget about wall storage! Create hanging organizers by cutting the body of a t-shirt into a rectangle, hemming the edges, and adding grommets at the top corners. Attach pockets from other t-shirts to create compartments for mail, craft supplies, or bathroom essentials. These organizers are especially useful in small spaces where vertical storage is key.
Expert tip: Use shirts with interesting patterns or graphics strategically – position them on the outside of your storage pieces for added visual interest.
Decorative Plant Holders
Transform your old t-shirts into stunning plant holders that add personality to your indoor garden. These eco-friendly decorative pieces are perfect for displaying your favorite houseplants while giving your worn-out tees a second life.
For a simple hanging planter, start by cutting your t-shirt into one continuous strip about 2 inches wide, stretching it slightly to create a rope-like texture. Braid three strips together for extra strength, then form a macramé-style holder by creating a series of knots. The natural stretch of the jersey material provides excellent support for small to medium-sized pots.
To make a no-sew pot cover, cut the bottom portion of your t-shirt into a circle about twice the size of your pot’s circumference. Create a sleeve by folding the fabric up around the pot and securing it with decorative safety pins or fabric glue. The shirt’s original hem creates a perfect finished edge at the top.
For a more structured look, try this quick technique: Cut off the sleeves and neckline of your t-shirt, then slip it over your pot like a sleeve. Gather the excess fabric at the bottom and secure it with a rubber band or twine. The result is a modern, minimalist pot cover that takes minutes to create.
These plant holders work especially well with lightweight plastic pots and air plants. Choose t-shirts with interesting patterns or colors to add visual interest to your plant display, and don’t be afraid to mix and match different shirt materials for varied textures.

Care and Maintenance Tips
To ensure your upcycled t-shirt creations last longer and maintain their beauty, proper care is essential. Just like our sustainable furniture care tips, these maintenance guidelines will help preserve your crafted items.
For machine-washable items like t-shirt pillows and rugs, use cold water and a gentle cycle to prevent fraying and maintain shape. Add a color catcher sheet if you’ve combined different colored t-shirts to prevent bleeding. Air-dry whenever possible to extend the life of the fabric and preserve any decorative elements.
For wall hangings and decorative pieces, regular dusting with a soft microfiber cloth will keep them looking fresh. Avoid hanging these items in direct sunlight to prevent fading and fabric deterioration. If spot cleaning becomes necessary, use a gentle fabric cleaner and test it on an inconspicuous area first.
T-shirt yarn projects require special attention. Before washing, secure any loose ends and place items in a mesh laundry bag to prevent tangling. Reshape while damp and lay flat to dry to maintain the intended form.
For items with embellishments like beads or embroidery, hand washing is recommended. Use lukewarm water and mild detergent, gently squeezing rather than wringing or twisting. Always store decorated pieces flat or hung up to prevent crushing or distorting the design.
Remember to periodically check for loose threads or weakening seams and repair them promptly to prevent further damage. With proper care, your upcycled t-shirt creations can remain beautiful and functional for years to come.
Transforming old t-shirts into beautiful, functional items isn’t just a creative outlet – it’s a meaningful step toward sustainable living. By breathing new life into worn clothing, you’re not only reducing textile waste but also creating unique, personalized pieces for your home. Whether you’ve tried our no-sew projects or tackled more complex sewing transformations, each upcycled t-shirt represents a small victory for both your creativity and the environment.
The beauty of t-shirt upcycling lies in its accessibility – anyone can start with basic projects and gradually build their skills. From simple plant hangers to intricate wall art, these eco-friendly DIY home projects offer endless possibilities for personalization and creative expression.
Don’t let those old shirts languish in your closet any longer. Start small with a basic project that catches your eye, and don’t be afraid to experiment with different techniques and combinations. Remember, perfection isn’t the goal – each unique creation tells its own story and adds character to your space.
Ready to begin your upcycling journey? Gather those old t-shirts, choose your first project, and enjoy the satisfaction of creating something beautiful while making a positive impact on the environment. Your creativity and commitment to sustainability can transform simple fabric into treasured pieces for your home.
