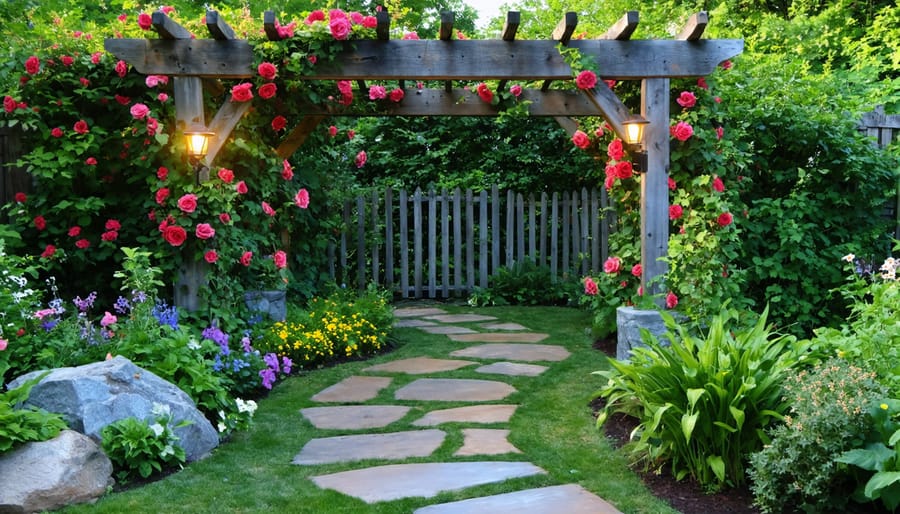
Create a stunning garden entrance that will transform your outdoor space into a welcoming sanctuary. Frame your garden pathway with reclaimed wooden arches, decorated with climbing roses and twinkling solar lights for an enchanting first impression. Install stepping stones in a curved pattern, using locally sourced materials like slate or repurposed pavers to establish a natural flow while keeping costs minimal. Build raised flower beds on either side of the entrance using weather-resistant cedar boards, filling them with drought-resistant perennials for year-round appeal. Add personality with DIY touches like hand-painted welcome signs, vintage garden tools as artistic elements, or strategically placed mirrors to create depth and reflection. Whether working with a grand garden or a modest backyard, these affordable entrance ideas combine functionality with aesthetic appeal while requiring only basic carpentry skills and common tools.
Planning Your Garden Entrance Design
Measuring and Space Planning
Before starting your garden entrance project, accurate measurements and thoughtful space planning are essential for success. Begin by measuring the total width and height of your intended entrance area, including any existing pathways or structures. A good rule of thumb is to make your entrance at least 3-4 feet wide to allow comfortable passage, even with gardening tools or wheelbarrows.
Consider the flow of movement through your space by observing how people naturally walk through the area. Mark your planned entrance location with stakes and string to visualize the space better. Don’t forget to account for the swing radius if you’re planning to install a gate.
Take note of nearby features like trees, shrubs, or utility boxes that might affect your design. Measure the distance from these elements to ensure proper clearance. It’s also important to check the ground level and slope – your entrance should have proper drainage to prevent water pooling.
Draw a simple sketch with all measurements clearly marked, including both horizontal and vertical dimensions. This will serve as your reference throughout the project and help you calculate material needs accurately. Remember to add extra space for decorative elements like planters or lighting fixtures if desired.
Style Selection and Material Options
Your garden entrance can reflect your personal style while staying within your budget through various design approaches and materials. Like other DIY home decor projects, your choice of materials will significantly impact both aesthetics and cost.
For a rustic charm, consider using reclaimed wood for arbors or gates, which adds character while being eco-friendly. Natural materials like bamboo or willow can create beautiful, affordable archways that blend seamlessly with your garden. Metal options range from budget-friendly aluminum to classic wrought iron, offering durability and elegance.
Stone and brick provide timeless appeal but require more investment and expertise. For budget-conscious DIYers, concrete pavers or gravel pathways paired with wooden elements create attractive entrances without breaking the bank. Consider vinyl for low-maintenance alternatives that mimic more expensive materials.
Enhance your chosen materials with climbing plants, solar lighting, or decorative hardware to add personality. Remember that mixing materials, such as combining wood with metal accents or stone with wooden gates, can create unique, eye-catching designs while potentially saving on costs.
Easy-to-Build Garden Entrance Structures
Wooden Arbor Construction
Building a wooden arbor is a rewarding weekend project that can transform your garden entrance. Start by gathering your materials: four 4×4 pressure-treated posts, 2x4s for cross beams, 2x2s for lattice supports, deck screws, and concrete mix. You’ll also need basic tools like a post-hole digger, level, saw, and drill.
Begin by marking your post locations, ensuring they’re square and evenly spaced about 4 feet apart. Dig holes 2 feet deep and pour 6 inches of gravel for drainage. Mix and pour concrete into each hole, then set your posts, checking for plumb with a level. Let the concrete cure overnight.
Next, cut and attach your main crossbeams to the posts using deck screws or carriage bolts. These should be mounted about 7 feet high. Add horizontal 2x4s across the top, spacing them evenly about 12 inches apart to create an attractive pergola effect.
For added stability and visual appeal, install diagonal braces between the posts and top beams at 45-degree angles. Finally, attach vertical 2x2s on the sides to create a lattice effect, perfect for climbing plants.
Consider treating the wood with a weather-resistant stain or sealer to protect your arbor from the elements. Add decorative elements like solar lights or hanging planters to personalize your creation. Remember to check local building codes before starting, as some areas require permits for structures over certain heights.
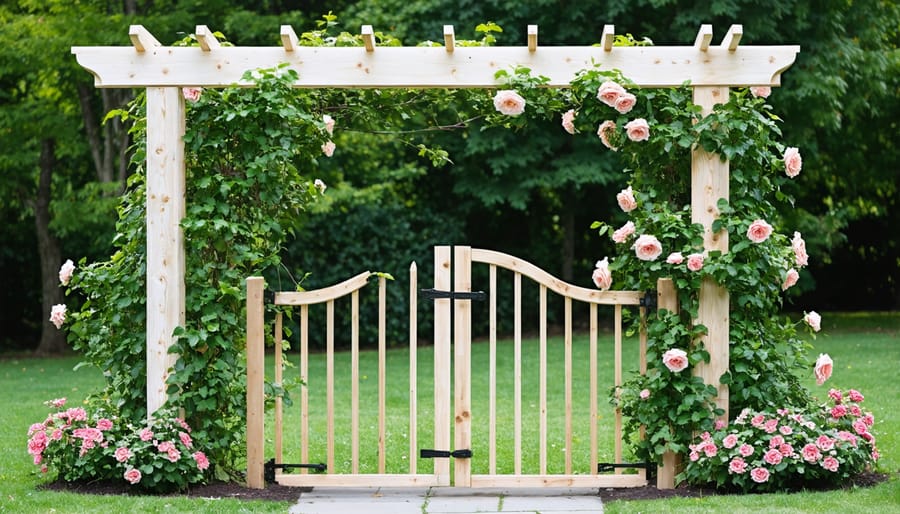
Garden Gate Installation
Installing a garden gate is a rewarding weekend project that adds both functionality and charm to your garden entrance. Begin by measuring your gate opening carefully, adding an extra inch on each side for proper clearance. Choose weather-resistant materials like cedar or pressure-treated lumber for longevity, and gather your tools: a saw, drill, level, post hole digger, and hardware.
Start by setting your gate posts. Dig holes at least 2 feet deep, or below the frost line in your area. Pour concrete into the holes and position your posts, using a level to ensure they’re perfectly straight. Allow the concrete to cure completely, typically 24-48 hours.
While the concrete sets, build your gate frame. Cut your lumber to size, creating a rectangular frame with diagonal bracing for support. Add your chosen gate material – whether it’s wooden planks, metal mesh, or decorative panels. Pre-drill holes for hinges and attach them to both the gate and post.
Hang your gate with help from a friend, ensuring it swings freely and sits level. Install a latch at a comfortable height and add any decorative elements like caps or finials. Consider adding rubber stoppers to prevent over-swinging and protect your gate.
For a professional finish, sand any rough edges and apply multiple coats of exterior-grade sealant or paint to protect your gate from the elements. Test the gate’s movement several times and adjust the hinges if needed for smooth operation.
Trellis and Pergola Options
Creating a welcoming garden entrance becomes even more magical with the right trellis or pergola. Let’s explore some simple designs that you can tackle as a weekend project.
For a classic trellis entrance, consider the ladder-style design. Take two 8-foot pressure-treated posts and connect them with horizontal boards spaced 12 inches apart. This creates a beautiful frame for climbing plants like jasmine or clematis. You can customize the width based on your pathway size, but 4-5 feet typically works well for comfortable passage.
A more rustic option is the A-frame trellis, which offers excellent stability without the need for deep post holes. Using cedar or redwood boards, create two identical frames in an A shape and connect them at the top. Add lattice panels or horizontal slats for plant support, and you’ve got an charming entrance that’s both functional and attractive.
For those wanting something more substantial, a basic pergola entrance can transform your garden. Start with four 4×4 posts set in concrete, topped with 2×6 cross beams and 2×2 slats. Space the slats about 6 inches apart to create appealing shadows while providing partial shade. This design works beautifully with climbing roses or wisteria.
Remember to weather-proof all wood components and ensure your structure is level and secure. For added charm, consider adding solar-powered string lights or hanging planters to your finished entrance.
Enhancing Your Garden Entrance
Plant Selection and Placement
Selecting the right plants for your garden entrance can transform it from ordinary to extraordinary. When choosing plants, consider both height and seasonal interest to create a welcoming atmosphere year-round. For maximum impact, layer your plants with taller specimens at the back and shorter ones in front, just as you would with small space garden solutions.
For vertical interest, consider climbing plants like jasmine, clematis, or climbing roses to adorn your entrance structure. These will create a stunning natural archway effect and provide delightful fragrance. For year-round structure, incorporate evergreen shrubs like boxwood or dwarf conifers near the entrance posts.
Add pops of color with seasonal flowers such as lavender, salvias, or hardy geraniums at the mid-level. For ground coverage, try creeping thyme or sedum, which can handle foot traffic and add texture. Place these lower-growing plants along pathway edges to soften hardscaping.
Remember to consider your entrance’s light conditions when selecting plants. For shaded entrances, opt for hostas, ferns, and astilbe. Sun-drenched spots are perfect for drought-resistant plants like ornamental grasses and Mediterranean herbs.
Group plants in odd numbers for natural-looking clusters, and maintain a cohesive color scheme that complements your home’s exterior. Don’t forget to include some container plants for easy seasonal updates and added height variation.
Lighting and Decorative Elements
Illuminate your garden entrance with strategically placed lighting to create a welcoming ambiance day and night. Solar-powered path lights are an eco-friendly choice that requires minimal maintenance – simply stake them along your walkway for instant charm. Consider mounting weather-resistant wall lanterns on posts or existing structures to provide focused lighting and enhance security.
For a magical touch, wrap fairy lights around archways or weave them through climbing plants. Battery-operated LED string lights offer flexibility and can be easily changed for seasonal decorations. Mason jars filled with solar fairy lights create charming lanterns that can be hung from shepherd’s hooks or tree branches.
Add personality with carefully chosen decorative elements. Weather-resistant metal signs, vintage garden tools, or repurposed items can serve as wall art. Incorporate potted plants at varying heights using decorative stands or vintage furniture pieces. Wind chimes and garden bells add both visual and auditory appeal, while decorative stones or mosaic pieces can create eye-catching focal points.
Remember to keep decorations proportional to your entrance size and maintain a cohesive theme that complements your home’s style.

Maintenance Tips
A beautiful garden entrance requires regular care to maintain its welcoming appeal. Start by establishing a monthly maintenance routine that includes cleaning any hardscaping elements like pathways or steps. Use a pressure washer or stiff brush to remove dirt, moss, and debris that can accumulate over time.
For wooden elements such as arbors or gates, inspect them quarterly for signs of rot or pest damage. Apply a fresh coat of weather-resistant paint or sealant annually to protect the wood and keep it looking fresh. If you have metal features, check for rust spots and touch them up promptly to prevent deterioration.
Keep climbing plants well-trimmed and trained along their supports, removing any dead or yellowing foliage. During growing seasons, prune regularly to maintain shape and prevent overgrowth that could obstruct the entrance. Water plants consistently, especially during dry spells, but avoid overwatering which can damage foundations.
Replace mulch around planted areas each spring to suppress weeds and retain moisture. Consider refreshing potted plants seasonally to ensure year-round color and interest. Finally, check all lighting fixtures monthly, cleaning covers and replacing bulbs as needed to maintain that warm, inviting glow.
Budget-Friendly Alternatives
Creating a stunning garden entrance doesn’t have to break the bank. With some creativity and these budget-friendly renovation tips, you can design an inviting entrance that looks more expensive than it actually is.
Consider using reclaimed materials for your project. Local salvage yards, online marketplaces, and construction sites (with permission) often have discarded materials that can be transformed into beautiful garden features. Old wooden pallets can be converted into rustic gates or decorative fencing, while salvaged bricks make excellent pathway borders.
Natural materials found in your surroundings can add charm without cost. Collect rocks and pebbles to create a welcoming pathway, or use fallen branches to craft an organic archway. These elements not only save money but also help your entrance blend seamlessly with the environment.
Paint can work wonders on a budget. Transform old garden furniture or containers with weather-resistant paint to create coordinated focal points near your entrance. Consider using leftover house paint for larger surfaces, ensuring it’s suitable for outdoor use.
Lighting doesn’t need to be expensive either. Solar-powered stake lights are affordable and require no electrical work. String lights draped through branches or along fencing create magical evening ambiance for a fraction of the cost of hardwired options.
For vertical interest, grow climbing plants from seeds rather than buying mature specimens. Morning glories, clematis, or climbing roses will eventually create a living archway that looks stunning while costing minimal money to establish.
Remember to check local buy-nothing groups and gardening communities for plant divisions and materials. Many gardeners are happy to share cuttings or divide perennials, helping you establish beautiful plantings around your entrance without spending a dime.
Creating your own garden entrance is a rewarding project that can transform your outdoor space and add significant curb appeal to your home. By following the guidelines and ideas we’ve explored, you can design and build an entrance that perfectly matches your style and budget. Remember to start with a solid plan, choose materials that complement your home’s architecture, and consider both functionality and aesthetics in your design.
Whether you opt for a simple arbor, a charming gate, or an elaborate pergola, the key is to make it uniquely yours. Don’t be afraid to get creative with climbing plants, lighting, or decorative elements to add personality to your garden entrance. Take your time with the construction process, ensuring each step is completed correctly for a lasting result.
Most importantly, safety and proper construction techniques should always be your priority. If you encounter any challenges during your project, don’t hesitate to consult with experienced DIYers or professionals. Now that you have all the necessary information and inspiration, it’s time to grab your tools and start creating the garden entrance of your dreams. Your perfect garden gateway awaits!