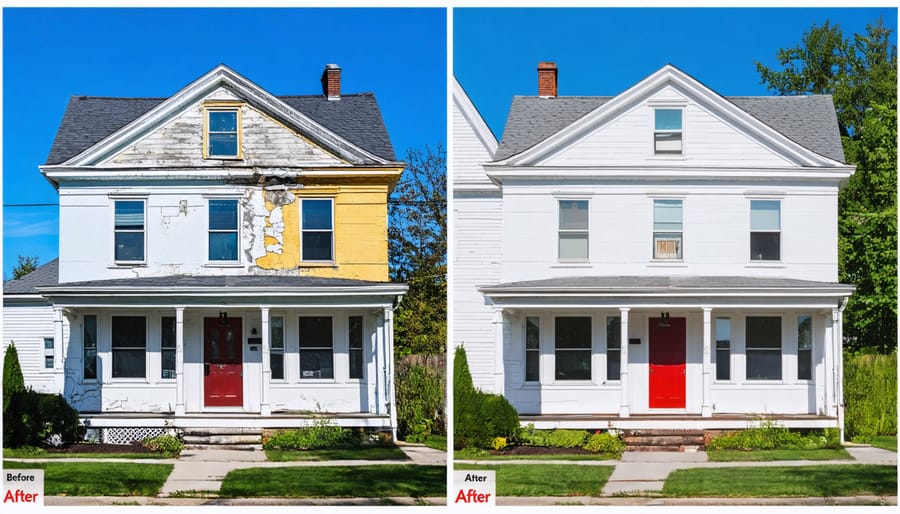
Transform your home’s exterior with a flawless paint job by mastering these essential techniques. Transform your home’s exterior through proper surface preparation – pressure wash to remove dirt and debris, scrape loose paint, and repair damaged siding before touching a paintbrush. Select high-quality, weather-resistant exterior paint specifically formulated for your surface material, whether it’s wood, stucco, or vinyl siding. Monitor weather conditions carefully – paint when temperatures range between 50-85°F with low humidity and no rain forecast for 24 hours. Start at the top and work downward in manageable sections, maintaining a wet edge to prevent lap marks and ensure even coverage. Your home’s exterior paint job serves as both a protective shield and a statement of style, making proper technique essential for lasting results.
Essential Preparation Steps for a Flawless Finish
Surface Cleaning and Repair
Before diving into painting, proper surface preparation is crucial for a lasting finish. Start by thoroughly pressure washing the exterior to remove dirt, mildew, and loose paint. Allow the surface to dry completely for at least 24 hours before proceeding.
Next, inspect your walls for damage. Look for cracks, holes, or rotting wood that needs attention. Small cracks can be filled with exterior-grade caulk, while larger holes may require patching compound. Pay special attention around window replacements and door frames, as these areas often show signs of wear first.
Sand any rough spots or peeling paint until smooth, being careful not to damage the underlying surface. Use a wire brush to remove stubborn paint chips and rust from metal surfaces. For wood siding, look for signs of rot or water damage – these areas should be replaced rather than painted over.
Don’t forget to protect areas you don’t want painted. Use plastic sheeting and painter’s tape to cover windows, doors, light fixtures, and any architectural details. Remove shutters if possible, or mask them carefully. Finally, scrape away any loose caulking around windows and doors, replacing it with fresh exterior-grade caulk. Let all repairs cure completely before painting to ensure the best possible results.
Weather and Timing Considerations
Timing your exterior painting project correctly can make the difference between a lasting finish and a disappointing result. The ideal conditions for exterior painting include temperatures between 50-85°F with relative humidity below 70%. Early summer and early fall typically offer the best weather windows, combining moderate temperatures with lower chances of rain.
Avoid painting in direct sunlight, as this can cause the paint to dry too quickly and lead to brush marks or uneven coverage. Instead, follow the shade around your house, painting walls as they become shaded. This approach not only makes the work more comfortable but also ensures better paint adhesion.
Always check the weather forecast before starting your project. You’ll need at least two days of dry weather before painting and 24-48 hours of dry conditions afterward to allow proper curing. Morning dew can affect fresh paint, so start painting after surfaces have completely dried and finish early enough for the paint to set before evening moisture sets in.
Wind can also impact your painting project. While a gentle breeze helps with drying, strong winds can blow debris onto wet paint and cause uneven drying. The sweet spot is typically between 8:00 AM and 2:00 PM on calm days when conditions are most stable.
Remember that different paint products may have specific temperature requirements, so always check the manufacturer’s guidelines before beginning your project.
Choosing the Right Paint and Tools
Paint Types and Finishes
Choosing the right paint type and finish for your exterior project is crucial for achieving stunning wall designs that last. Let’s break down your main options to help you make the best choice for your home.
Latex paints are the most popular choice for exterior surfaces. They’re water-based, dry quickly, and maintain their color well over time. Plus, they’re easier to clean up and more environmentally friendly. Look for 100% acrylic latex paints for superior durability and weather resistance.
Oil-based paints offer excellent durability and a smooth finish, making them ideal for surfaces that need extra protection. While they take longer to dry and require mineral spirits for cleanup, they’re perfect for areas exposed to harsh weather conditions or frequent touching, like doors and trim.
When it comes to finishes, flat paints are great at hiding surface imperfections but are less durable. They’re best for aging siding or textured surfaces. Satin finishes offer a subtle sheen and good durability, making them perfect for most exterior walls. Semi-gloss finishes provide the most protection against moisture and are ideal for trim, doors, and shutters.
For specialized applications, consider elastomeric coatings for masonry surfaces or anti-mold formulations for humid climates. Remember to always check that your chosen paint is specifically rated for exterior use and compatible with your surface material. The right combination of paint type and finish will ensure your home looks fantastic while standing up to the elements.
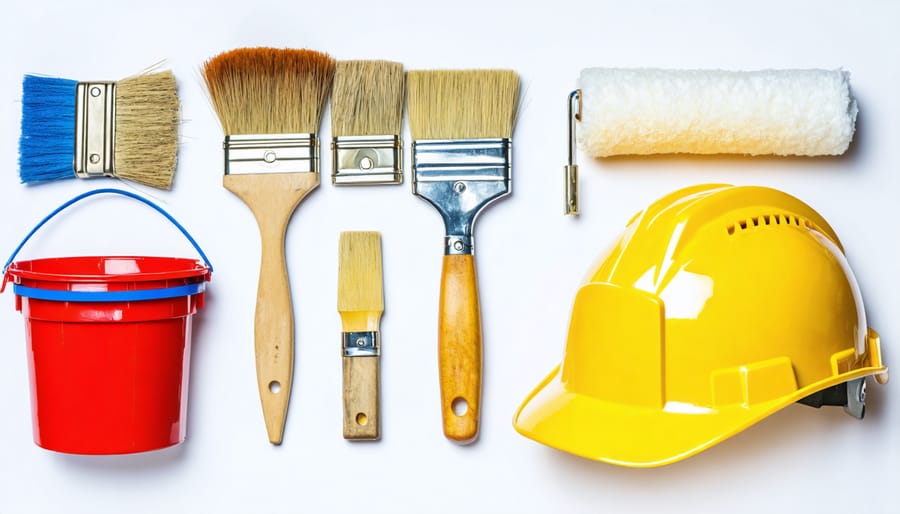
Essential Tools and Equipment
Before diving into your exterior painting project, gathering the right tools and equipment is crucial for achieving professional-looking results. Here’s your essential toolkit:
Paint Supplies:
– High-quality exterior paint
– Paint primer
– Paint stirring sticks
– 5-gallon buckets
– Paint strainer
– Paint tray and liners
Application Tools:
– Extension pole
– Paint brushes (4-inch for large areas, 2-inch for trim)
– Paint rollers with 3/8-inch to 1/2-inch nap
– Angled brush for cutting in
– Paint sprayer (optional for large projects)
Surface Preparation:
– Wire brush
– Paint scraper
– Putty knife
– Sandpaper (various grits)
– Caulking gun and exterior caulk
– Power washer or garden hose with spray attachment
Safety Equipment:
– Sturdy ladder
– Safety goggles
– Dust mask or respirator
– Work gloves
– Drop cloths
– Painter’s tape
– Canvas or plastic sheeting
Clean-up Materials:
– Paint thinner
– Clean rags
– Soap and water
– Brush cleaner
Remember to invest in quality tools – they’ll make your job easier and help achieve better results. Store your equipment properly between painting sessions, and clean everything thoroughly after use to extend their lifespan. Having these tools ready before starting will help your project run smoothly and efficiently.
Professional Painting Techniques
Proper Application Methods
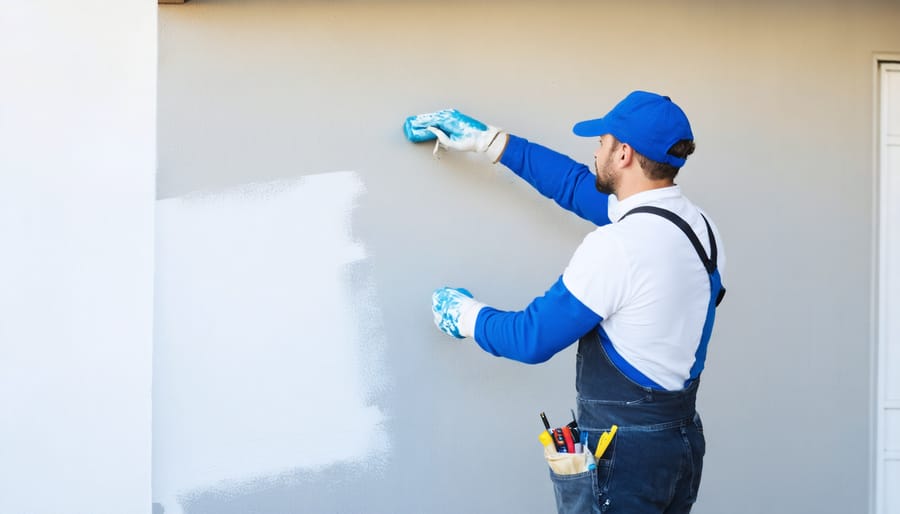
When it comes to painting your home’s exterior, proper technique is just as important as preparation. Start by working from top to bottom, which prevents drips and streaks from marring already-painted surfaces. Paint in manageable sections, typically 3-4 feet wide, to maintain a “wet edge” that ensures smooth, even coverage.
For the best results, use long, smooth strokes in a W or M pattern when using a roller. This technique helps distribute paint evenly and prevents lap marks. When using a brush, paint in the direction of the siding or wood grain, using steady, overlapping strokes. Don’t try to stretch the paint too far – adequate coverage usually requires two coats.
Temperature and timing matter significantly. Paint in the shade whenever possible, following the sun’s movement around your house. This prevents the paint from drying too quickly and helps maintain consistent application. Ideal painting conditions are between 50-85°F with moderate humidity.
For textured surfaces, use the stippling technique: press the brush tips gently against the surface to work paint into small crevices. When painting trim, use painter’s tape for clean lines, but remove it before the paint fully dries to prevent peeling.
Pay special attention to corners and edges, where paint tends to build up. Use a brush to “cut in” around windows, doors, and trim before rolling larger areas. This ensures neat transitions and professional-looking results.
Remember to back-brush or back-roll after applying paint to help work it into the surface and create an even finish. This is especially important on rough or porous surfaces. Keep a wet rag handy to quickly clean up any drips or mistakes before they dry.
These techniques might take a bit more time, but they’ll result in a lasting, professional-looking paint job that you’ll be proud of for years to come.
Common Mistakes to Avoid
When tackling an exterior painting project, even small mistakes can lead to big headaches down the road. Let’s look at some common pitfalls and how to avoid them for a professional-looking finish that lasts.
One of the biggest mistakes is skipping proper surface preparation. Many DIYers rush straight to painting without thoroughly cleaning, sanding, or repairing damaged areas. This shortcut almost always results in paint that peels or bubbles within months. Always take time to prep your surfaces properly.
Weather-related errors can also derail your project. Painting in direct sunlight or extreme temperatures causes the paint to dry too quickly, leading to visible brush marks and poor adhesion. Similarly, painting just before rain or when humidity is high can prevent proper curing. Check the weather forecast and aim for overcast days with moderate temperatures.
Using low-quality materials to save money often backfires. Cheap brushes leave bristles in your paint job, while inferior paint requires more coats and deteriorates faster. Invest in quality tools and paint – you’ll save money and time in the long run.
Another common mistake is inadequate coverage. Many people try to stretch their paint too thin or skip crucial second coats. This results in an uneven finish and reduced protection for your home’s exterior. Always apply the recommended number of coats, even if the first coat looks good.
Poor planning around windows and trim can create messy results. Starting with walls before trim (or vice versa) without proper masking leads to paint bleeding and uneven lines. Have a clear plan for your painting sequence and use high-quality painter’s tape.
Finally, neglecting safety precautions is a serious mistake. Working without proper ladder security, failing to wear protective gear, or ignoring lead paint concerns in older homes can have serious consequences. Always prioritize safety over speed.
By avoiding these common mistakes, you’ll achieve better results and enjoy your fresh exterior paint job for years to come.
Maintenance and Protection Tips
Your fresh paint job can last for years with proper maintenance and care. Start by regularly inspecting your exterior walls for any signs of wear, peeling, or damage – especially after severe weather conditions. Clean your painted surfaces at least once a year using a gentle mixture of water and mild detergent, avoiding harsh chemicals that might damage the paint.
Pay special attention to areas near weather protection barriers and spots prone to moisture accumulation. Use a soft-bristled brush or cloth to remove dirt and debris, working from top to bottom to prevent streaking.
Address any issues promptly to prevent further damage. Small touch-ups can prevent bigger problems down the line. Keep spare paint properly stored for these touch-ups – label containers with the color code and date of application. Store paint in a cool, dry place with the lid tightly sealed.
Trim back any vegetation that touches your house’s exterior, as this can trap moisture and lead to paint deterioration. Install or maintain proper drainage systems to prevent water from constantly hitting painted surfaces. Consider applying a protective clear coat in high-wear areas to extend the life of your paint job.
Remember that different climate zones may require different maintenance schedules. In coastal areas, you might need more frequent cleaning due to salt exposure, while in humid regions, keeping an eye out for mold growth becomes crucial. By following these maintenance tips, you can significantly extend the lifespan of your exterior paint and maintain your home’s curb appeal.
Armed with these essential exterior painting tips, you’re now ready to transform your home’s appearance with confidence. Remember to prioritize proper preparation, choose quality materials, and pay attention to weather conditions for the best results. While the process may seem daunting at first, taking it step by step and following these guidelines will help ensure a professional-looking finish that protects and beautifies your home for years to come. Don’t forget to maintain your tools and keep leftover paint for touch-ups. With patience and attention to detail, your exterior painting project can be a rewarding DIY success that adds significant value to your property. Start planning your project today, and enjoy watching your home’s transformation unfold!