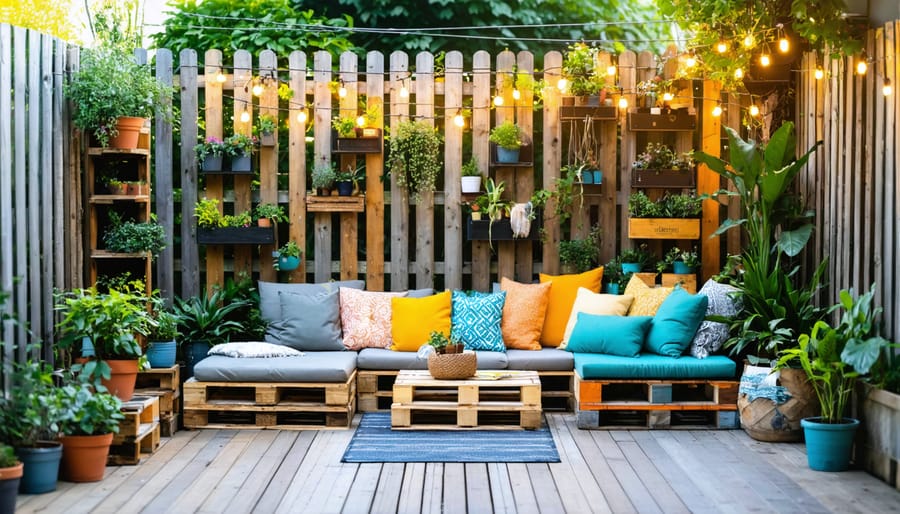
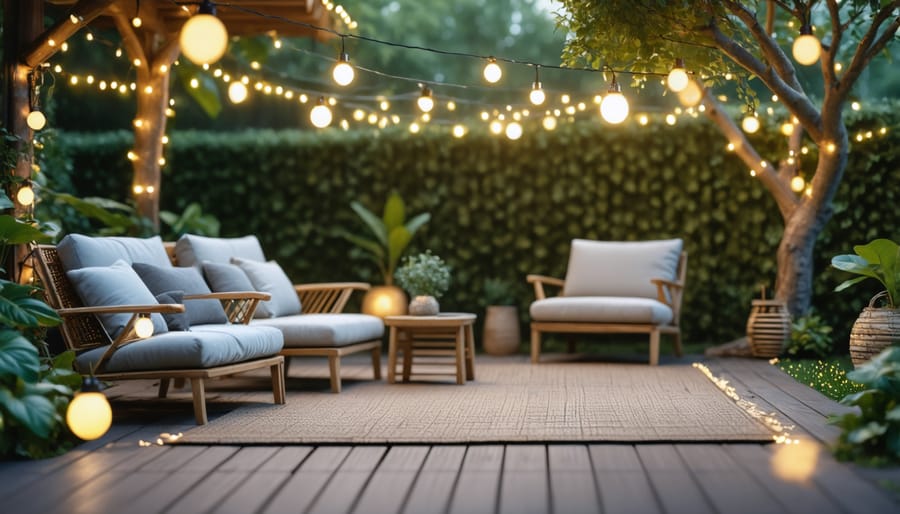
Transform your backyard into a luxurious retreat without breaking the bank by repurposing wooden pallets into modular seating, creating defined zones with outdoor rugs and potted plants, and installing string lights between posts for enchanting ambient lighting. Build a climate-ready outdoor space by incorporating weather-resistant materials and native plants that thrive in your local environment. Maximize small spaces by installing vertical gardens on fence panels or constructing a fold-down murphy bar against an exterior wall. Design conversation areas using affordable materials like concrete blocks and weather-treated lumber, then add personality with colorful outdoor cushions and throws made from water-resistant fabric. Strategic placement of large planters creates natural privacy screens while defining distinct areas for dining, lounging, and entertaining. These budget-friendly transformations turn ordinary backyards into stunning outdoor living rooms that seamlessly blend function with style.
Planning Your Perfect Outdoor Space
Space Assessment and Zoning
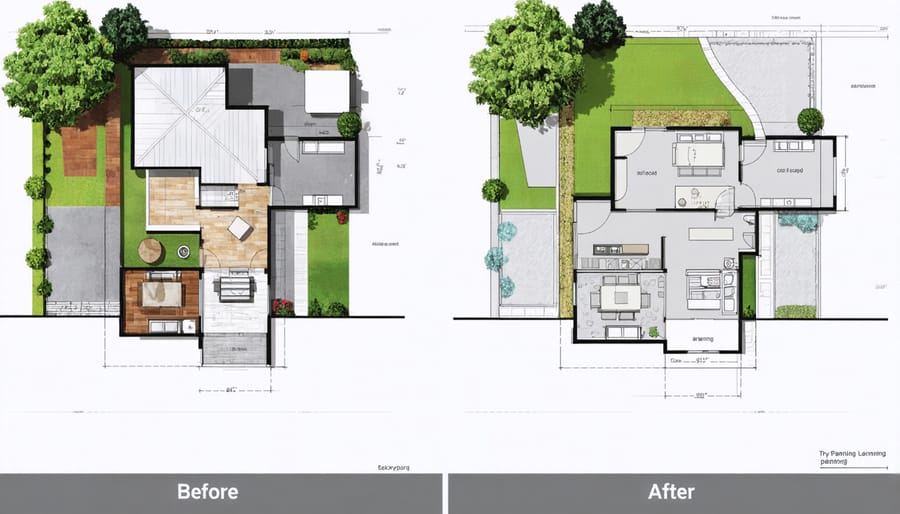
Before diving into your outdoor living space project, take time to assess your available area and plan functional zones. Start by measuring your outdoor space and noting any fixed features like trees, utility connections, or existing structures. Consider the natural flow of traffic and how you’ll move between different areas.
Think about how you want to use your space. Do you dream of a cozy dining area for family meals? Maybe a relaxation zone with comfortable seating? Or perhaps a dedicated grilling station? Map out these zones on paper, ensuring each area serves a specific purpose while maintaining harmony with adjacent spaces.
Don’t forget to factor in your climate and sun exposure. Note which areas receive the most sunlight throughout the day and where natural shade occurs. This information will help you position seating areas and plant selections appropriately.
Create buffer zones between different areas using natural elements like potted plants or decorative screens. Remember to leave enough space for comfortable movement between zones – a good rule of thumb is to allow at least 3 feet for walkways and 2 feet between furniture pieces.
Budget-Friendly Design Tips
Creating a stunning outdoor living space doesn’t have to break the bank. Start by shopping during off-season sales for significant discounts on furniture and decor items. Consider upcycling existing materials – wooden pallets can become stylish seating, while old containers make perfect planters. Scout local thrift stores and yard sales for unique pieces that can be refreshed with weather-resistant paint.
For lighting, solar-powered options eliminate electrical costs while creating ambiance. String lights and lanterns are affordable choices that make a big impact. Instead of expensive flooring, try laying gravel or creating a pebble mosaic – both are cost-effective and visually appealing.
When it comes to privacy, growing climbing plants on simple trellises offers a natural, budget-friendly solution. For shade, canvas drop cloths can be transformed into attractive sail shades at a fraction of the cost of pre-made options.
Plan your space in phases, focusing on one area at a time. This approach helps spread costs while ensuring each element receives proper attention. Remember, mixing high-impact, low-cost elements like colorful throw pillows with strategic investments in quality basics creates a space that looks expensive without the hefty price tag.
DIY Seating and Lounging Areas
Pallet Furniture Projects
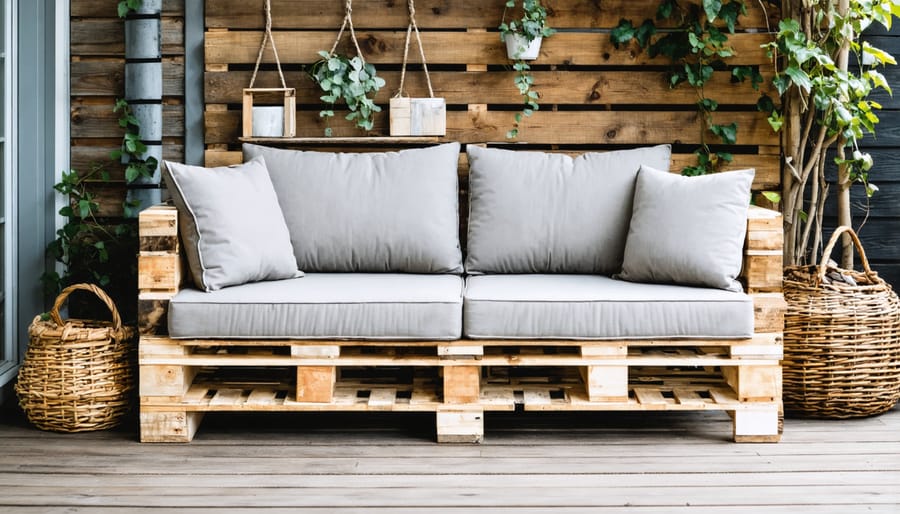
Transform your outdoor space with these ingenious pallet furniture projects – one of the most rewarding creative upcycling projects you can tackle. Let’s create a comfortable pallet sofa that’s perfect for outdoor relaxation.
Start by gathering your materials: 3-4 wooden pallets (depending on desired seating length), weather-resistant wood stain, screws, sandpaper, and cushions. You’ll need basic tools like a drill, screwdriver, and saw.
Step 1: Preparation
Clean your pallets thoroughly and inspect for any damaged boards or protruding nails. Sand all surfaces until smooth, paying special attention to edges and corners to prevent splinters.
Step 2: Base Construction
Place two pallets side by side for the seat base. Secure them together using screws at multiple points for stability. For a deeper seat, stack another pallet on top of the base and secure firmly.
Step 3: Backrest Assembly
Stand one pallet vertically behind the base to create the backrest. Attach it to the base using L-brackets and screws at several points for maximum stability.
Step 4: Finishing Touches
Apply two coats of weather-resistant wood stain, allowing proper drying time between coats. This protects your furniture from the elements and enhances its appearance.
Step 5: Comfort Layer
Add weather-resistant cushions for comfort. Consider using outdoor fabric in colors that complement your space. You can even create storage space underneath by adding hinges to the top pallet.
Remember to place your finished piece in a covered area or use furniture covers during harsh weather to extend its lifespan. With proper care, your pallet sofa will provide comfortable seating for years to come.
Built-In Bench Solutions
Built-in benches are a game-changer for outdoor spaces, offering both comfortable seating and smart storage solutions. With some basic carpentry skills and a weekend’s worth of time, you can create a permanent seating area that’ll become the heart of your outdoor living space.
Start by choosing weather-resistant materials like cedar, redwood, or pressure-treated lumber. These woods naturally resist decay and can withstand the elements. For a basic L-shaped bench, you’ll need 2x4s for the frame, 1x6s for the seating surface, and concrete blocks or post anchors for the foundation.
Begin by mapping out your bench location and installing the support posts, ensuring they’re level and securely anchored. Build the frame using 2x4s, creating a sturdy box structure that attaches to the posts. Space your support joists every 16 inches for optimal stability. For the seating surface, lay your 1×6 boards with small gaps between them to allow for water drainage.
Pro tip: Add a slight slope to the seat (about 1-2 degrees) to prevent water from pooling. Consider incorporating hinged tops in sections of the bench for hidden storage – perfect for cushions, garden tools, or outdoor games.
For added comfort, build a backrest at a 100-110 degree angle from the seat. Install arm rests at the ends for that finishing touch. Don’t forget to sand all edges smooth and apply multiple coats of exterior-grade sealant to protect your investment.
Customize your bench with weather-resistant cushions and throws for extra comfort. For evening enjoyment, consider installing LED strip lighting underneath the seating for a subtle ambient glow.
Creating Shade and Privacy
Natural Shade Options
Creating natural shade in your outdoor space isn’t just practical – it’s one of the most beautiful eco-friendly outdoor solutions you can implement. Start by strategically planting fast-growing trees like maples or crepe myrtles along the sunniest edges of your space. These will provide long-term shade while adding natural beauty to your yard.
For more immediate coverage, consider climbing plants on pergolas or trellises. Wisteria, grape vines, and clematis create stunning natural canopies while offering welcome relief from the sun. Position these vertical gardens where you need shade most, like over seating areas or dining spaces.
Bamboo screens offer another quick-growing option that provides both shade and privacy. Plant them in large containers for flexibility in placement, or create a living wall along property lines. For smaller spaces, try potted banana plants or tall ornamental grasses – they’re easy to maintain and can be moved as needed.
Don’t forget about seasonal options! Annual vines like morning glory or moonflower can provide temporary shade during summer months, while deciduous plants naturally allow more sun during winter when you want it. Layer different heights of plants to create a lush, private outdoor room that feels like a natural retreat.
Remember to consider the mature size of plants and their growth rates when planning your natural shade solutions. With proper placement and patience, you’ll create a cool, inviting outdoor space that gets better with each passing season.
DIY Pergolas and Screens
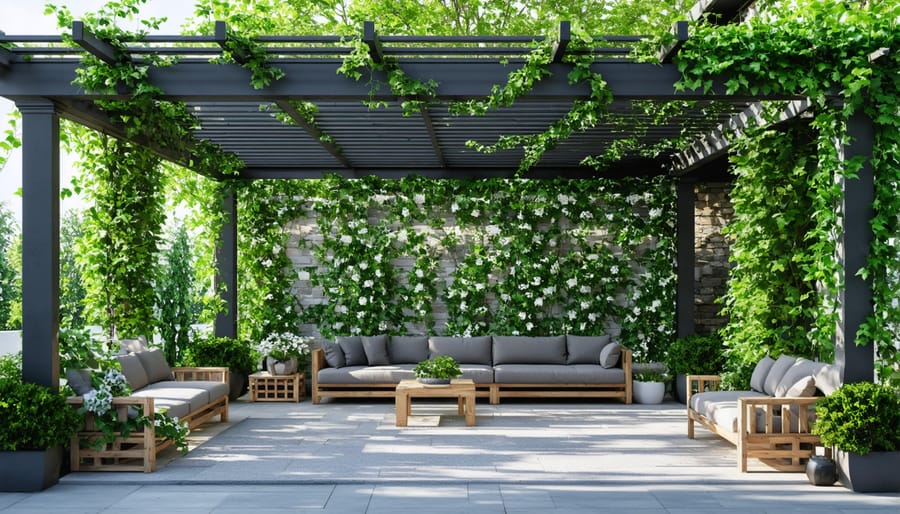
Creating your own pergola or privacy screen can transform your outdoor space into a cozy retreat while adding valuable shade and structure. Start with a simple post-and-beam pergola design using pressure-treated lumber – four 6×6 posts form the corners, with 2×8 beams connecting them at the top. Add 2×6 rafters across the beams for that classic pergola look and varied shade coverage.
For a more modern touch, consider building a slatted privacy screen using cedar boards. Space 1×6 boards vertically with a 1-inch gap between them, attached to a sturdy frame made from 2x4s. This creates an elegant barrier while maintaining airflow and allowing glimpses of greenery beyond.
Want something more budget-friendly? Try creating a bamboo screen by mounting poles horizontally between posts and weaving bamboo rolls through them. Or craft a living screen by building a simple trellis from lattice panels and training climbing plants like jasmine or clematis to grow up it.
Remember to check local building codes before starting any structure project. Always dig post holes below the frost line and use concrete footings for stability. Apply weather-resistant sealer or stain to protect your wooden structures, and inspect them annually for any needed maintenance.
Pro tip: Install solar-powered string lights or lanterns on your pergola for enchanting evening ambiance without complex electrical work.
Lighting and Ambiance
Solar Lighting Projects
Solar lighting can transform your outdoor space into a magical retreat while being eco-friendly and cost-effective. Start with solar-powered string lights, which are perfect for wrapping around pergolas, deck railings, or weaving through tree branches. These create a warm, inviting ambiance and require no electrical work.
For pathway lighting, try making DIY mason jar solar lights by attaching solar caps to regular mason jars and placing them along walkways or stairs. You can paint or frost the jars for different lighting effects. Another creative option is to repurpose old wine bottles into solar torch lights using solar stake lights and bottle mounting brackets.
Create stunning overhead lighting by crafting a solar chandelier using a vintage light fixture frame and solar-powered bulbs. For a modern touch, install solar-powered deck post caps, which provide both safety lighting and aesthetic appeal.
Don’t forget about accent lighting! Place solar spotlights near garden features or architectural elements. For a whimsical touch, try making solar-powered fairy gardens using mini solar lights tucked among plants and decorative elements. Remember to position solar panels where they’ll receive maximum sunlight during the day for optimal nighttime performance.
String Light Installation
Transform your outdoor space into a magical retreat with the perfect string light installation. Start by planning your layout, measuring the area, and determining how many light strands you’ll need. Choose commercial-grade outdoor string lights with weatherproof ratings for durability and safety in all conditions.
For secure installation, create a sturdy support system using either existing structures or installing posts. Space wooden or metal posts every 8-12 feet, ensuring they’re at least 8 feet tall and buried 2 feet deep in concrete for stability. When using existing structures, install heavy-duty screw hooks or guide wire for support.
Use a guide wire system by attaching stainless steel cable between posts or anchor points. This prevents sagging and provides better wind resistance. Secure the lights to the guide wire using UV-resistant zip ties every few feet. Leave a bit of slack between attachment points to allow for natural movement and temperature changes.
Always plug your lights into outdoor-rated GFCI outlets and use waterproof connection boxes where light strands meet. Consider installing a timer or smart plug for convenient automatic operation. For extra stability, add small cable ties every few bulbs to prevent shifting, and ensure all connections are weather-sealed.
Finally, test your installation thoroughly before finalizing, and keep spare bulbs on hand for quick replacements when needed.
Personal Touches and Decor
Upcycled Garden Art
Transform your outdoor space into a whimsical wonderland with creative upcycled garden art. By repurposing everyday items, you can create unique decorative pieces that add personality to your yard while supporting sustainability through these eco-friendly DIY projects.
Old wooden ladders can become stunning vertical planters – simply attach small pots or hanging baskets to each rung. Transform mason jars into magical lanterns by adding solar lights or tea candles, then hang them from shepherd’s hooks or tree branches for enchanting evening ambiance.
Give new life to vintage bicycles by painting them in vibrant colors and using the basket and frame to showcase trailing flowers. Chipped teacups and cracked plates make charming bird feeders or succulent planters when arranged creatively on salvaged fence posts.
Consider creating a vertical garden wall using old wooden pallets, or turn vintage window frames into eye-catching trellises for climbing plants. Metal watering cans, colorful rubber boots, and even retired kitchen colanders can become unique hanging planters that add whimsy to your space.
For a conversation starter, arrange mismatched chairs in bold colors around your garden, using seats as planters where cushions once sat. Remember, the key to successful garden art is weatherproofing your pieces and ensuring proper drainage for planted items. Let your creativity flow as you turn yesterday’s treasures into today’s garden masterpieces.
DIY Planters and Gardens
Transform your outdoor space with custom planters and gardens that showcase your personality while keeping costs down. Start by repurposing everyday items into unique planters – wooden crates, old wheelbarrows, or even rain boots can become charming homes for your plants. Simply drill drainage holes in the bottom and add a layer of gravel before filling with potting soil.
For a modern touch, create concrete planters using plastic containers as molds. Mix your concrete according to package instructions, pour it into the larger container, then press a smaller container into the center to form the planter shape. Let it cure for 24-48 hours before removing the molds.
Vertical gardens are perfect for small spaces. Build a simple wood frame and attach mason jars or recycled tin cans horizontally to create a living wall. Paint the containers in coordinating colors for added visual interest. For larger spaces, construct raised garden beds using weather-resistant cedar boards. A 4×4 foot bed is ideal for beginners and can yield plenty of vegetables or flowers.
Don’t forget about herb gardens! Create a hanging herb garden using a wooden pallet – sand it down, attach landscape fabric to the back, fill with soil, and plant your favorite cooking herbs between the slats. Mount it on a sunny wall near your cooking area for easy access while entertaining outdoors.
Remember to consider sunlight requirements and water accessibility when placing your planters and gardens. Group plants with similar needs together for easier maintenance.
Maintenance Tips
Regular maintenance is key to keeping your DIY outdoor living space looking fresh and inviting throughout the seasons. Start by establishing a weekly cleaning routine – sweep surfaces, wipe down furniture, and remove any debris that’s accumulated. For wooden elements, apply a fresh coat of weatherproof sealant annually to protect against moisture and UV damage.
Check your outdoor cushions and fabrics monthly for signs of mildew or water damage. When not in use, store these items in a dry place or use weather-resistant covers. Clean cushions with mild soap and water, allowing them to dry completely before storing or using them again.
For planted areas, maintain a regular watering schedule and trim plants as needed. Remove dead foliage and weeds promptly to keep your garden beds looking tidy. Check irrigation systems seasonally to ensure they’re working properly and adjust watering times based on weather conditions.
Inspect all lighting fixtures every few months, replacing bulbs as needed and ensuring connections are secure and weather-protected. For DIY features like pergolas or decking, conduct quarterly checks for loose boards, protruding nails, or signs of rot.
Before winter, clean and store temperature-sensitive items, drain water features, and protect delicate plants. Taking these preventative steps will extend the life of your outdoor space and maintain its appeal year after year.
Creating your dream outdoor living space doesn’t have to be overwhelming or expensive. With the DIY ideas and tips we’ve explored, you can transform your outdoor area into a comfortable, stylish, and functional extension of your home. Whether you choose to start small with a cozy seating area and some string lights, or go all out with a full outdoor kitchen and entertainment space, the key is to plan carefully and tackle projects one step at a time.
Remember to consider your climate, available space, and budget when planning your outdoor oasis. Focus on incorporating elements that truly matter to you and your lifestyle, whether that’s a peaceful reading nook, a vibrant garden space, or an area for entertaining friends and family.
Don’t be afraid to get creative and mix different materials, textures, and design elements to create a unique space that reflects your personality. With some effort, basic tools, and a clear vision, you can craft an outdoor living area that you’ll enjoy for years to come. So grab your tools, gather your materials, and start bringing your outdoor dreams to life!