Transform your outdoor space without breaking the bank using proven climate-ready landscaping solutions. Start by repurposing fallen leaves and grass clippings into rich, free mulch that retains moisture and suppresses weeds. Divide existing perennials in early spring or fall to multiply your plants at zero cost, creating fuller garden beds and sharing extras with neighbors. Source local stone and reclaimed materials from community marketplaces to build striking walkways and borders at fraction of retail prices. Create defined edges between lawn and garden beds using a sharp spade – this professional-looking technique costs nothing but immediately elevates your landscape’s appearance. With thoughtful planning and these budget-conscious strategies, your dream yard is within reach, regardless of your financial constraints.
Create a Low-Maintenance Native Plant Garden
Choosing Local Species
One of the smartest ways to keep your landscaping budget in check is by choosing hardy native plants that naturally thrive in your area. These local species are already adapted to your region’s climate, rainfall patterns, and soil conditions, which means they’ll require less maintenance, water, and expensive care products to flourish.
Start by visiting your local nursery or botanical garden to learn which plants are indigenous to your area. These experts can guide you toward options that match your yard’s specific conditions, whether you have full sun, partial shade, or challenging soil types.
Native plants also tend to be more resistant to local pests and diseases, reducing the need for costly pesticides and treatments. Plus, they support local wildlife and pollinators, creating a vibrant ecosystem in your yard. Consider grouping plants with similar water needs together to maximize efficiency and minimize maintenance costs.
Remember that while some native species might cost a bit more upfront, their lower maintenance requirements and longer lifespan make them a budget-friendly choice in the long run.
Natural Grouping Techniques
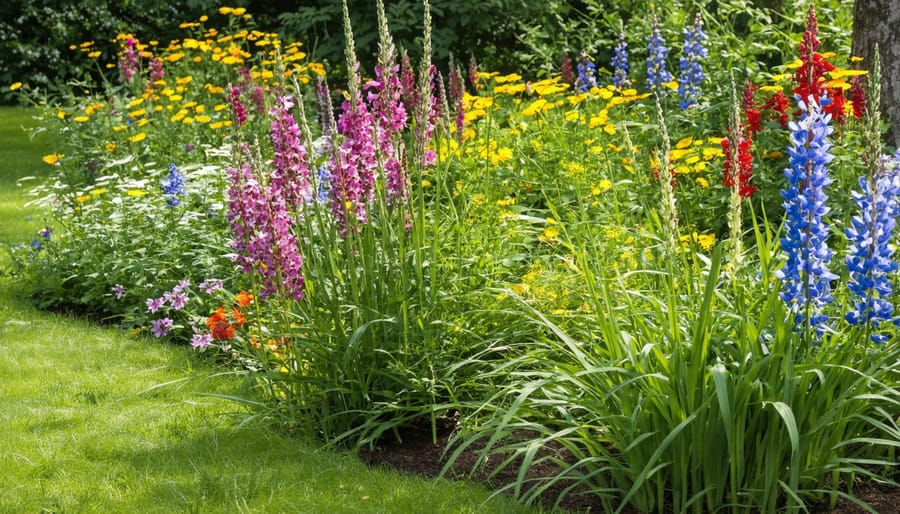
Group your plants strategically to create beautiful, water-efficient landscapes without breaking the bank. Start by clustering plants with similar water needs together, a technique known as hydrozoning. Place water-loving plants in naturally moist areas, like spots that collect rainwater, while drought-resistant varieties can thrive in drier zones.
Create natural-looking plant communities by mimicking how plants grow in nature. Layer your plantings with taller species at the back, medium-height plants in the middle, and ground covers in front. This not only looks appealing but also helps retain moisture by providing shade and reducing evaporation.
Consider planting in blocks or drifts rather than scattered individual plants. This approach requires less water and creates a more cohesive look. Group at least three to five of the same plant species together for maximum impact. Don’t forget to mulch around your plant groupings – this helps retain moisture and reduces the need for frequent watering.
For the best results, observe your yard’s natural conditions, including sun exposure and drainage patterns, before deciding where to place your plant groups. This thoughtful arrangement will lead to healthier plants and lower water bills.
Build Your Own Rainwater Collection System
Materials and Setup
To get started with your budget-friendly landscaping projects, you’ll need some basic materials that won’t break the bank. Here’s what you’ll need:
Essential Tools:
– Garden spade and hand trowel
– Pruning shears
– Wheelbarrow or garden cart
– Work gloves
– Garden rake
– Watering can or hose
Basic Materials:
– Mulch (can be purchased or created from fallen leaves)
– Compost (homemade or store-bought)
– Native plant seeds or seedlings
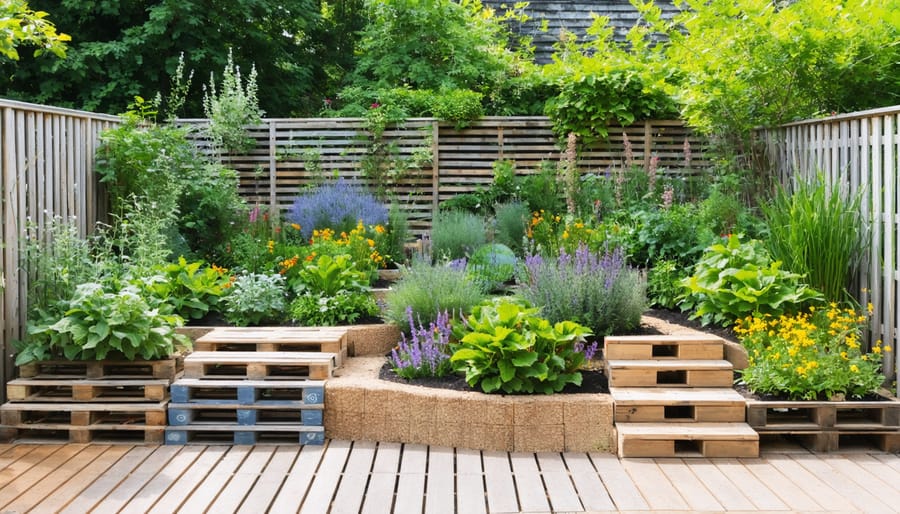
– Repurposed materials (wooden pallets, old bricks, or stones)
– Basic garden soil
– Natural edging materials (rocks or fallen branches)
Optional but Helpful:
– Landscape fabric for weed control
– Solar-powered garden lights
– Paint or wood stain for DIY features
– Basic hand tools for assembly
Before starting any project, clear your workspace and organize your materials. Consider borrowing larger tools from neighbors or renting them for one-time use to save money. Many materials can be sourced for free through local community groups or online marketplaces. Remember to check your local regulations regarding any necessary permits before beginning major landscape changes.

Maintenance Tips
Regular maintenance is key to keeping your budget-friendly landscape looking its best. Start by creating a simple weekly maintenance schedule that includes basic tasks like watering, weeding, and trimming. Water your plants deeply but less frequently to encourage strong root growth and save on water bills. Consider installing a timer for your irrigation system to prevent overwatering.
Keep your tools clean and sharp to extend their life and make your work easier. After each use, remove dirt and debris, and store them in a dry place. A light coating of oil on metal parts can prevent rust and save you money on replacements.
Monitor your plants for signs of pest problems or disease early on. Many issues can be resolved with natural solutions like neem oil or homemade insecticidal soap, saving you money on expensive chemical treatments. Add a fresh layer of mulch annually to retain moisture and suppress weeds.
Remember to divide perennials every few years – this not only keeps your plants healthy but also gives you free plants to expand your garden or share with neighbors. Regularly check and adjust hardscape elements like pavers or edging to prevent bigger problems down the line.
Create Paths with Recycled Materials
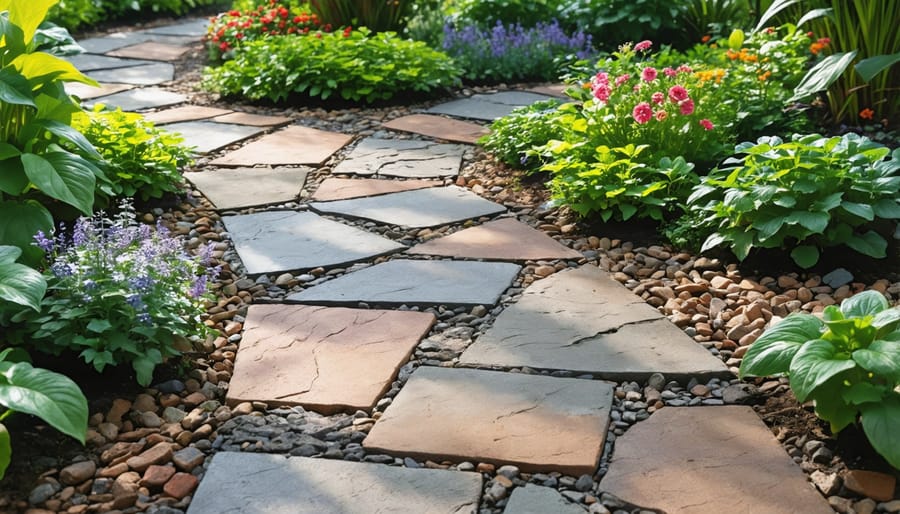
Creating beautiful garden paths doesn’t have to break the bank when you use recycled materials creatively. One of the most cost-effective options is using broken concrete pieces, often called urbanite, which you can usually get for free from construction sites or renovation projects. Arrange these pieces like puzzle pieces to create a charming, mosaic-like walkway that adds character to your yard.
Reclaimed brick is another excellent choice for pathway construction. Check local demolition sites, salvage yards, or online marketplaces for used bricks, which often cost significantly less than new ones. Clean them up, and lay them in interesting patterns like herringbone or basket weave for an elegant look.
Wood chips or mulch from tree services make fantastic pathway materials and are often available for free. Layer them about 3-4 inches deep, and add landscape fabric underneath to prevent weed growth. For a more structured look, edge your path with reclaimed wood or salvaged stone to keep the materials contained.
Old pavers from neighborhood renovations can be repurposed into stunning walkways. Mix and match different styles and colors for an eclectic design, or arrange them uniformly for a more traditional appearance. Don’t forget to check online community groups and local buy-nothing groups for free materials.
To add unique touches, incorporate recycled glass bottles, broken ceramic tiles, or even old kitchen plates into your pathway design. Embed them partially in concrete or mortar to create eye-catching accents that sparkle in the sunlight. Remember to thoroughly clean all materials and ensure sharp edges are properly covered for safety.
Pro tip: Before starting your pathway project, collect enough materials to complete the entire path to ensure consistency in your design.
Start a Compost System
Creating your own home composting system is one of the smartest investments you can make for your landscape. Not only does it reduce waste, but it also provides you with free, nutrient-rich fertilizer for your garden.
Start by choosing a sunny corner of your yard for your compost bin. You can build a simple enclosure using wooden pallets (often available for free on marketplace sites) or purchase an affordable plastic bin. The key is ensuring good airflow and drainage.
Layer your materials using the “green and brown” method. Green materials include kitchen scraps (fruits, vegetables, coffee grounds) and fresh grass clippings, while brown materials consist of dry leaves, newspaper, and cardboard. Aim for a ratio of about 3:1 brown to green materials.
Keep your compost pile slightly moist, like a wrung-out sponge. Turn it every few weeks with a pitchfork or garden fork to speed up decomposition. In about 3-6 months, you’ll have dark, crumbly compost that smells like fresh earth.
Pro tip: Save fallen leaves in autumn by storing them in garbage bags – they’re perfect “brown” materials to use throughout the year. For kitchen scraps, keep a small container with a lid under your sink for easy collection.
Once ready, use your compost to enrich garden soil, top-dress your lawn, or mix it into potting soil for container plants. This natural fertilizer will help you grow healthier plants while saving money on store-bought alternatives.
Design Natural Borders with Found Materials
Natural borders can transform your garden while keeping costs minimal by utilizing materials you can find in your own backyard or neighborhood. Start by collecting fallen branches, stones of various sizes, and pinecones during your walks or yard cleanup. These materials not only come free but also add an authentic, rustic charm to your landscape.
For a simple yet effective border, arrange larger stones along your garden edges, gradually incorporating smaller ones to fill gaps. Mix and match colors and textures for visual interest, and consider partially burying the stones to create a more established look. If you’re working with branches, select sturdy ones approximately 4-6 inches in diameter and cut them into equal lengths of about 12 inches. Place them side by side, slightly angled into the soil for stability.
Pro tip: Before setting your natural border, lay down landscape fabric underneath to prevent weeds from growing between the materials. This small investment will save you countless hours of maintenance later.
Consider creating a “living border” by incorporating found materials with drought-resistant ground covers or native plants. For instance, place larger stones as anchor points and allow creeping thyme or sedum to grow between them. This combination creates a dynamic edge that evolves with your garden while maintaining a natural appearance.
Remember to periodically check and adjust your borders, especially after heavy rains or strong winds. Natural materials may shift over time, but that’s part of their organic charm.
By implementing these sustainable landscaping tips, you’ll not only create a beautiful outdoor space but also enjoy significant savings over time. From reduced water bills to lower maintenance costs, these eco-friendly approaches pay off in both the short and long term. Best of all, you’ll have the satisfaction of knowing your DIY efforts contribute to a healthier environment while keeping more money in your pocket. Start small, stay consistent, and watch your budget-friendly landscape flourish.