Transform molten glass into stunning artisan home decor through the ancient craft of glassblowing. Working with temperatures reaching 2,000°F, artists shape liquid glass into delicate vases, bold sculptures, and ethereal installations that capture light in ways no other medium can match. This mesmerizing process combines precise technical skill with creative vision, allowing makers to manipulate color, texture, and form into pieces that become focal points in contemporary interiors. Whether you’re drawn to traditional Venetian techniques or contemporary fused glass methods, the art glass journey begins with understanding basic safety protocols, mastering fundamental tools, and developing an eye for design that pushes the boundaries of this versatile material.
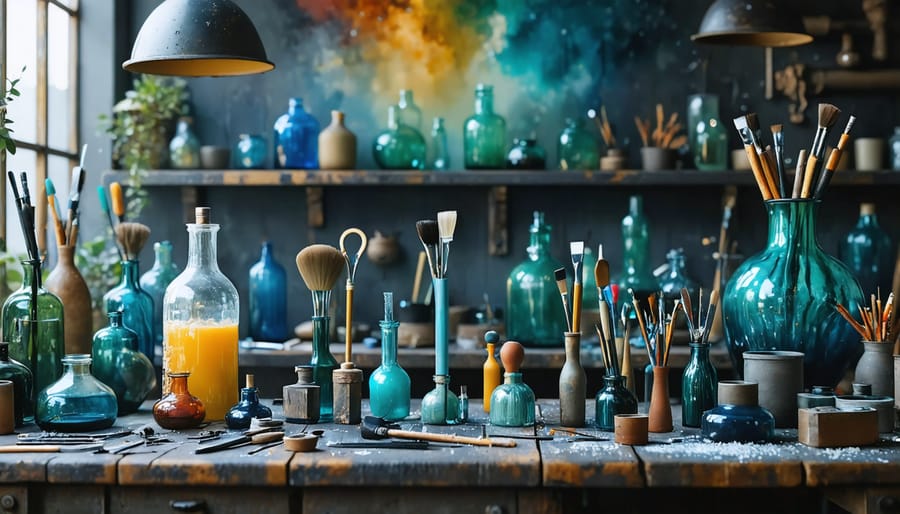
Essential Tools and Equipment for Art Glass Creation
Basic Glassblowing Equipment
Before diving into glassblowing, you’ll need to gather some essential equipment to get started. A glassblowing furnace, which maintains temperatures around 2,000°F, is your primary tool for melting glass. You’ll also need a glory hole, a reheating chamber that keeps your glass workable as you shape it.
Basic hand tools include blowpipes (hollow metal rods for gathering and blowing glass), punties (solid metal rods for transferring and shaping), and various shaping tools like jacks, paddles, and blocks. A graphite paddle helps form flat surfaces, while wooden blocks shape and smooth curved areas.
Your workspace should include a sturdy metal workbench called a marver, which is essential for rolling and shaping hot glass. Safety equipment is non-negotiable: heat-resistant gloves, safety glasses with proper UV protection, and natural fiber clothing are must-haves.
For cooling finished pieces, you’ll need an annealing oven (or kiln) that gradually reduces temperature to prevent thermal shock and breakage. Keep basic measuring tools handy, including calipers and gauges, to ensure consistency in your work.
For beginners, consider starting with a complete starter kit from a reputable supplier. While the initial investment might seem substantial, quality tools will last longer and produce better results. Remember to arrange your workspace with safety and efficiency in mind, keeping tools within easy reach during the glassblowing process.
Safety Equipment and Workspace Setup
Before you begin creating art glass, setting up a safe workspace is absolutely essential. Start by choosing a well-ventilated area, ideally with access to outdoor air or equipped with a proper ventilation system. Your workspace should be spacious enough to move freely and store equipment safely.
Essential safety gear includes heat-resistant gloves rated for high temperatures, safety glasses with side shields, and a face shield for additional protection. Always wear natural fiber clothing that covers your skin, as synthetic materials can melt when exposed to high heat. Close-toed shoes are non-negotiable.
Organize your workspace with clearly defined zones: one for hot work, another for cold work, and a separate area for storing materials and tools. Keep a fire extinguisher and first aid kit within easy reach. Install proper lighting to ensure clear visibility of your work, and consider adding anti-fatigue mats where you’ll be standing for extended periods.
Your work surface should be heat-resistant and stable. Many artists use stainless steel tables or specialized workbenches. Keep tools organized on a nearby rack or magnetic strip for easy access while working. Always maintain clear pathways around your workspace to prevent tripping hazards.
Remember to never work alone when using hot glass equipment, and always have a safety plan in place for emergencies. Taking these precautions seriously will help ensure a safe and enjoyable art glass making experience.
Fundamental Art Glass Techniques
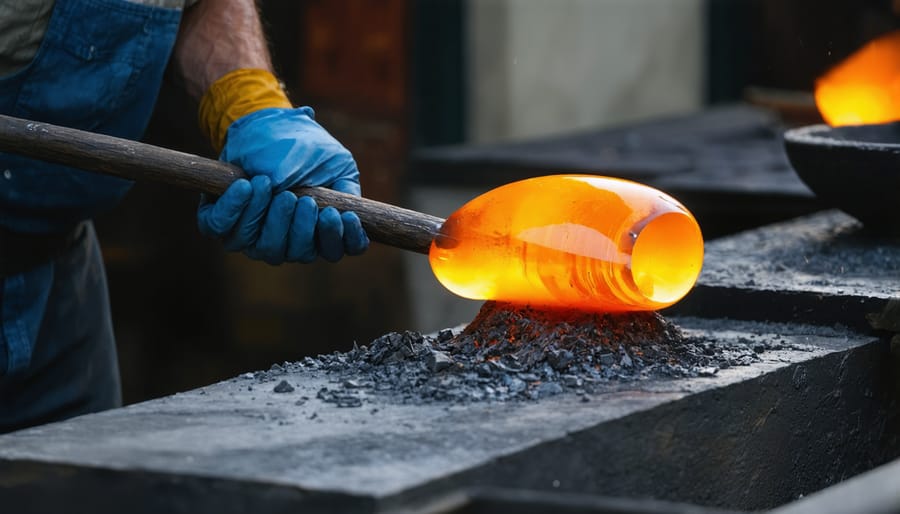
Gathering and Shaping Glass
The journey of creating art glass begins with gathering molten glass from the furnace, a process that requires both skill and patience. Using a hollow steel pipe called a blowpipe, glassmakers carefully dip and roll it in the molten glass, which typically maintains a temperature of around 2,000°F. This initial gather of glass, looking like honey on a spoon, is the foundation of any glass piece.
Once the glass is gathered, artists begin the shaping process through a combination of gravity, centrifugal force, and specialized tools. By continuously rotating the blowpipe, they prevent the glass from dripping while using wooden blocks, newspapers, or paddles to give the piece its preliminary form. This stage requires precise timing and movement to maintain the glass at the right working temperature.
The art of manipulating molten glass involves several fundamental techniques. Marvering, where the glass is rolled on a smooth steel surface, helps create symmetry and even wall thickness. Blocking, using wooden tools shaped like cups, allows artists to form the basic shape while keeping the glass centered on the pipe. Throughout these processes, frequent reheating in a smaller furnace called a glory hole maintains the glass’s workability.
Color can be added during this stage by rolling the hot glass in colored glass fragments or powders, or by layering different colored glasses together. This technique, known as overlay, creates depth and complexity in the final piece. Artists might also use metal oxides or special glass frits to achieve unique effects and patterns.
Temperature control is crucial during gathering and shaping. Too hot, and the glass becomes too fluid to control; too cool, and it becomes stiff and unworkable. Experienced glassmakers learn to read the glass’s temperature by its glow and viscosity, making constant adjustments to maintain the perfect working consistency.
Color Application Methods
Adding color to art glass is where the magic really happens, and there are several exciting techniques to explore. The most common method is using metal oxides and powdered glass colors, which are mixed into the molten glass during the creation process. These materials create stunning, permanent colors that won’t fade over time.
For a more dramatic effect, many artists use the overlay technique, where layers of different colored glass are applied on top of each other. This method allows for beautiful depth and can create striking patterns when the layers are manipulated. You might see this in pieces with swirling designs or gradient effects.
Another popular approach is the frit technique, where small pieces of colored glass are sprinkled onto the surface of hot glass and then melted in. This creates interesting speckled patterns and can be used to make everything from subtle textures to bold, abstract designs.
For more precise work, many artists use colored glass rods or canes. These are carefully heated and incorporated into the piece, allowing for detailed patterns and specific color placement. This technique is particularly useful for creating stripes, spirals, or specific design elements.
Reactive glasses are particularly exciting to work with – these special types of glass change color when exposed to different temperatures or when combined with other specific glass types. The results can be unpredictable but often create fascinating effects that make each piece truly unique.
Remember that colors can look different when the glass is hot versus when it’s cooled, so it takes practice to achieve exactly the look you’re after. Start with simple color combinations and gradually work your way up to more complex designs as you gain confidence.
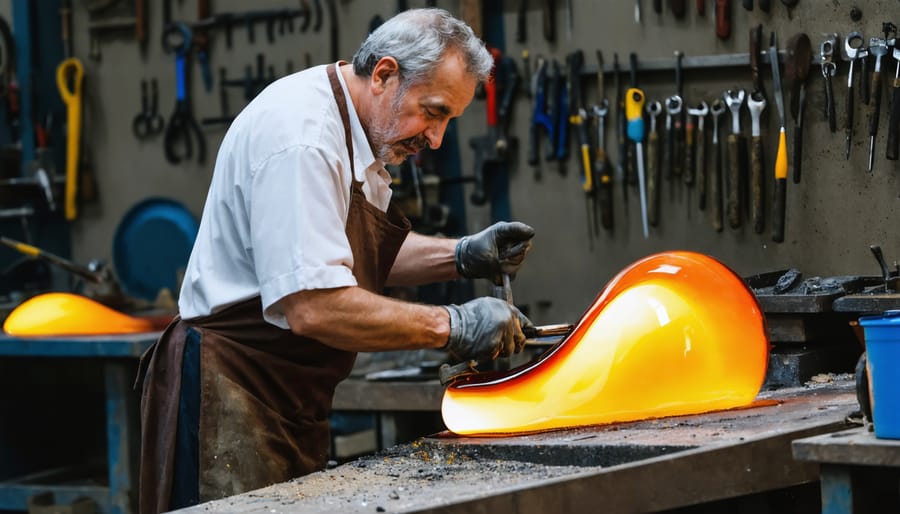
Finishing Techniques
Once your glass piece has taken its basic form, the finishing process begins – this is where your artwork truly comes to life. Start by allowing your piece to cool slowly in an annealing oven, which prevents stress cracks and ensures durability. This cooling process typically takes 12-24 hours, depending on the size and thickness of your piece.
After cooling, inspect your piece for any rough edges or imperfections. Using a variety of diamond-grit files and sandpaper, carefully smooth these areas, working from coarse to fine grits. Remember to wear protective gloves and work in a well-ventilated area during this process.
For a glossy finish, fire-polishing is your best friend. By carefully reheating the surface of your piece with a torch, you can achieve a brilliant shine without mechanical polishing. If you prefer a more subtle appearance, cold-working techniques like grinding and sandblasting can create beautiful frosted or textured effects.
Adding decorative elements is another way to enhance your piece. Consider applying metallic foils, creating etched patterns with acid solutions (always under proper ventilation and with safety equipment), or incorporating colored glass powders for unique effects.
The final step is cleaning your piece thoroughly with a lint-free cloth and glass cleaner. Take time to photograph your work from multiple angles in good lighting – this helps document your progress and creates memories of your artistic journey.
Pro tip: Always sign and date your pieces while they’re still warm using a diamond-tipped engraving tool. This not only adds authenticity but also helps you track your growth as an artist.
Creating Decorative Glass Pieces for Your Home
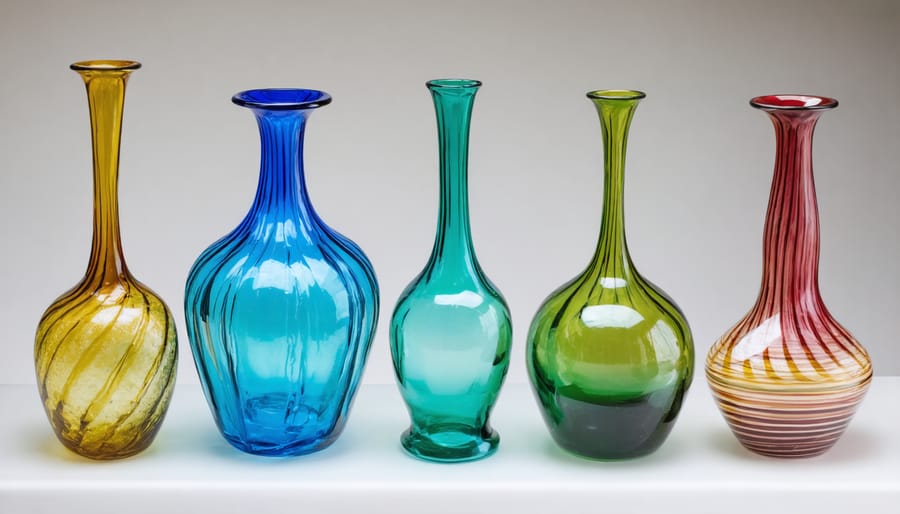
Vases and Vessels
Creating vases and vessels is one of the most rewarding aspects of art glass making, allowing you to blend functionality with stunning artistic expression. The process begins with gathering molten glass on the end of your blowpipe, a technique that requires precise timing and temperature control. As you gather the glass, maintain a steady rotation to ensure even distribution.
To shape your vessel, start by creating a bubble in the glass using controlled breath through the blowpipe. This initial bubble will form the core of your piece. Use wooden blocks and tools to shape the exterior while continuing to heat and rotate the piece in the glory hole. For taller vessels, gravity becomes your ally – let the glass stretch naturally while maintaining control through careful rotation.
Adding decorative elements to your vases requires careful planning. Consider incorporating different colored glass, creating swirls by rolling the piece in colored frit (crushed glass), or using tools to create patterns and textures. Remember that less is often more when designing your piece – simple, elegant forms can be just as striking as complex patterns.
The neck and lip of your vessel deserve special attention. Use jacks to create clean openings andgarret tools to shape delicate rims. If you’re making a vase with a narrow neck, timing is crucial – work quickly while the glass is at the right temperature to avoid unwanted thickness variations.
Once your vessel reaches its final form, carefully transfer it to the annealing oven. This controlled cooling process prevents stress fractures and ensures your piece will last for years to come. Each vessel you create will be unique, reflecting both your artistic vision and the natural behavior of the glass.
Sculptural Elements
Glass art takes on a whole new dimension when you venture into sculptural creation. Whether you’re drawn to flowing abstract forms or lifelike figurative pieces, sculpting with glass offers endless possibilities for creating stunning modern home design elements that catch both light and attention.
For abstract sculptures, start with simple geometric shapes and gradually work your way toward more complex forms. Hot glass can be manipulated using various tools to create waves, spirals, and organic shapes that seem to defy gravity. Try working with different colored glass rods to create striking patterns within your piece, or experiment with clear glass to focus on form and light interaction.
When creating figurative sculptures, patience is key. Begin by sketching your design and breaking it down into basic shapes. Many artists find success by working on individual components separately before joining them with careful heating. Remember to keep your glass at a consistent temperature throughout the process to prevent cracking.
Consider incorporating mixed media elements like metal or stone bases to enhance your sculptural pieces. These additions not only provide stability but can also create interesting contrasts in texture and material. For beginners, start with smaller pieces like birds or simple human forms before attempting more complex sculptures.
Temperature control is crucial when working on sculptural elements. Use your torch with precision, focusing heat where needed while maintaining the overall stability of your piece. Keep a warming chamber nearby to gradually cool finished sections while you work on others. This prevents thermal shock and ensures your creative vision comes to life exactly as planned.
Functional Art Pieces
Creating functional art pieces from glass allows you to blend beauty with practicality in your home. From elegant vases that showcase fresh flowers to stunning serving bowls that become conversation pieces at dinner parties, practical glass art adds a touch of sophistication to everyday items.
Consider crafting items like decorative light fixtures that cast enchanting patterns on your walls, or unique wine glasses that elevate your dining experience. Paperweights, candleholders, and decorative plates are excellent starter projects that serve both aesthetic and practical purposes. These pieces not only enhance your living space but also provide opportunities to practice various glassworking techniques.
When designing functional pieces, focus on both form and usability. Ensure drinking vessels have comfortable lips, vases feature stable bases, and decorative bowls maintain proper proportions for their intended use. Pay special attention to thickness consistency, especially for items that will hold water or be handled frequently.
Temperature control is crucial when creating functional pieces. Proper annealing (controlled cooling) prevents stress points that could lead to cracks or breaks during use. For items that will contain food or beverages, use only food-safe materials and techniques.
Remember to consider the practical aspects of cleaning and maintenance when designing your pieces. Simple shapes with smooth surfaces are easier to care for than intricate designs with hard-to-reach crevices. With thoughtful planning and careful execution, your glass art can become both a beautiful addition to your home and a useful part of daily life.
Displaying and Caring for Art Glass
Your art glass pieces deserve to be showcased in a way that highlights their beauty while keeping them safe. Strategic placement near natural light sources can help your pieces transform modern home decor by creating stunning light effects throughout the day.
When displaying your glass art, opt for sturdy shelving or display cases with proper lighting. LED spotlights work wonderfully as they don’t generate excess heat that could damage your pieces. Consider using rotating display stands for pieces that deserve to be admired from all angles.
Caring for your art glass is surprisingly straightforward but requires consistent attention. Dust your pieces weekly using a soft, lint-free cloth or a feather duster. For deeper cleaning, use lukewarm water with a mild dish soap, being careful to avoid harsh chemicals that might damage the glass surface.
Handle your pieces with clean, dry hands, always gripping them at their most stable points. When moving larger pieces, wrap them in bubble wrap or soft cloths, and store them in padded containers if they’re not on display.
Keep your art glass away from areas with dramatic temperature changes or high humidity, as these conditions can stress the glass. Also, avoid placing pieces where they might be knocked over by pets or children, ensuring your beautiful creations remain safe and pristine for years to come.
Creating art glass is a mesmerizing journey that combines artistic vision with technical skill, resulting in stunning pieces that can transform modern living spaces. Whether you’re crafting delicate sun catchers or bold sculptural pieces, the process of working with molten glass offers endless possibilities for creative expression. As you’ve learned, with the right tools, safety measures, and techniques, you can begin exploring this ancient craft in your own workspace. Don’t be discouraged by initial challenges – every glass artist started somewhere, and each piece you create will help build your confidence and expertise. Consider starting with simple projects and gradually working your way up to more complex designs. The joy of seeing light dance through your own handcrafted glass pieces makes every careful step worthwhile. We encourage you to take that first step into the captivating world of art glass creation.