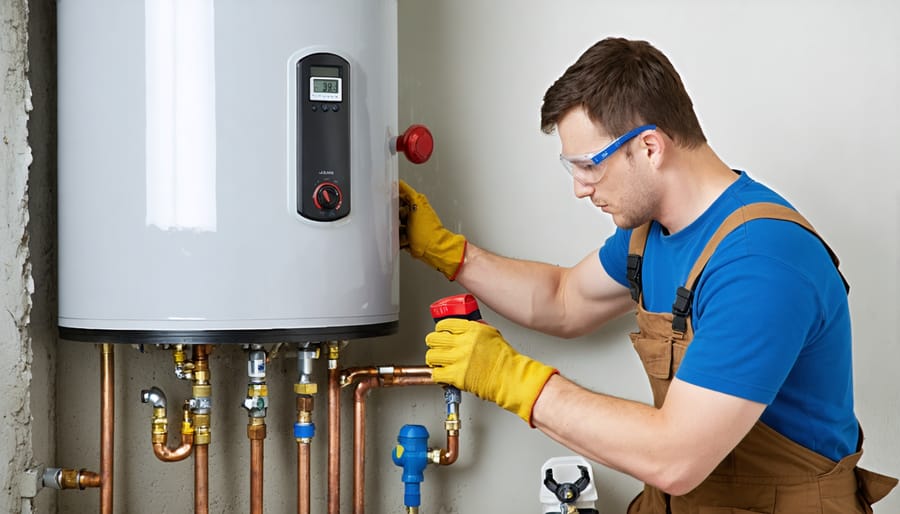
Installing a gas water heater demands careful attention to safety protocols and building codes. While understanding the risks of DIY installation is crucial, proper preparation and methodical execution can ensure a successful setup. Professional installation remains the safest option, but determined DIY enthusiasts should focus on three critical areas: precise gas line connection with appropriate threading and sealants, proper venting to prevent carbon monoxide buildup, and correct water line installation with temperature and pressure relief valve placement.
This guide walks through the essential steps for installing a gas water heater, emphasizing safety measures and code compliance. Before beginning, gather necessary permits, understand local regulations, and ensure you have appropriate tools and safety equipment. Remember that incorrect installation can lead to gas leaks, carbon monoxide poisoning, or water damage – situations that could endanger your household and property.
Whether replacing an existing unit or installing new, following manufacturer specifications and local building codes is non-negotiable. Let’s explore the step-by-step process, starting with proper preparation and ending with thorough testing procedures.
Essential Safety Precautions Before Installation
Gas Line Safety Checks
Before connecting your new water heater, a thorough gas line safety check is absolutely essential. Start by applying a mixture of dish soap and water to all gas line connections – any bubbles forming indicate a leak that needs immediate attention. Using a gas pressure gauge, verify that the gas pressure matches your heater’s requirements, typically between 4 and 10 inches of water column for natural gas.
Check all gas line fittings for signs of corrosion or damage, and ensure the gas shutoff valve operates smoothly. When connecting the gas line to your water heater, use two wrenches – one to hold the fitting steady and another to tighten the connection. This prevents damaging the gas line or creating leaks.
Always use approved gas pipe joint compound or Teflon tape specifically rated for gas lines. After making connections, test again for leaks using the soap solution. If you smell gas at any point during installation or testing, immediately evacuate the area and contact your gas company. Remember, proper gas line safety isn’t just about following code – it’s about protecting your family’s safety.
Feel unsure about any step? Don’t hesitate to contact a licensed plumber. When it comes to gas lines, it’s better to be extra cautious than sorry.
Ventilation Requirements
Proper ventilation is crucial for your gas water heater’s safe operation. Start by ensuring your installation space has adequate airflow – you’ll need roughly 50 cubic feet of air space per 1,000 BTUs of the water heater’s input rating. If your space is confined, consider installing ventilation openings: one near the floor and another near the ceiling.
Your vent pipe should be made of approved materials like galvanized steel or aluminum, and must maintain an upward slope of ¼ inch per foot toward the chimney or vent termination. Avoid using more than three 90-degree elbows in your vent system, as this can restrict airflow.
The vent pipe must extend at least 12 inches above your roof line and be properly secured. Install a draft hood or diverter (usually supplied with your heater) to ensure proper ventilation and prevent backdrafting. Check that all connections are tight and properly sealed.
For extra safety, consider installing a carbon monoxide detector near your water heater. This provides an early warning if ventilation problems occur.
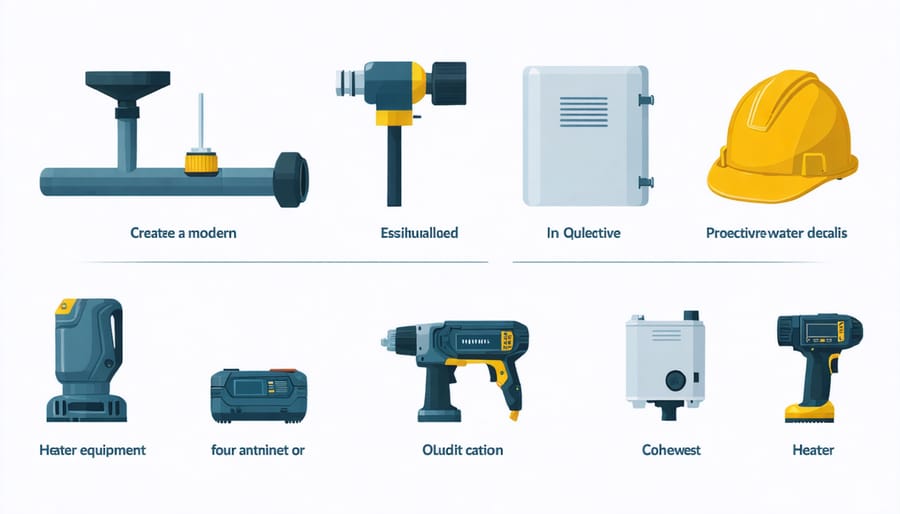
Required Tools and Materials
Before starting your gas water heater installation, gather all the necessary tools and materials. Having everything ready will make the process smoother and help you avoid unnecessary trips to the hardware store.
Essential Tools:
– Pipe wrench (2)
– Adjustable wrench
– Channel-lock pliers
– Screwdrivers (flathead and Phillips)
– Level
– Tape measure
– Utility knife
– Wire stripper
– Drill and bits
– Hacksaw or pipe cutter
– Thread seal tape (Teflon tape)
– Safety glasses
– Work gloves
– Ventilation mask
Required Materials:
– New gas water heater unit
– Gas line (black iron pipe or flexible gas line)
– Gas pipe fittings and connectors
– Pipe joint compound
– Water supply lines (flexible or copper)
– Discharge pipe
– Temperature and pressure relief valve
– Drain pan
– Vent pipe and fittings
– Wall anchors and mounting straps
– Gas leak detector solution
– Plumbing tape
– Insulation for hot water pipes
– Earthquake straps (if required by local code)
Optional but Recommended:
– Water heater installation kit
– Plumber’s putty
– Dielectric unions
– Water heater blanket (for energy efficiency)
– Expansion tank (if required by local code)
– Shut-off valve
– Drain valve
– Pipe insulation sleeves
Remember to check your local building codes, as they may require additional materials or specific types of components. Always ensure all materials meet current safety standards and are approved for gas water heater installations.
Step-by-Step Installation Process
Removing the Old Water Heater
Before starting your new installation, removing your old water heater safely is crucial. First, turn off the gas supply by locating the gas shutoff valve near the heater and rotating it perpendicular to the gas line. Next, shut off the cold water supply valve and drain the tank by connecting a garden hose to the drain valve at the bottom of the heater.
Open a hot water faucet somewhere in your house to prevent vacuum formation while draining. Once the tank is empty, disconnect the gas line using two wrenches – one to hold the fitting and another to loosen the connection. Be sure to cap the gas line immediately to prevent gas leakage.
Now, disconnect the water lines, starting with the hot water outlet on top of the tank, followed by the cold water inlet. You might encounter some residual water, so keep a bucket and towels handy. If your heater has a temperature and pressure relief valve with connected piping, remove these components as well.
With all connections removed, you can now carefully tilt and remove the old unit. Consider having a helper, as water heaters are heavy. Remember to dispose of your old unit properly – many hardware stores and recycling centers accept old water heaters, or your local waste management service might offer special pickup for large appliances.
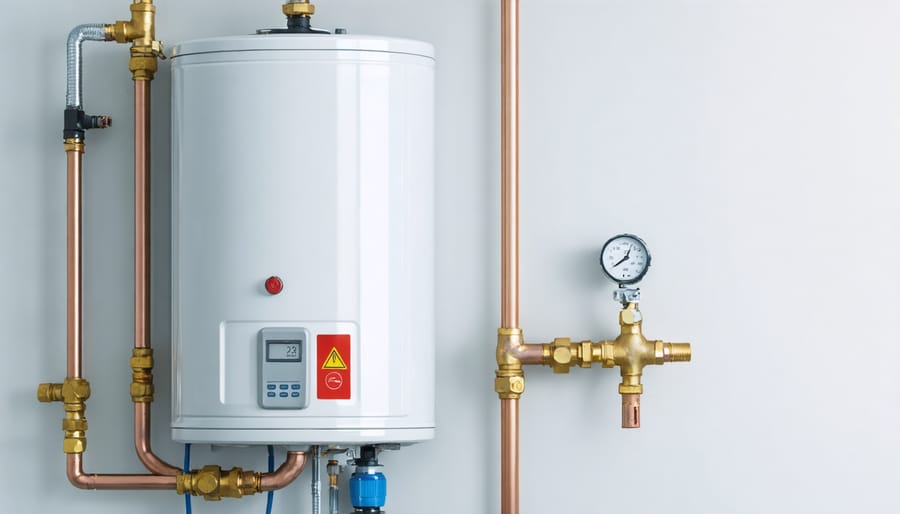
Positioning and Connecting the New Unit
Proper positioning of your new gas water heater is crucial for both safety and efficiency. Start by ensuring you have a level, stable surface – ideally a concrete platform or sturdy floor that can support the unit’s weight when filled with water. Following professional installation techniques will help you avoid common placement mistakes.
Position the unit at least 6 inches away from walls to allow for proper ventilation and maintenance access. If you’re installing in a garage or basement, elevate the water heater 18 inches above the floor to protect the flame from flammable vapors. This is especially important in garage installations where gas fumes might be present.
Before making any connections, verify that your gas line is the correct size and properly positioned. The gas supply line should have a dedicated shut-off valve within 6 feet of the water heater. For water connections, identify the cold water inlet (usually marked with blue) and hot water outlet (typically marked with red). Install dielectric unions on both water connections to prevent corrosion between different metal types.
When connecting the temperature and pressure (T&P) relief valve, ensure the discharge pipe points downward and terminates 6 inches above the floor. This safety feature needs to be properly installed to prevent potential accidents. The vent pipe should be secured firmly and rise continuously upward without any dips or sags.
For optimal performance, consider installing heat traps on both the hot and cold water lines if they’re not already built into the nipples. These simple devices can improve energy efficiency by preventing unwanted heat circulation when the heater is idle. Remember to maintain proper clearances around the unit as specified in your manufacturer’s guidelines to ensure safe operation and easy access for future maintenance.
Gas Line and Vent Pipe Installation
Proper gas line and vent pipe installation is crucial for both safety and efficiency. Let’s start with the gas line connection. First, apply pipe joint compound or PTFE tape to all threaded connections to ensure a secure seal. Connect the gas supply line to the water heater’s gas valve, making sure to use the correct size pipe and fittings for your model.
Hand-tighten all connections first, then use a pipe wrench to secure them firmly – but be careful not to overtighten, as this can damage the threads. Once connected, test for gas leaks by applying a mixture of dish soap and water to all joints. If you see bubbles forming, there’s a leak that needs immediate attention.
Moving on to the venting system, proper installation is essential for directing harmful gases outside your home. Start by connecting the draft hood to the top of the water heater. The vent pipe should be the same diameter as the draft hood outlet and made of approved materials like galvanized steel or aluminum.
Install the vent pipe with a slight upward slope (¼ inch per foot) to ensure proper draft. All horizontal runs should be supported every 4 feet to prevent sagging. When making connections, secure each joint with at least three sheet metal screws. The vent pipe should extend through the roof with appropriate flashing and termination cap to prevent water infiltration.
Remember these key points for venting:
– Maintain proper clearance from combustible materials
– Avoid excessive bends in the vent pipe
– Ensure all connections are tight and secure
– Install carbon monoxide detectors nearby
– Follow local building codes for specific requirements
If you’re unsure about any aspect of gas line or vent pipe installation, don’t hesitate to contact a licensed professional. The safety of your household depends on proper installation of these critical components.
Testing and Troubleshooting
Initial Startup Procedure
Before turning on your newly installed gas water heater, ensure all connections are secure and the tank is completely full of water. Open all hot water faucets in your home and let them run until you get a steady stream of water without any air bubbles. This prevents damage to your system and ensures an energy-efficient setup.
Check that the gas supply valve is fully open and inspect all gas connections using a soapy water solution – bubbles indicate a leak that needs immediate attention. If you detect any gas odor, exit the building immediately and contact your gas company.
With all safety checks complete, turn the temperature control to its lowest setting. Light the pilot light following your manufacturer’s instructions, typically by pressing and holding the pilot button while using the spark igniter. Once lit, continue holding the pilot button for about a minute before releasing.
Watch the pilot light for several minutes to ensure it stays lit. If successful, turn the temperature control to your desired setting (120°F is recommended for most households). Listen for the main burner to ignite and check for a steady blue flame, which indicates proper combustion.
Common Installation Issues
While installing a gas water heater, you might encounter several common installation mistakes that can affect performance and safety. One frequent issue is incorrect venting, which can lead to dangerous carbon monoxide buildup. If you notice unusual odors or poor water heating, double-check that your vent pipe is properly connected and angled upward.
Another common problem is improper gas line sizing. If your water heater isn’t heating efficiently, verify that your gas line diameter matches manufacturer specifications. Water connection issues often arise from cross-threading or over-tightening fittings. When you spot leaks, try loosening and carefully re-tightening connections, ensuring proper alignment.
Temperature and pressure relief valve problems can occur if the valve is improperly installed or blocked. If you notice water dripping from the valve, check for proper installation height and clear any obstructions. Remember, a professional plumber can quickly diagnose and fix these issues if you’re unsure about handling them yourself. Most problems can be prevented by carefully following installation instructions and not rushing the process.

Installing a gas water heater is a significant undertaking that requires careful attention to detail and a strong commitment to safety. Throughout this guide, we’ve covered the essential steps, from gathering the necessary tools and materials to properly venting the system and testing for leaks. While many homeowners successfully install their gas water heaters, it’s crucial to recognize when a project might be beyond your comfort level or expertise.
Remember that proper installation is not just about convenience – it’s about the safety of your home and family. Even small mistakes in gas line connections, venting, or temperature settings can lead to serious consequences. If at any point during the installation process you feel uncertain or encounter unexpected challenges, don’t hesitate to contact a licensed plumber or gas technician.
Key points to keep in mind include always checking local building codes and obtaining necessary permits, ensuring proper ventilation, maintaining appropriate clearances, and conducting thorough leak tests. The extra time spent double-checking connections and following safety protocols is always worth the effort.
For those who’ve successfully completed their installation, congratulations! Be sure to keep your manufacturer’s manual in a safe place and schedule regular maintenance checks to extend the life of your new water heater. If you’ve decided that professional installation is the better choice for your situation, that’s an equally wise decision. The most important outcome is having a safely installed, efficiently operating gas water heater that provides reliable hot water for years to come.