Transform your woodworking practice with ancient Japanese joinery techniques that eliminate the need for metal fasteners and create stunning, long-lasting furniture. Master the art of kumiko patterns using sustainably harvested woods like cypress and cedar, combining traditional craftsmanship with modern eco-friendly crafting techniques. Experience the meditative precision of hand-cut joints while creating minimal waste, as Japanese woodworking emphasizes using every part of the material purposefully.
From elegant shoji screens to sophisticated tansu cabinets, Japanese woodworking projects offer a perfect blend of functionality and aesthetic harmony. These time-tested methods not only produce beautiful, durable pieces but also foster a deeper connection with natural materials and traditional craftsmanship. Whether you’re crafting a simple chopstick rest or an intricate wooden box with complex joinery, each project teaches valuable lessons in patience, precision, and sustainable woodworking practices.
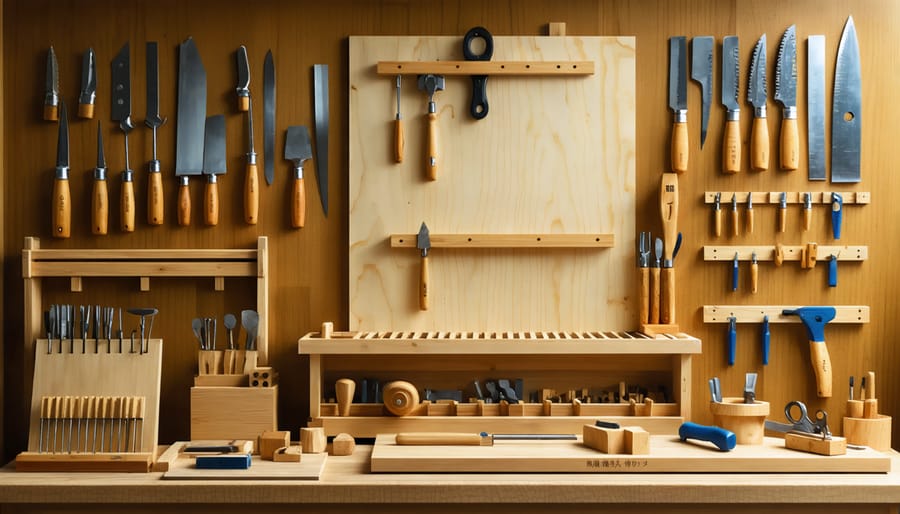
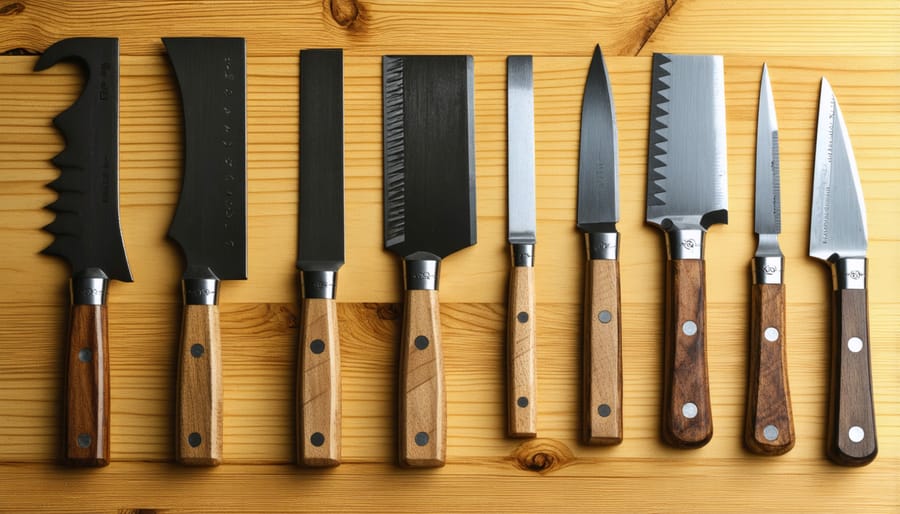
Begin your journey into Japanese woodworking with essential tools like the dozuki saw, marking knife, and chisel set, understanding that mastery comes from respecting both the material and the process. These projects emphasize working with the wood’s natural properties rather than against them, resulting in pieces that will last for generations while honoring the environment.
The Sustainable Foundations of Japanese Woodworking
Zero-Waste Design Philosophy
Japanese woodworking embraces a profound respect for materials that goes beyond mere craftsmanship. At its heart lies the principle of mottainai – a cultural concept that teaches us to avoid waste and use resources with gratitude. This philosophy shapes every aspect of Japanese woodworking, from material selection to project completion.
Traditional Japanese woodworkers are masters at maximizing every piece of wood they work with. They carefully plan their cuts to utilize even the smallest pieces, often incorporating these into smaller projects or decorative elements. When working with precious hardwoods, craftsmen often create paper templates first to ensure optimal material usage and minimize mistakes.
This waste-conscious approach extends to wood scraps and sawdust. Small offcuts become wooden pegs (known as dowels) for joinery, while sawdust is collected and sometimes mixed with natural glues to fill gaps or create putty. Even wood shavings find purpose, traditionally used as packaging material or garden mulch.
The zero-waste mindset also influences design choices. Japanese woodworkers often leave natural edges intact, embracing the wood’s inherent character rather than forcing it into rigid geometric shapes. They work with the grain patterns and natural features of the wood, turning what might be considered imperfections in Western woodworking into aesthetic focal points.
By adopting these principles, modern woodworkers can both honor this traditional approach and contribute to environmental sustainability, creating beautiful pieces that minimize waste and maximize resource efficiency.
Traditional Tools and Their Environmental Impact
In Japanese woodworking, the choice between traditional hand tools and modern power tools isn’t just about preserving culture – it’s also about environmental impact. Hand tools like chisels, planes, and saws require no electricity and typically last for generations when properly maintained. This longevity means fewer tools end up in landfills, reducing waste and resource consumption.
While power tools might seem more efficient, they come with a significant environmental footprint. They require electricity, generate noise pollution, and often need replacement parts or complete replacement after a few years. In contrast, Japanese woodworking tools are designed to be resharpened and maintained indefinitely, creating a smaller environmental impact over their lifetime.
The sawdust produced by hand tools is generally coarser and heavier than the fine dust from power tools, making it easier to collect and less likely to become airborne. This not only creates a healthier working environment but also makes the waste more suitable for composting or garden use.
Additionally, working with hand tools often results in more precise cuts and less material waste, as craftspeople tend to be more mindful and deliberate with each action. This careful approach naturally leads to more sustainable woodworking practices, helping preserve our valuable timber resources for future generations.
Essential Japanese Joinery Techniques
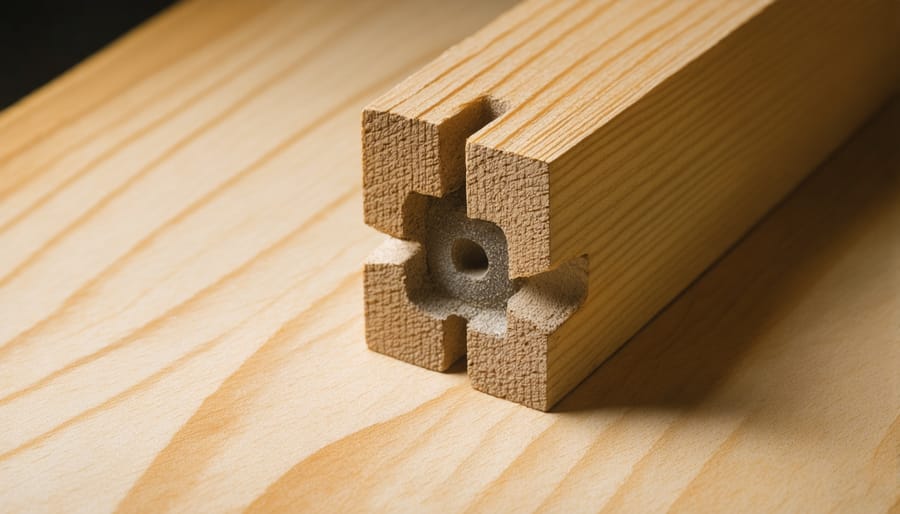
Mortise and Tenon Joints
The mortise and tenon joint is one of the most fundamental and elegant connections in Japanese woodworking, embodying the essence of traditional craft techniques. This joint consists of two parts: the mortise (a cavity or pocket) and the tenon (a protruding piece that fits snugly into the mortise).
For beginners, start with a simple straight mortise and tenon. First, mark your mortise dimensions clearly on the receiving piece using a marking gauge. The mortise should typically be one-third the thickness of your stock. Next, carefully chisel out the mortise, working from the center outward to prevent splitting. Take your time here – patience is crucial for clean edges.
To create the tenon, mark its dimensions precisely on the end of your joining piece. The tenon should fit snugly in the mortise with just enough room for a thin coat of glue. Use a pull saw to cut the shoulders and cheeks of the tenon, staying just outside your marking lines. Fine-tune the fit with a sharp chisel, testing frequently.
Remember that Japanese joinery emphasizes precision over force. Your joint should come together with gentle pressure, not hammering. A well-made mortise and tenon can last generations and often doesn’t require mechanical fasteners or glue, though modern woodworkers often use both for added security.
Practice this joint on scrap pieces before attempting it on your project. As you gain confidence, you can explore variations like angled joints or through-tenons that add visual interest to your work.
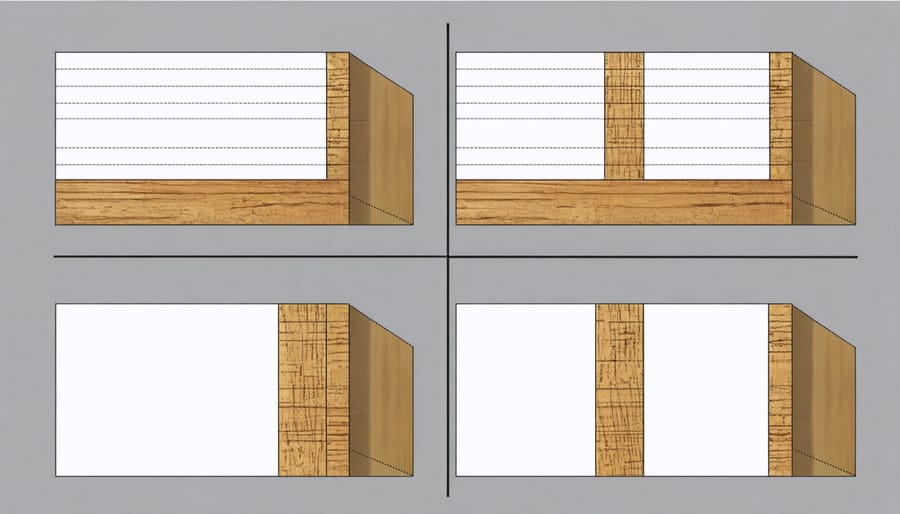
Dovetail Variations
The art of Japanese dovetail joinery takes the familiar Western dovetail and elevates it to new heights of precision and beauty. While traditional dovetails connect at 90-degree angles, Japanese craftsmen have developed several unique variations that offer both enhanced strength and visual appeal.
The most common variation is the stepped dovetail (kamatsugi), which features multiple levels that lock together like a three-dimensional puzzle. This joint not only provides exceptional strength but also creates an interesting visual detail that many woodworkers choose to highlight rather than hide.
Another fascinating variation is the gooseneck dovetail (kama-tsugi), which combines a curved profile with traditional dovetail principles. This joint is particularly useful in projects where wood movement needs to be accommodated while maintaining structural integrity.
For more decorative applications, the butterfly dovetail (chōchin-hozo) offers both strength and visual interest. Unlike standard dovetails, this joint is often used as a surface feature to connect two boards side by side or to prevent cracks from spreading.
When creating these joints, remember these essential tips:
– Always mark your cuts with a knife rather than a pencil for greater precision
– Use pull saws for cleaner, more controlled cuts
– Work slowly and check fits frequently
– Consider grain direction when laying out your joints
– Practice on scrap wood before attempting complex variations
While these joints require patience and practice to master, they offer unparalleled strength and can transform ordinary woodworking projects into extraordinary pieces of craftsmanship.
Beginner-Friendly Sustainable Projects
Japanese Tool Box
Creating a Japanese-style tool box is a perfect weekend project that combines functionality with traditional aesthetics. This simple yet elegant storage solution will help you organize your woodworking tools while practicing essential joinery techniques.
Materials needed:
– Cedar or pine boards (¾” thick)
– Wood glue
– Japanese pull saw
– Chisels
– Marking gauge
– Pencil
– Sandpaper (120 and 220 grit)
Step 1: Prepare Your Boards
Cut your boards to the following dimensions:
– Two sides: 8″ × 14″
– Two ends: 8″ × 6″
– Bottom: 14″ × 6″
– Lid: 15″ × 7″
Step 2: Create the Joints
Mark and cut finger joints on all four corners. These joints provide both strength and visual appeal. Use your marking gauge to ensure consistent spacing, typically ½” between fingers.
Step 3: Bottom Assembly
Create a ¼” groove along the bottom edge of all four sides to house the bottom panel. This traditional dado joint ensures a sturdy base while allowing for wood movement.
Step 4: Test Fit
Dry-fit all pieces before applying any glue. Make adjustments as needed for a snug fit. The joints should come together with minimal force.
Step 5: Assembly
Apply a thin layer of wood glue to all joints. Assemble the box, ensuring square corners. Use gentle clamp pressure and wipe away excess glue immediately.
Step 6: Lid Creation
Fashion a simple sliding lid by adding grooves to the upper inside edges of the long sides. The lid should slide smoothly but not too loosely.
Step 7: Final Touches
Once the glue has dried, sand all surfaces progressively, starting with 120-grit and finishing with 220-grit sandpaper. Apply a natural oil finish to protect the wood while maintaining its natural beauty.
This tool box design emphasizes clean lines and practical functionality, hallmarks of Japanese woodworking. The finished piece will not only store your tools effectively but also serve as a testament to traditional craftsmanship.
Wooden Rice Scoop (Shamoji)
The shamoji, or traditional Japanese rice scoop, is a perfect beginner-friendly project that combines functionality with elegant simplicity. Like many artisanal home accessories, this utensil carries cultural significance while serving a practical purpose in your kitchen.
To craft your own shamoji, start with a piece of hardwood like maple or cherry, roughly 12 inches long, 4 inches wide, and 1 inch thick. Cherry is particularly suitable as it’s naturally antibacterial and won’t impart any flavors to your food. Begin by drawing your scoop template – the classic shape resembles an elongated oval with a handle.
Using a bandsaw or coping saw, cut out the basic shape. Next, create the gentle bowl of the scoop using a gouge chisel or curved spokeshave. Work slowly and deliberately, checking your progress frequently. The goal is to achieve a smooth, shallow depression that’s approximately ¼ inch deep at its center.
Shape the handle using a combination of rasps and sandpaper, ensuring it feels comfortable in your grip. The transition from handle to scoop should be gradual and ergonomic. Sand the entire piece progressively, starting with 80-grit and working your way up to 220-grit for a silky-smooth finish.
For food safety, finish your shamoji with food-grade mineral oil or walnut oil. Apply several thin coats, allowing each to absorb completely. This not only protects the wood but also brings out its natural beauty. After 24 hours of drying, your shamoji is ready for use.
Remember to hand wash your scoop with mild soap and warm water, and occasionally reapply oil to maintain its protective finish. With proper care, your handcrafted shamoji will become a cherished kitchen companion for years to come.
Sourcing Sustainable Materials
Local Wood Options
While traditional Japanese woodworking often calls for specific Asian wood species, you can achieve similar results using sustainable local alternatives. Start by connecting with nearby sawmills, lumber yards, and arborists who can provide locally harvested woods. Many urban tree services also offer milled lumber from removed trees, giving these materials a second life in your projects.
For lighter woods traditionally used in Japanese joinery, consider locally sourced maple, birch, or poplar. These woods offer similar working properties to Japanese white pine (shiraki) and are excellent for detailed joinery work. Cherry and walnut make fantastic substitutes for darker Japanese hardwoods, providing beautiful grain patterns and excellent durability.
Look for FSC-certified suppliers in your area who can verify the sustainability of their wood sources. Many local woodworking groups and online forums can point you toward reliable suppliers who practice responsible forestry. Consider using reclaimed wood from old buildings or furniture – this not only provides unique character but also reduces environmental impact.
Before purchasing, ensure the wood is properly dried and acclimated to your local climate. Most Japanese woodworking techniques require wood with moisture content between 8-12%. Ask suppliers about their drying methods and storage conditions. Remember that locally sourced wood often comes with a story of its origin, adding a meaningful dimension to your projects while supporting your local economy and reducing transportation emissions.
Reclaimed Wood Resources
Embracing the Japanese philosophy of mottainai (avoiding waste), incorporating reclaimed wood into your projects adds character and environmental consciousness to your work. Here are several reliable sources for finding quality reclaimed materials:
Architectural salvage yards often stock vintage Japanese wood elements, including tansu chest components and traditional door frames. These pieces typically feature beautiful aged hinoki cypress or keyaki elm, perfect for smaller projects.
Local construction sites and renovation projects can be goldmines for salvaged wood. Build relationships with contractors and ask about collecting discarded materials. Just ensure you have proper permission before taking anything.
Online marketplaces and community boards frequently list old Japanese furniture or demolished traditional homes’ materials. Look for keywords like “vintage Japanese,” “antique tansu,” or “traditional timber.”
Before using reclaimed wood, follow these essential preparation steps:
– Clean thoroughly with a soft brush to remove dirt and debris
– Check for and remove all metal objects like nails
– Allow wood to acclimate to your workspace for at least two weeks
– Test moisture content with a meter (aim for 8-12% for interior projects)
– Sand lightly to reveal the wood’s natural beauty while preserving its patina
Remember that reclaimed wood may have slight imperfections – embrace these as wabi-sabi elements that add unique character to your projects. For structural pieces, always verify the wood’s integrity before use.
As we’ve explored throughout this guide, Japanese woodworking techniques offer a remarkable pathway to creating sustainable, beautiful home projects that stand the test of time. By embracing these traditional methods, you’re not just crafting furniture – you’re participating in a centuries-old practice that prioritizes environmental responsibility and lasting quality.
The use of joinery instead of metal fasteners reduces waste and creates stronger connections that can be repaired rather than replaced. This approach naturally extends the life of your pieces while minimizing your environmental impact. The focus on working with wood’s natural properties rather than against them results in pieces that move and age gracefully with your home.
Perhaps most importantly, Japanese woodworking techniques teach us to be more mindful consumers and creators. By carefully selecting materials, making precise cuts, and creating pieces that last generations, we reduce our overall consumption and waste. The satisfaction of creating something beautiful and durable using these methods far exceeds the temporary pleasure of quick-fix solutions.
Whether you’re just starting with simple joints or advancing to more complex projects, incorporating these techniques into your woodworking practice will enhance both your skills and your home’s sustainability. Remember, every project you complete using these methods represents a step toward a more sustainable future, while honoring a remarkable crafting tradition that has proven its worth over centuries.
Consider starting small, but thinking long-term. Your journey into Japanese woodworking isn’t just about creating beautiful pieces – it’s about adopting a more sustainable approach to home improvement that benefits both your living space and the environment.