Transform your home into a haunted Halloween haven with authentic vintage decorations that capture the nostalgic charm of Halloween’s golden age. Create paper mache jack-o’-lanterns using period-correct techniques from the 1920s and 1930s, featuring classic triangle eyes and crooked grins. Display antique-inspired crepe paper decorations in traditional Halloween colors – vibrant orange, deep black, and harvest yellow – draped elegantly across mantels and doorways. Position reproduction Victorian die-cut black cats, witches, and grinning skeletons throughout your space, mixing genuine vintage finds with carefully crafted DIY pieces that honor original designs. Illuminate your vintage vignettes with reproduction electric candoliers featuring flickering amber bulbs, replicating the warm, spooky glow that defined mid-century Halloween celebrations. These time-tested decoration methods blend historical authenticity with modern safety standards, creating an enchanting atmosphere that celebrates Halloween’s rich decorative heritage.
The Charm of Classic Halloween Paper Decorations
Die-Cut Paper Decorations
Die-cut paper decorations were a Halloween staple from the 1920s through the 1950s, and their charm lies in their delightfully spooky yet whimsical designs. These flat paper cutouts typically featured black cats with arched backs, grinning jack-o’-lanterns, and cackling witches on broomsticks, often accented with vibrant orange and black colors.
To incorporate these classic decorations into your vintage Halloween display, you can either hunt for authentic pieces at antique stores and online marketplaces or create your own using printed templates. For a DIY approach, start with heavy black and orange cardstock, print out vintage-inspired templates, and carefully cut along the lines with sharp scissors or a craft knife.
Traditional placement includes taping these decorations to windows, hanging them from string to create festive garlands, or arranging them on walls in playful scenes. For added authenticity, look for designs with embossed details and articulated joints that allow the figures to move when touched by a breeze.
Pro tip: To protect original vintage die-cuts, display them behind glass in vintage-style frames. If you’re creating your own, distress the edges slightly with sandpaper and apply a light coat of coffee stain to achieve that coveted aged appearance. Remember to store these delicate decorations flat between sheets of acid-free paper to preserve them for future Halloween seasons.

Honeycomb Tissue Decorations
No vintage Halloween display is complete without the iconic honeycomb tissue decorations that were a staple of mid-century celebrations. These accordion-style paper decorations, particularly the classic orange pumpkins and mysterious black cats, add an authentic touch that instantly transports you back to Halloween parties of the 1950s and 60s.
The beauty of honeycomb decorations lies in their versatility and impact. When collapsed, they store flat, but once expanded, they create striking 3D displays that can transform any space. The traditional designs feature bold, simple colors with charming facial expressions – grinning jack-o’-lanterns and wide-eyed black cats being the most sought-after varieties.
To incorporate these nostalgic pieces into your décor, try clustering several honeycomb pumpkins of different sizes on a mantel, or hang black cats in windows where they can cast spooky shadows. Original vintage pieces can be found at antique stores and online marketplaces, though modern reproductions capture the same charm while being more affordable and durable.
Pro tip: When working with vintage honeycomb decorations, handle them gently as the tissue paper can become brittle with age. Store them flat between uses, away from moisture and direct sunlight, to preserve their condition for future Halloween seasons. For added authenticity, pair them with crepe paper streamers and vintage-style die-cut cardboard decorations.
Creating Authentic Vintage Lighting Ambiance
Vintage-Style Electric Lanterns
Vintage-style electric lanterns are a perfect way to capture the eerie charm of classic Halloween decor while incorporating modern lighting design techniques. These reproduction pieces combine the nostalgic appeal of antique lanterns with the safety and convenience of electric lighting, making them ideal for both indoor and outdoor Halloween displays.
Look for lanterns featuring amber or orange-tinted glass, weathered metal finishes, and classic Victorian or Gothic designs. Many modern reproductions come with flickering LED bulbs that perfectly mimic the dancing flames of oil lanterns, creating an authentic vintage ambiance without the fire hazard.
To style these lanterns effectively, place them strategically around your entryway, porch steps, or window sills. Create depth by clustering different sizes together or hanging them at varying heights. For an extra spooky touch, wrap thin, black branches or vintage-style cobwebs around the lantern bases.
Pro tip: Choose battery-operated lanterns for outdoor placement to avoid unsightly cords. Inside, incorporate them into tablescapes alongside vintage Halloween postcards and black cats, or use them to illuminate dark corners for an instantly haunting atmosphere. Remember to look for weather-resistant options if you’re planning to use them outdoors.

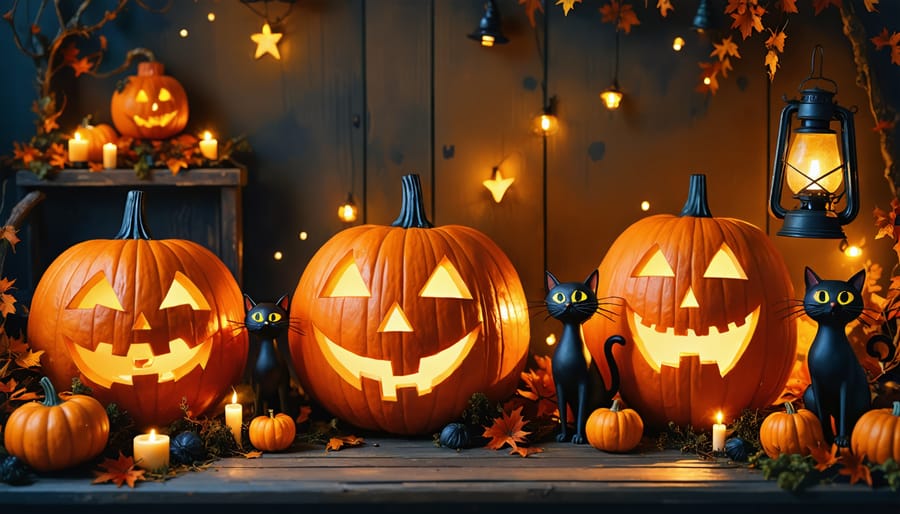
Classic Jack-o’-Lantern Displays
Nothing captures the nostalgia of Halloween quite like traditionally carved jack-o’-lanterns displayed on your porch. To create an authentic vintage feel, opt for classic face designs featuring triangular eyes, a broad nose, and a toothy grin – the same beloved patterns that have illuminated October nights since the early 1900s.
Arrange your pumpkins in graduated sizes on hay bales or weathered wooden crates for that perfect farmhouse vintage look. Consider using multiple pumpkins with varying expressions, from friendly grins to spooky scowls, to create visual interest. For authentic period lighting, skip the modern LED lights and opt for real candles in glass holders, just as our grandparents did.
To preserve these traditional designs, start by sketching your pattern on paper first. Transfer it to your pumpkin using push pins to create dotted outlines. When carving, use simple kitchen tools like large spoons and paring knives – the same implements used generations ago. For added vintage charm, surround your jack-o’-lanterns with heritage items like antique lanterns, dried corn stalks, or weathered metal watering cans.
Remember to place your pumpkins strategically near your entryway, creating welcoming pools of flickering light that guide trick-or-treaters to your door, just as they have for decades.

Antique-Inspired Table Decorations
Vintage Party Favors and Place Settings
Transform your Halloween gathering into a nostalgic celebration with carefully curated vintage-inspired party favors and place settings. Start with classic paper place cards featuring black cats, jack-o’-lanterns, or witches, which were popular in the 1920s and ’30s. Create your own by printing vintage Halloween images on cream-colored cardstock, or age modern cards with coffee stains and careful distressing.
For authentic party favors, consider small paper boxes filled with classic candies like butterscotch drops or vintage-style chocolate kisses. Wrap them in crepe paper featuring traditional Halloween colors – orange, black, and deep purple. Add paper doilies underneath place settings to evoke the elegant touch common in mid-century entertaining.
Incorporate traditional party games by placing small fortune-telling cards or paper palm-reading guides at each setting. These were hugely popular at Halloween parties from the 1900s through the 1950s. Complete each place setting with reproduction tin noisemakers or paper party horns decorated with classic Halloween motifs.
For centerpieces, arrange small paper mache jack-o’-lanterns or black cats from the 1940s style (or modern reproductions) along the table. Scatter vintage-style pressed paper decorations between place settings – these were common party favors during the golden age of Halloween celebrations and can be easily found or recreated today.
Remember to include traditional party menus or dance cards at each setting – these small details help create an immersive vintage atmosphere that your guests will love.
Centerpiece Arrangements
Create enchanting vintage-inspired centerpieces that capture the spooky-yet-sophisticated charm of Halloween’s golden age. Start with a classic black milk glass vase or a weathered brass container as your base. Fill it with dried autumn leaves, twisted branches, and preserved flowers in deep oranges and rich purples to establish that authentic vintage feel.
For a truly nostalgic touch, incorporate traditional Halloween symbols like black cats, owls, and witches using antique-style paper cutouts or small figurines from thrift stores. Position these elements among natural materials like gourds, mini pumpkins, and Indian corn to create depth and visual interest.
Consider crafting a haunting scene using vintage Halloween postcards propped up among mercury glass candleholders. Add texture with strands of aged-looking crepe paper in classic Halloween colors – orange, black, and deep purple. Victorian-inspired paper die-cuts make perfect accent pieces when scattered throughout the arrangement.
Don’t forget the lighting element – place authentic vintage or reproduction candlesticks with black or orange taper candles to cast ethereal shadows. For safety, LED flameless candles work wonderfully while maintaining the vintage aesthetic. Complete your centerpiece with carefully placed cobweb material, being careful not to overwhelm the arrangement – remember, vintage Halloween decor was typically more restrained than modern versions.
Pro tip: Visit estate sales and antique shops in early fall to find genuine vintage pieces that can become the focal points of your arrangements. These authentic touches will give your centerpieces that coveted old-world charm that’s impossible to replicate with modern items alone.
DIY Vintage Halloween Projects
Aging Techniques for New Decorations
Creating an authentic vintage look for new Halloween decorations doesn’t require decades of aging – just a few clever techniques and common household items. Start by lightly sanding painted surfaces to create natural wear patterns, focusing on edges and high-contact areas where genuine antiques typically show age.
For paper decorations, brew strong black tea and carefully dab it onto the surfaces to create a natural yellowing effect. Once dry, gently crumple the paper and smooth it back out to add authentic-looking creases and wear marks. Coffee grounds can also be used to create subtle staining and add depth to aged appearances.
To weather metallic items, mix equal parts vinegar and salt in a spray bottle. Mist the solution onto the surface and let it sit overnight – this creates a natural patina effect. For plastic decorations meant to look like aged ceramics or metals, dry-brush techniques work wonders: use a nearly dry brush with brown or gray paint to highlight raised areas and create the illusion of collected dust and age.
Give fabric decorations an aged appearance by soaking them in a mixture of water and vanilla extract, then allowing them to air dry. This creates a slightly worn, vintage color while adding a subtle antique scent. For an extra touch of authenticity, carefully fray edges and add small strategic tears that can be reinforced with hidden stitches.
Remember that authentic vintage pieces often show uneven aging, so vary your techniques across different parts of each decoration. The key is to work gradually – it’s easier to add more aging effects than to correct heavy-handed weathering. Test your chosen technique on a small, hidden area first to ensure you’re happy with the results before treating the entire piece.
Handmade Vintage-Style Ornaments
Creating your own vintage-style Halloween ornaments adds a personal touch while keeping with authentic retro aesthetics. Plus, handmade decorations align perfectly with budget-friendly decorating tips while delivering that coveted nostalgic charm.
Start with classic paper decorations by crafting accordion-style black cats and grinning jack-o’-lanterns. Use brown kraft paper or aged sheet music for an authentic vintage look. Simply fold the paper accordion-style, trace your design, cut it out, and unfold to reveal a charming paper chain.
Cotton batting ghosts are quintessentially vintage and delightfully simple to make. Form a ball of cotton batting for the head, drape additional batting to create the body, and secure with white thread. Add black button eyes or felt cutouts for that classic spooky expression.
Transform plain craft pumpkins into vintage-inspired pieces using chalk paint in muted oranges and creams. Distress the edges with sandpaper and add hand-painted faces using traditional designs from the 1920s-1950s. For extra authenticity, spray them lightly with coffee to create an aged patina.
Create spooky silhouettes by cutting black cardstock into classic Halloween shapes – witches, black cats, and haunted houses. Mount them on aged paper or directly onto walls and windows. Add vintage-style details like scalloped edges or detailed witch hats for period accuracy.
Don’t forget to incorporate natural elements like dried corn husks, autumn leaves, and twisted branches – staples of vintage Halloween decorating. Arrange these with your handmade pieces to create authentic vintage-inspired vignettes throughout your space. Remember, imperfections add character and make your decorations look genuinely antique.
Embracing vintage Halloween decorations brings a special kind of magic to your seasonal celebrations, connecting us with decades of spooky traditions and timeless charm. Whether you’ve chosen to hunt for authentic pieces at antique stores, create your own DIY versions, or mix both approaches, you’re part of a growing community that values the character and craftsmanship of Halloween’s golden age.
Remember that vintage Halloween decorating isn’t about achieving perfection – it’s about creating an atmosphere that feels both nostalgic and personal. Start small with a few key pieces, like paper decorations or carved jack-o’-lanterns, and gradually build your collection over time. Don’t be afraid to mix eras or combine vintage-inspired items with authentic antiques.
The beauty of vintage Halloween décor lies in its ability to transform any space into a whimsical, slightly spooky wonderland that delights both children and adults alike. By incorporating these time-tested decorating ideas into your home, you’re not just decorating for a holiday – you’re preserving and celebrating Halloween’s rich decorative history for future generations to enjoy.