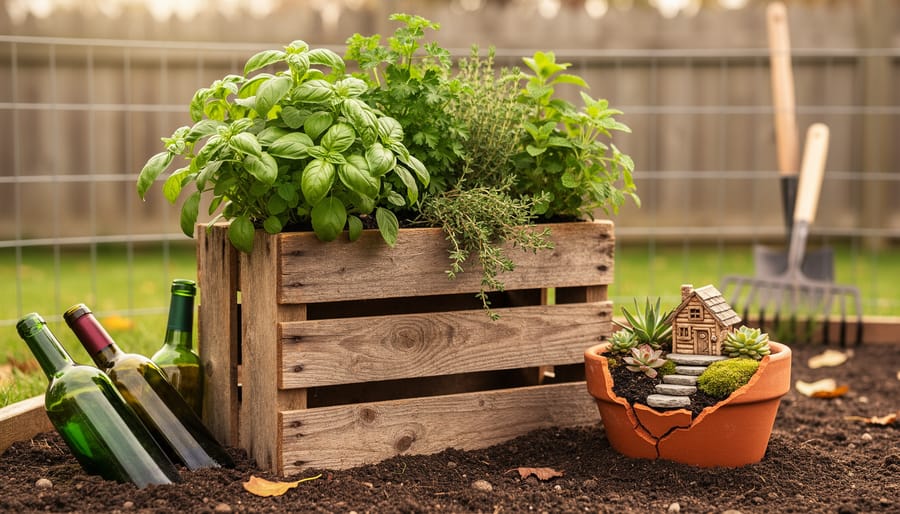
You can transform your garden into a sustainable oasis using materials you already have at home or can salvage for free. Old pallets become vertical planters, wine bottles turn into elegant garden borders, and broken terracotta pots convert into charming fairy gardens. These practical upcycling ideas require minimal tools, no special skills, and most projects take under two hours to complete.
The beauty of recycled garden projects lies in their accessibility. That stack of tin cans under your sink becomes a hanging herb garden. Wooden crates left over from deliveries transform into rustic storage bins or raised beds. Even items destined for the trash, like plastic bottles and cardboard, serve as effective seed starters and mulch alternatives.
What makes these projects particularly valuable right now is the rising cost of garden supplies and growing awareness about reducing household waste. Rather than spending hundreds on planters, edging, and decorative pieces, you’re repurposing items that cost nothing while keeping them out of waste streams. The projects ahead range from simple 15-minute builds to weekend undertakings, each designed to work with common household discards and basic tools you likely own.
Why Choose Recycled Materials for Your Garden
Using recycled materials in your garden delivers tangible benefits that extend far beyond the immediate project. You’ll save money while making a positive environmental impact, all while creating a garden space that reflects your personality and values.
The advantages of building your garden with reclaimed and repurposed items include:
- Reduces landfill waste by giving discarded items a second life
- Saves money on materials that would otherwise cost $50-$200 or more for new equivalents
- Adds unique character and conversation-starting elements to your outdoor space
- Supports the circular economy by keeping materials in use longer
- Reduces carbon footprint by avoiding manufacturing and transportation of new products
Beyond these practical advantages, working with recycled materials sparks creativity in ways that buying new never does. You’ll develop problem-solving skills as you figure out how to transform a wine bottle into edging or a pallet into a vertical planter. Each project becomes a puzzle where you match available materials to garden needs, often discovering solutions more interesting than store-bought alternatives.
This approach aligns perfectly with sustainable gardening principles. When you combine recycled planters with composting and water-conservation techniques, you’re building an entire ecosystem that minimizes waste and maximizes resources. The money you save on containers and structures can go toward quality soil amendments, seeds, or plants themselves, improving your garden’s overall health and productivity.
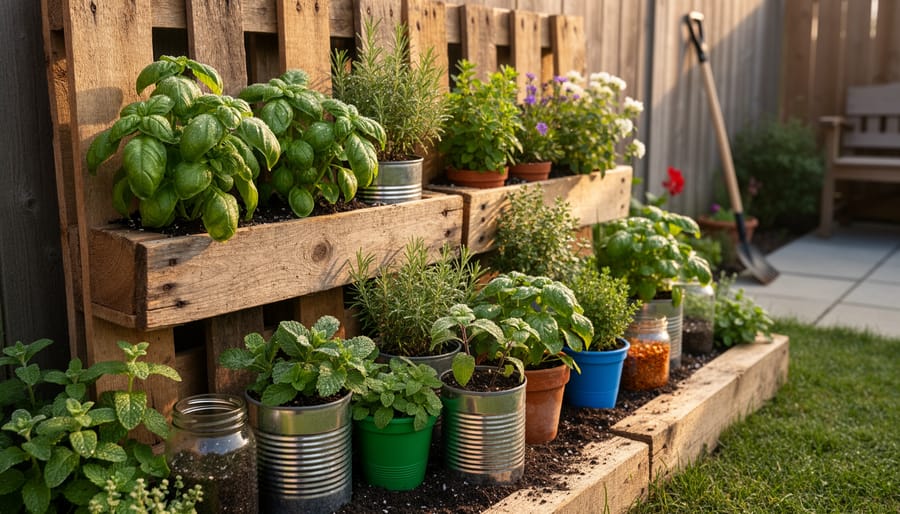
Tools and Materials You’ll Need
Most recycled garden projects require tools you probably already have in your garage or shed. The key is having the right basic equipment for cutting, joining, and finishing various materials safely.
Before you start any project, gather your essential tools and supplies:
- Cutting tools: Utility knife, scissors, hand saw or reciprocating saw, tin snips for metal cans, drill with various bits
- Fastening tools: Hammer, screwdriver set, cordless drill/driver, wood screws, nails, heavy-duty staple gun, wire or zip ties
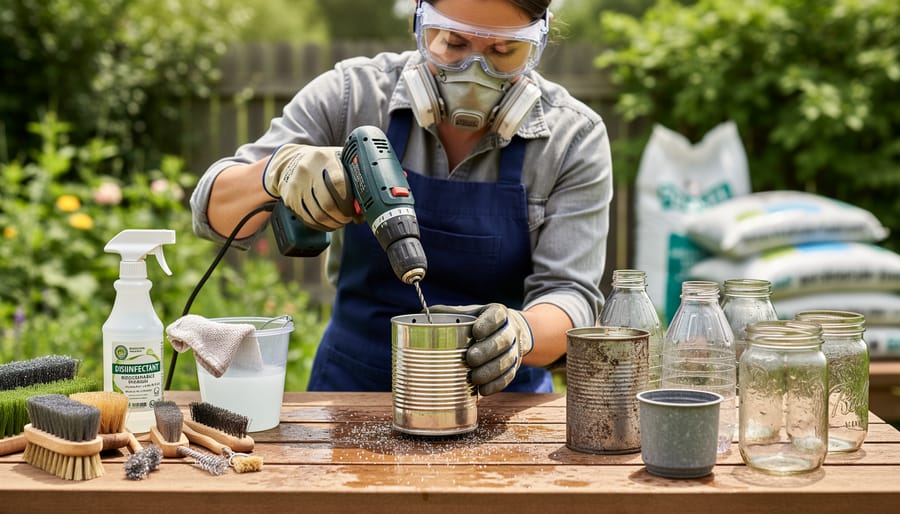
- Safety gear: Work gloves, safety glasses, dust mask, closed-toe shoes, ear protection for power tools
- Finishing supplies: Sandpaper or sanding block, outdoor paint or sealant, paintbrushes, cleaning rags, measuring tape
For most beginners, a basic toolkit covering cutting and fastening will handle 80% of recycled garden projects. You don’t need specialized equipment to transform tin cans into planters or stack tires into a raised bed. A drill makes jobs faster and easier, but many projects work fine with manual tools and elbow grease.
The safety equipment matters more than you might think when handling reclaimed materials. Old wood can have splinters or hidden nails, metal edges turn sharp when cut, and glass bottles require careful handling. Invest in quality work gloves and safety glasses first, they’ll protect you across every project. Keep a first aid kit nearby, especially when working with cutting tools or power equipment.
Safety Considerations When Working with Recycled Materials
Working with recycled materials demands careful attention to potential hazards that new materials do not carry. Before you repurpose any item for your garden, examine it thoroughly for sharp edges, rust, cracks, or structural weakness that could cause injury or failure during use.
Check all materials for chemical residues, especially containers that previously held pesticides, motor oil, solvents, or other toxic substances. Even after cleaning, these chemicals can leach into soil and harm plants or contaminate edible crops. Plastic containers marked with recycling codes 1, 2, 4, or 5 are generally safe for planting, while codes 3, 6, and 7 may release harmful chemicals when exposed to heat or soil moisture.
Wear protective equipment appropriate to the task. Heavy-duty gloves protect against cuts from metal edges and glass, while safety glasses shield your eyes when cutting or drilling reclaimed materials. A dust mask is essential when sanding old wood or working with materials that might release particles, and closed-toe shoes prevent foot injuries from dropped items.
Inspect wooden materials for rot, which compromises structural integrity, and metal items for sharp protrusions or weak spots from corrosion. Sand rough edges smooth and file down sharp metal corners before incorporating materials into your garden projects.
15 DIY Garden Ideas Using Recycled Materials
Container Planters from Household Items
Almost anything in your home can become a container planter with a few simple preparations. The beauty of household items is that they already have the character and size variety that expensive store-bought pots lack, and you’re keeping functional objects out of landfills.
Start by gathering potential containers. Tin cans from canned vegetables or coffee, plastic bottles (especially 2-liter soda bottles), old colanders or strainers, worn-out boots or shoes, and vintage tea kettles all make excellent planters. Look for items with interesting shapes, colors, or textures that will add personality to your garden space.
The basic preparation process is the same regardless of which container you choose:
- Clean the container thoroughly with soap and water, removing any labels, residue, or food particles that could harbor bacteria or attract pests.
- Create drainage holes in the bottom using a drill, hammer and nail, or heated metal tool for plastic. Aim for 3-5 small holes depending on container size to prevent waterlogging.
- Add a thin layer of small pebbles or broken pottery pieces at the bottom to improve drainage and prevent soil from washing out the holes.
- Fill with quality potting mix, leaving about an inch of space at the top, then plant your chosen herbs, flowers, or small vegetables.
For decoration, tin cans can be painted with outdoor acrylic paint or wrapped in twine or fabric. Leave plastic bottles clear to show root growth, or paint them with spray paint designed for plastic. Boots and kettles often look best in their original patina, though a light sanding and clear sealant can preserve weathered metal.
Group different-sized containers together on steps, shelves, or hanging from hooks to create visual interest. Smaller containers like tea kettles work beautifully for succulents or herbs, while larger plastic bottles can support tomatoes or peppers when cut in half horizontally.
Pallet Garden Projects
Wooden pallets offer remarkable versatility for garden projects, transforming from shipping materials into functional garden features at minimal cost.
Start by selecting the right pallets. Look for stamps reading “HT” (heat-treated), which are safe for gardens, and avoid “MB” (methyl bromide), which indicates chemical treatment harmful to plants and soil. Inspect each pallet for damage, rot, or signs of chemical spills before bringing them into your garden space.
For vertical gardens, stand a pallet upright and secure landscape fabric or burlap to the back and sides, creating pockets between slats. Fill these with potting soil and plant herbs, strawberries, or flowers. This space-saving design works brilliantly on balconies or against walls.
Raised beds require disassembling pallets and cutting boards to your desired dimensions. Stack and secure boards with corner posts, creating a frame 6-12 inches high. Line the interior with landscape fabric if you’re concerned about soil contact with wood.
Compost bins are perhaps the simplest pallet project. Stand three pallets on edge forming a U-shape, securing corners with wire or zip ties. Add a fourth pallet as a removable front panel for easy access to finished compost. The slatted design provides excellent airflow while containing materials.
Tire Planters and Garden Borders
Old tires can become striking garden features with proper preparation and safety awareness. Start by scrubbing tires thoroughly with soapy water and a stiff brush, then rinse completely. Before painting, consider that toxic chemicals from tire rubber may leach into soil, so use these planters for ornamental flowers rather than edibles.
For painted planters, apply outdoor primer followed by two coats of exterior latex or spray paint in bold colors. Stack two or three tires of graduating sizes to create tiered gardens, securing each level with landscape adhesive. Fill the bottom third with gravel for drainage before adding potting mix.
Tire borders work beautifully along pathways when half-buried vertically, creating scalloped edges. Alternate colors for visual interest, or paint them to match your garden’s color scheme. For stability, dig a trench about four inches deep and pack soil firmly around each tire.
Cut tires in half to make smaller planters or use whole tires laid flat for sprawling plants like strawberries. One tire yields multiple projects when you separate the sidewalls from the tread.
Glass Bottle Garden Edging and Decorations
Glass bottles, beer, wine, or soda, create stunning garden borders that capture sunlight while keeping weeds at bay. Start by collecting bottles in coordinating colors; brown, green, and clear create beautiful patterns when arranged together.
Bottle Preparation and Installation:
Dig a trench 4-6 inches deep along your desired border line. Remove labels by soaking bottles in warm, soapy water overnight, then scrubbing off residue. Rinse thoroughly and check for chips or cracks.
Bury bottles neck-down at a 30-45 degree angle, leaving about two-thirds visible above ground. Pack soil firmly around each bottle, ensuring they’re stable. Space them touching or slightly overlapping for a solid barrier that prevents grass encroachment.
For light catchers, hang bottles from tree branches using twine wrapped around the neck. Fill partially with colored water for enhanced shimmer. Create mini cloches by cutting bottle bottoms off with a glass cutter and placing over seedlings for frost protection.
Combine bottle borders with other repurposed materials, the same creative approach you’d use to restore old furniture applies to garden projects. Mix bottle colors deliberately or create ombre effects by gradually transitioning shades along the border length.
Reclaimed Wood Garden Structures
Old fence boards, broken furniture, and wooden shipping crates become versatile garden structures through budget-friendly upcycling. For a simple trellis, nail or screw together three fence boards in a ladder configuration, then lean against a wall or anchor in the ground for climbing plants like tomatoes, beans, or morning glories. Plant markers are the easiest project: cut small pieces of wood, sand one end to a point, and write plant names with permanent marker or wood-burning tools.
Raised beds require more lumber but follow straightforward construction. Stack and secure four boards in a rectangular frame, adding corner braces from scrap pieces for stability. Before use, verify the wood hasn’t been treated with harmful chemicals like creosote or CCA (chromated copper arsenate) by checking stamps or avoiding railroad ties and older pressure-treated lumber.
Weatherproofing extends lifespan significantly. Apply linseed oil, outdoor wood stain, or non-toxic sealers to prevent rot and splitting. Let treated wood cure for several days before planting. Even with protection, expect reclaimed wood structures to last 3-5 years before needing replacement or repair.
Egg Carton Seed Starters
Cardboard egg cartons make perfect seed-starting trays because they’re free, biodegradable, and provide individual compartments for each seedling. When transplant time arrives, you can plant the entire cell directly in the ground without disturbing roots.
- Cut the lid off the egg carton and poke a small drainage hole in the bottom of each cup using a pencil.
- Fill each compartment three-quarters full with seed-starting mix or finely sifted compost.
- Plant seeds according to packet depth recommendations, typically two seeds per cell.
- Water gently using a spray bottle to avoid washing seeds away, keeping soil consistently moist but not soggy.
- Place the carton on a tray to catch drainage and position in a warm spot with adequate light.
- Once seedlings develop their second set of true leaves and outdoor conditions are suitable, separate individual cells and plant them directly in the garden, tearing away any carton edges above soil level.
These biodegradable egg carton planters work best for vegetables and flowers with shorter root systems like lettuce, herbs, marigolds, and zinnias. The cardboard decomposes within weeks after planting, eliminating transplant shock.
Newspaper and Cardboard Mulch and Weed Barriers
Newspaper and cardboard are surprisingly effective materials for suppressing weeds while simultaneously feeding your soil. This method, called sheet mulching, blocks sunlight to prevent weed germination while breaking down over time to add organic matter.
Start by removing any large weeds from your garden bed. Lay down newspaper in 4-6 sheet layers, overlapping edges by several inches to prevent gaps where weeds can emerge. Cardboard works even better for persistent weeds, flattened moving boxes or shipping boxes are ideal. Wet each layer thoroughly as you go; moisture speeds decomposition and keeps materials from blowing away.
Cover the paper or cardboard with 2-3 inches of organic mulch like wood chips, straw, or shredded leaves. This protective layer holds everything in place and looks more attractive than bare newspaper.
Within 3-6 months, the paper materials will decompose completely, enriching your soil just like composting does. You can plant directly through the barrier by cutting X-shaped slits, or wait for full decomposition. This technique works particularly well for establishing new garden beds or converting lawn areas into planting space without digging.
Plastic Container Self-Watering Systems
Cut a 2-liter soda bottle in half. Poke a small hole in the cap, thread a cotton wick or strip of old t-shirt through it, and screw the cap back on. Fill the top half (now inverted) with potting soil, letting the wick dangle through the cap into the bottom reservoir. Plant your seedlings or herbs in the soil. Fill the bottom half with water, then nestle the inverted top into it so the wick reaches the water. The fabric draws moisture up to the roots as the soil dries.
For larger containers, use plastic storage bins. Drill holes in a smaller bin’s bottom, place it inside a slightly larger bin, and run wicks from the upper bin down into the water reservoir below. Add soil and plants to the top bin. This setup keeps roots consistently moist without daily watering, perfect for busy schedules or vacation periods.
Check water levels weekly by lifting the top section slightly. Refill when the reservoir runs low. These systems reduce overwatering and help plants thrive with minimal effort.
Integrating Recycled Materials with Composting Systems
Recycled materials aren’t just for visible garden projects, they’re ideal for building the infrastructure that supports simple composting systems. Wooden pallets make excellent three-bin compost systems: stack two or three pallets upright for each bin’s walls, securing them with wire or rope, and leave the front open for easy turning access. The gaps between slats provide the airflow compost needs without letting material spill out. For smaller spaces, large plastic storage bins or old trash cans work brilliantly. Drill ventilation holes around the sides and bottom, add a tight-fitting lid to keep pests out, and you’ve got a compact composter that fits on a balcony or patio.
Many common household items can support your composting setup:
- Wire mesh or old window screens for sifting finished compost
- Punctured plastic bins with lids for contained hot composting
- Wooden fruit crates stacked to create aerated compost chambers
- Chicken wire bent into cylinder shapes for simple open-air bins
- Shipping pallets arranged to form sturdy three-compartment systems
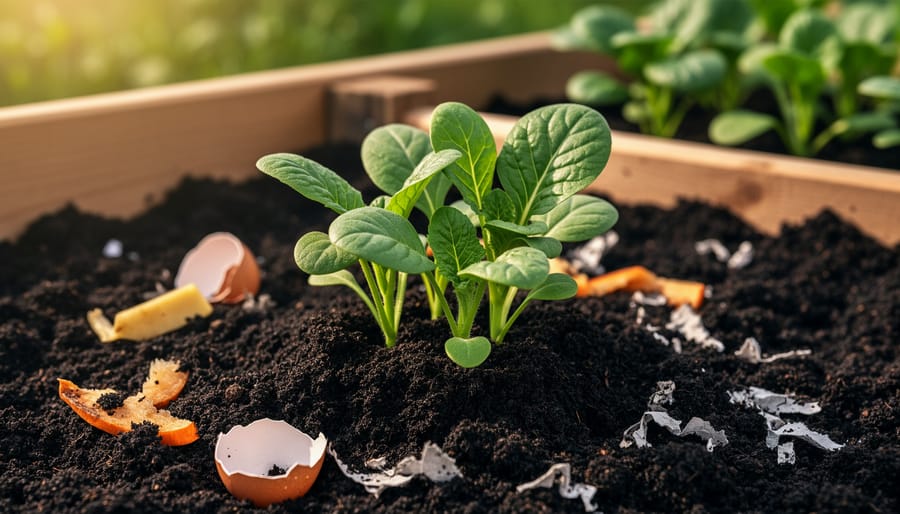
Once your compost matures, fill those recycled tire planters, pallet raised beds, and repurposed container gardens with the nutrient-rich result. This closes the sustainability loop: kitchen scraps become compost in a recycled bin, which then feeds plants growing in recycled containers, an entirely waste-free garden cycle that costs almost nothing.
Verifying Your Project Success
Once your recycled garden projects are in place, regular assessment ensures they’re working as intended and supporting healthy plant growth. Start by checking drainage within the first week, water your containers thoroughly and observe whether excess water flows out within a few minutes. Pooling water or completely dry soil despite watering indicates you need to adjust drainage holes or add a layer of gravel at the bottom.
Test structural stability by gently pressing on corners, joints, and supporting elements. Wooden pallet structures should feel solid without wobbling, tire planters shouldn’t shift when touched, and bottle edging should remain firmly anchored in the soil. Tighten any loose connections or add additional support stakes before weight and weather compromise the structure.
Monitor plant health as your most reliable success indicator. Within two to three weeks, plants should show new growth, vibrant leaf color, and strong stems. Yellowing leaves might signal nutrient deficiencies from inadequate soil depth, while wilting despite watering suggests drainage problems. Brown leaf edges can indicate salt buildup from painted containers, flush the soil thoroughly with water and consider repainting with non-toxic alternatives.
Check durability at the end of each growing season. Inspect wooden structures for rot, painted surfaces for peeling, and plastic containers for brittleness or cracking. Address minor wear immediately, a coat of weatherproof sealant or reinforcing bracket now prevents complete replacement later.
Common Questions About DIY Recycled Garden Projects
Are recycled materials safe for growing edible plants?
Most recycled materials are safe if you choose wisely. Avoid containers that previously held chemicals, pesticides, or motor oil, and steer clear of treated wood that might leach arsenic or chromium into soil. Stick with food-grade plastics, untreated wood, ceramic, glass, and metal containers that originally held non-toxic products.
How long will recycled garden projects last outdoors?
Durability varies by material and climate. Metal containers might rust within 2-3 years without protective coating, while properly sealed wood can last 5-10 years. Glass and ceramic pieces withstand weather indefinitely, though they can crack in hard freezes. Applying weatherproof sealant and bringing delicate projects indoors during harsh winters extends their life considerably.
How do I make mismatched recycled items look cohesive?
Unify disparate pieces with a consistent color scheme using outdoor paint or stain. Grouping items by material type, all metal containers in one bed, all wood structures in another, creates visual order. Adding matching decorative elements like twine, stenciled numbers, or coordinating plant selections ties everything together without sacrificing the eclectic charm.
Where can I find quality recycled materials for garden projects?
Check curbside pickups on trash day, browse Craigslist or Facebook Marketplace free sections, and visit construction site dumpsters with permission. Thrift stores, garage sales, and recycling centers often have abundant materials for pennies, while friends and neighbors usually have pallets, containers, or wood scraps they’re happy to offload.
When projects don’t perform as expected, troubleshooting is straightforward. If plants wilt despite watering, check that drainage holes aren’t clogged with soil and that containers aren’t sitting in standing water. Wobbly structures need additional support, drive stakes beside pallet beds or add corner braces to wooden trellises. Paint peeling off metal or plastic means you skipped primer or used interior paint instead of exterior-grade products. Reapply proper outdoor paint after light sanding.
Winter preparation protects your investment. Move terra cotta, ceramic, and thin plastic containers indoors or into a shed before the first hard freeze, since moisture trapped in cracks expands and causes breakage. Wood structures benefit from a fresh coat of sealant each fall. Leave sturdy metal and thick plastic pieces outside, but empty soil from containers to prevent freeze-thaw damage. Cover pallet structures with tarps to reduce moisture absorption and extend their lifespan by several seasons.
You don’t need to transform your entire garden overnight. Pick one recycled material project that speaks to you, maybe those tin cans sitting in your recycling bin become herb planters this weekend, or that stack of newspapers turns into weed barrier for your vegetable patch. Each small step reduces waste heading to landfills while creating something genuinely useful for your outdoor space.
These projects connect to something bigger than just saving money or getting creative. When you build a pallet compost bin or plant seeds in egg cartons, you’re participating in a cycle that nourishes soil, reduces your environmental footprint, and produces healthier plants. Your garden becomes a living example of resourcefulness.
The materials already exist around you, in your garage, your neighborhood, or that pile of things you’ve been meaning to discard. Start simple, learn as you go, and watch both your skills and your garden grow. The most sustainable garden is one that reuses what we already have while giving back to the earth. Your recycled-material project today plants seeds for a more thoughtful tomorrow.