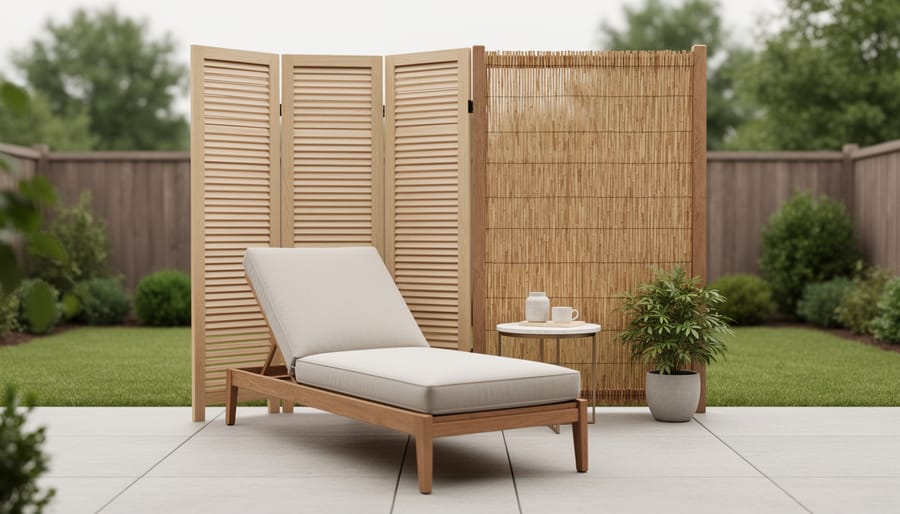
The fastest way to get outdoor privacy is to match the screen to your situation: outdoor curtains or a folding screen if you rent, bamboo roll fencing if you want quick texture, and planter boxes, trellises, or living hedges if you’d rather build coverage that grows with your space. Most of these take an afternoon or less, and several need no tools at all.
Privacy screens work because they block sightlines, not just space. A well-placed panel at seated eye level can make a patio feel like a separate room, even when neighbors are close.
We picked eight ideas that cover the real tradeoffs people face: tight budgets, rental rules, and varying comfort with DIY. Each one is distinct, easy to try, and honest about effort. We also kept an eye on sustainable outdoor materials since a screen that holds up season after season is better for your wallet and the planet.
Ready to find your fit? Start with idea one.
How We Chose These Outdoor Privacy Screen Ideas
This list is curated from research and common design practice, not from hands-on testing, so think of it as a well-organized starting point rather than a lab report. I looked for ideas that work for real yards, real budgets, and real renter restrictions. Many of the options also double as eco-friendly yard upgrades which is a nice bonus when you want a greener space.
Each idea was weighed against the same set of questions:
- Budget: what a typical setup costs, from a quick weekend fix to a bigger investment.
- DIY difficulty: whether a beginner can handle it or you’ll want a pro.
- Renter-friendliness: if it can go up (and come down) without drilling or permanent changes.
- Durability: how well it stands up to sun, rain, and wind.
- Light and airflow: how much breeze and brightness still get through.
- Upkeep: the ongoing cleaning, sealing, watering, or trimming involved.
You won’t find a single “perfect” screen here, because the right choice depends on your space. That’s why every idea below notes who it suits best, how much effort it takes, and a quick tip to help you get it right the first time.
Outdoor Privacy Screen Ideas to Try in Your Space
1. Outdoor Curtains, Soft and Flexible Privacy on a Budget
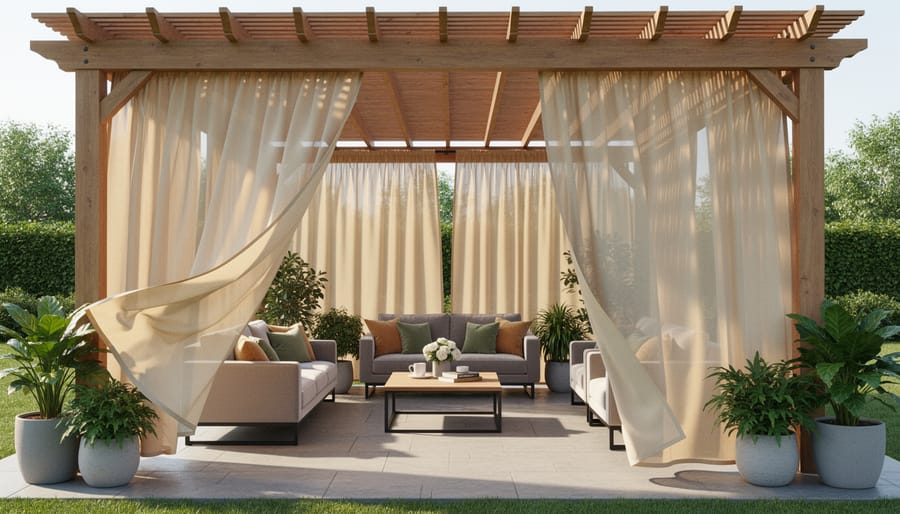
Outdoor curtains are the fastest way to turn an open patio into a cozy nook, and they’re a favorite for renters since nothing permanent gets built. Hang them from a pergola, a porch ceiling, or a simple tension rod between posts, and you can pull them closed for privacy or tie them back when you want the view.
Best for: renters, covered patios, and pergolas. Effort: easy, usually under an hour.
Fabric matters here. Look for solution-dyed acrylic, which holds its color in strong sun and resists mildew, or outdoor polyester, which costs less and still handles rain well. Skip indoor fabrics, since they fade and mold quickly outside. If you’re planning a setup for year-round outdoor comfort the sturdier acrylic is worth the extra money.
To hang them, install a curtain rod or a taut wire along the top of your structure. Grommet-top panels slide easily on a rod, and tab tops work well on a wire. Hang the panels a couple of inches above the floor so the hems stay clean and dry.
Wind is the usual complaint, so plan for it. Sew or clip weights into the hems, add tiebacks to hold panels open, and use hooks on the posts to anchor the bottom corners when the breeze picks up.
Quick tip: Buy panels about one and a half times as wide as the opening for a fuller, more private look when closed.
2. Bamboo or Reed Roll Fencing, Natural Texture in Minutes
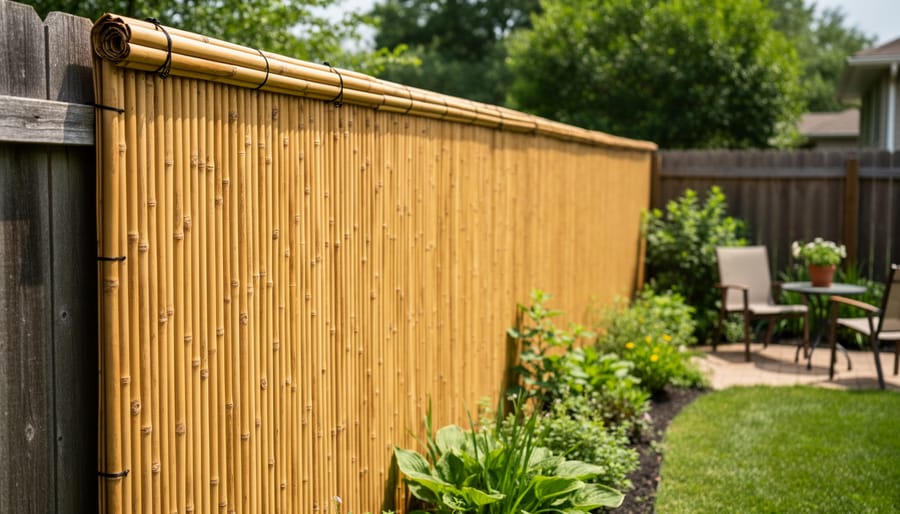
Rolled bamboo, reed, or willow fencing is one of the fastest ways to turn a see-through fence or railing into a cozy, textured screen. It’s best for renters with a chain-link fence, anyone with deck railings, and budget-minded owners who want privacy this weekend. Effort level: easy, about an hour for a typical section.
Be honest with yourself about the tradeoff, though. Natural materials fade from golden to silvery gray, and bamboo can split after a few seasons of strong sun and rain. Reed and willow tend to loosen and shed bits as they age. A coat of clear exterior sealant or UV-protective stain at installation, then once a year, can noticeably extend their life. Expect roughly three to five years, longer in a sheltered spot.
How to attach it:
1. Measure your fence or railing and cut the roll to length with sturdy pruning shears or a hacksaw.
2. Unroll it against the fence with the best side facing out, and ask a helper to hold it taut.
3. Starting at the top corner, secure it with zip ties or thin galvanized wire, looping around both the fence and a horizontal strand of the roll.
4. Fasten every 12 to 18 inches along the top, bottom, and middle so it stays flat and doesn’t sag.
5. Trim the loose tie ends for a neat finish.
Expert tip: use black zip ties, since they nearly disappear against the dark gaps between canes.
3. Horizontal Slat Fence Panels, a Modern Look With Real Coverage
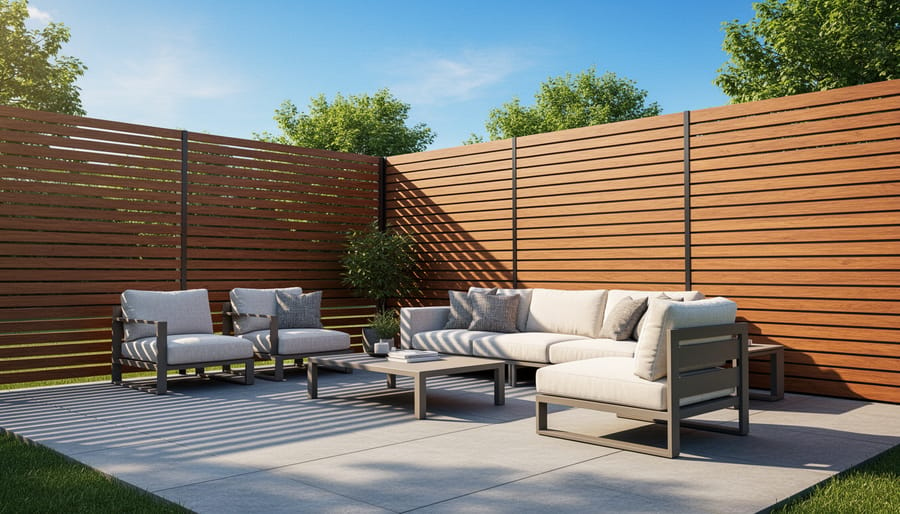
Horizontal slat panels are the go-to choice when you want real privacy without a boxy, old-school look. Cedar, composite, and aluminum all work, and each one suits a different kind of backyard.
Start with spacing, since it decides how the screen feels. Tight slats with no gaps give you near-total coverage, which is great for blocking a neighbor’s sightline. Leaving a gap of about half an inch to an inch lets air and dappled light through, so the space stays breezy and wind has an easier time passing through instead of pushing against a solid wall.
Here’s how the materials compare:
– Cedar: Warm, natural, and the most budget-friendly of the three. It needs a sealant or stain every couple of years to keep its color, or it will quietly weather to silver-gray.
– Composite: Low maintenance, won’t rot or splinter, and costs more upfront. It can get heavy, so plan for sturdy posts.
– Aluminum: Light, rust-resistant, and very sleek. It’s often sold as ready-made panels, which keeps installation simple.
As for effort, a short run of prefab panels between posts is a very doable weekend DIY. Longer runs, uneven ground, or anything near a property line is worth a pro’s help, mostly so the posts are set deep and straight. Check your local height limits before you build.
4. Planter Box Screens, Privacy That Doubles as Décor
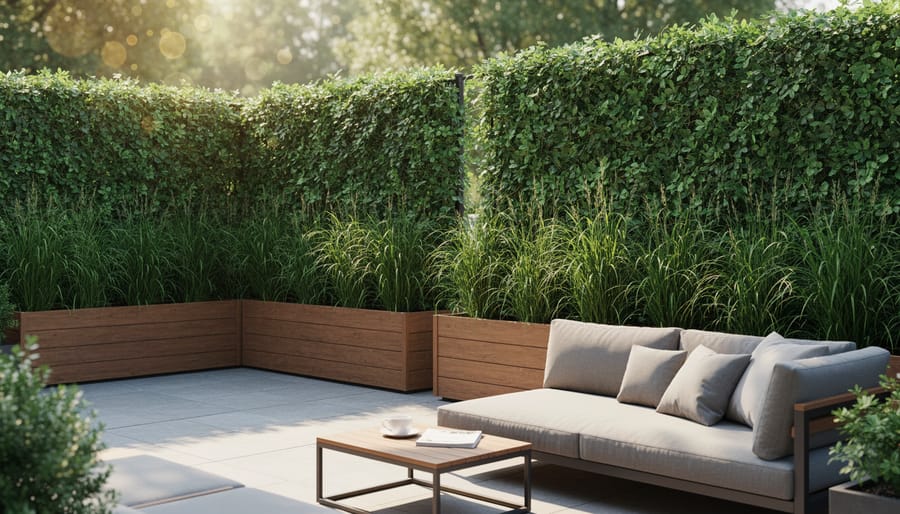
Tall planter boxes turn privacy into décor. Fill them with plants and you get a green wall you can rearrange whenever the mood (or the neighbors) change. They work especially well on patios, balconies, and decks where you can’t dig, plant in the ground, or build anything permanent.
For the best coverage, choose planters at least 18 to 24 inches deep so roots have room, and pick plants that grow tall and dense. Ornamental grasses like miscanthus or feather reed grass give you a soft, swaying screen that fills in fast. Arborvitae offers evergreen coverage year-round, so you won’t lose your privacy in winter. Clumping bamboo brings that lush, modern look and grows quickly in a pot.
Line the planters up side by side for a solid wall, or stagger them at different heights for a more relaxed, layered feel. Because everything sits in containers, you can shift the arrangement to follow the sun, block a new sight line, or take it all with you if you move. Just remember that large planters get heavy once filled with soil and watered, so set them where you want them before you plant, or add casters to the base for easy repositioning.
5. Freestanding Lattice or Trellis Panels With Climbing Vines
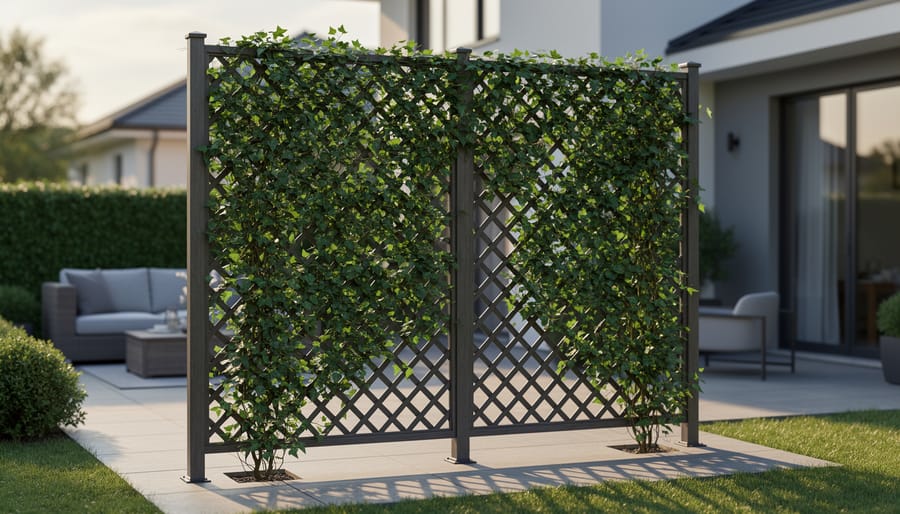
Freestanding lattice or trellis panels are one of the most flexible outdoor privacy screen ideas because you can set them almost anywhere: along a patio edge, beside a hot tub, or in a sunny corner of the yard. They give you partial privacy right away, since the crisscross pattern breaks up sight lines the moment you stand them up.
The real payoff comes with climbing plants. Clematis, star jasmine, climbing roses, and honeysuckle will wind through the openings and fill in over a season or two, turning a simple panel into a leafy, fragrant wall. Fuller coverage takes patience, but that gradual growth is part of the charm.
Best for: Renters with a little patience, small patios, and anyone who wants privacy that softens the space.
Effort level: Low to medium. Most panels just need to be anchored securely.
Quick tip: Choose climbers that thrive in your climate and light. Check the plant tag for your hardiness zone, and ask a local nursery which vines perform best nearby. Some, like English ivy, can turn invasive in certain regions, so it pays to ask first.
Anchor each panel with ground stakes, a weighted planter base, or posts set in the soil so it stays upright in wind. Plant the vine a few inches from the base and guide the first shoots onto the lattice with soft ties.
6. Pergola or Shade Sail Add-Ons, Privacy From Above and Beside
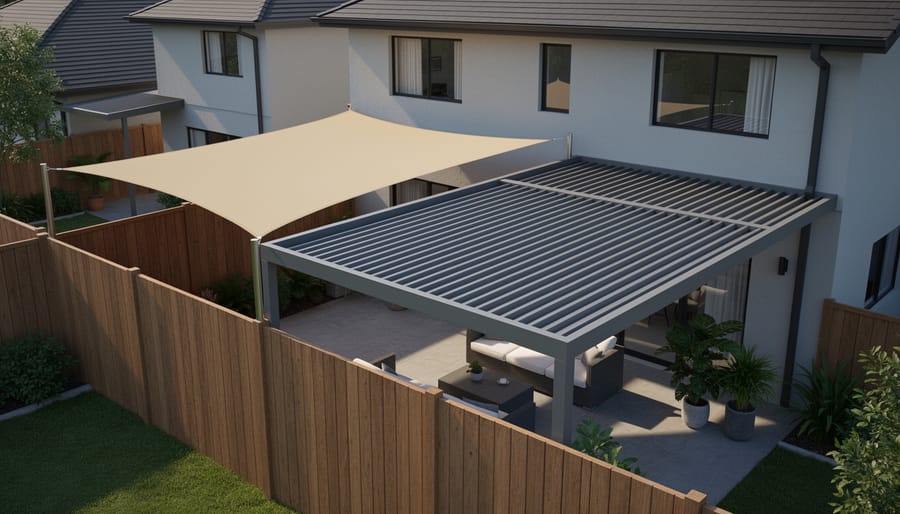
A fence stops at eye level, but a neighbor’s second-floor window looks right over the top of it. That’s where overhead structures earn their keep. A pergola with slatted side panels or louvered walls blocks sight lines from above and beside you at once, while a tensioned shade sail gives you a lighter, more affordable canopy that also cuts sun glare.
If you already have a pergola, you can add privacy by attaching cedar slat panels to one or two sides, or by hanging outdoor curtains between the posts. For a shade sail, aim for a slight angle or a diagonal pitch. It sheds rain and looks more intentional than a flat sheet.
Expert tip: Before you buy, stand in your seating spot and note exactly where the neighbor’s window sits. Position the sail or panels to block that specific line of sight, not the whole yard.
Safe anchoring matters here, since overhead structures catch wind like a kite. Use heavy-duty hardware, anchor posts into concrete footings or solid framing, and never attach a sail to a flimsy railing or fascia board. Add a bit of slack-free tension and check the hardware each season.
Finally, check your local rules first. Many towns require permits for permanent structures, and some set height or setback limits, so a quick call to your building department can save you a costly redo.
7. Living Hedges, a Long-Term Green Wall
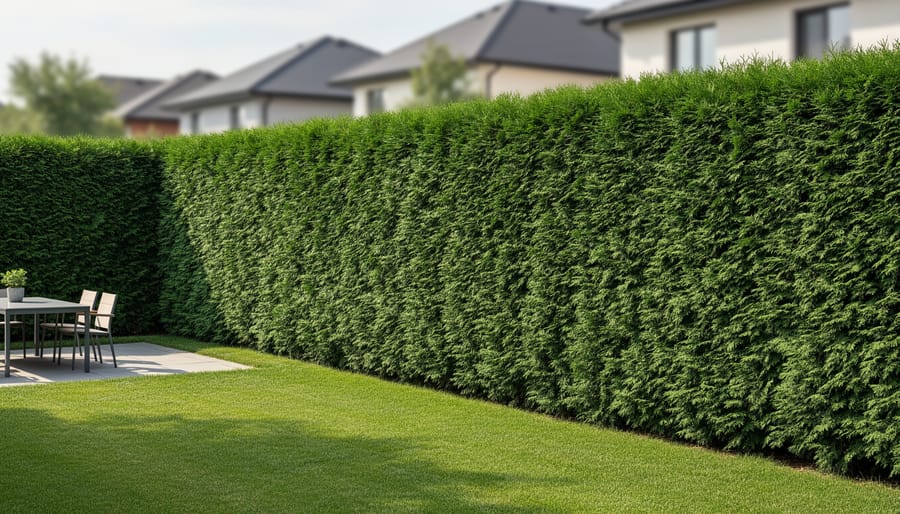
If you’re willing to play the long game, a living hedge gives you the most coverage for the least money per foot. Arborvitae, boxwood, and privet are classic choices, and a row of evergreens can quietly turn a bare lot line into a thick green wall that helps you create a relaxing retreat right at home.
Here’s the honest part: hedges take patience. Small, affordable plants may need two to four years before they fill in, so think of this as an investment rather than an instant fix.
Spacing matters more than most people expect. Plant too far apart and you’ll see gaps for years, but plant too close and the roots compete. Your plant tag or nursery will list a spacing range, and that’s the number to follow for your species.
The first year is when you earn your hedge. Water deeply once or twice a week, more during hot, dry spells, so the roots can establish. After that, most hedges become far more self-sufficient.
Trim lightly each year to encourage dense growth, shaping the sides slightly wider at the bottom so sunlight reaches the lower branches.
Finally, the best species really do depend on where you live. A local nursery can tell you which evergreens handle your climate, soil, and pests, and that quick conversation can save you years of frustration.
8. Outdoor Folding Screens and Room Dividers, Instant Privacy You Can Move
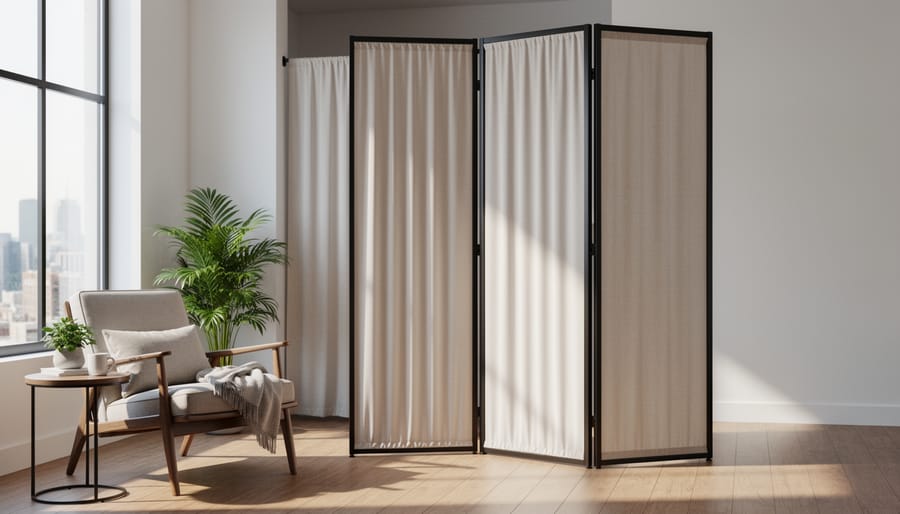
If you want privacy today, not next month, a freestanding folding screen is hard to beat. These weather-rated panels hinge together, stand on their own, and slide wherever you need cover. That makes them a great match for hot tubs, cozy seating nooks, and small balconies, and a smart pick for renters since there’s nothing to drill or build.
Pick your material based on the look and upkeep you want:
– Laser-cut metal: Powder-coated steel or aluminum is sturdy and low-maintenance, and the cutout patterns throw lovely shadows. Aluminum won’t rust, which helps in damp climates.
– Treated wood: Warm and classic, but plan to reseal it every year or two so it doesn’t gray or warp.
– Composite: Resists rot and fading with almost no upkeep, though it tends to be heavier.
Wind is the one thing to plan for, since a tall folding screen can act like a sail. Set the panels in a zigzag instead of a straight line, because the bends add stability. Then add weight: sandbags or flat pavers tucked behind the feet work well on a deck or balcony. On soil or lawn, drive ground stakes through the base or use anchor clips. If your space is breezy, choose a screen with some open pattern, since letting a little air through reduces the push.
How to Choose the Right Privacy Screen for Your Yard
Start with your situation, because it narrows the list fast. If you rent, lean on movable options like outdoor curtains, planter boxes, or folding screens. They come with you when the lease ends. Owners have more room to commit to slat panels, pergola add-ons, or a living hedge.
Next, think about sun and wind. A solid slat fence blocks sightlines well, but in a gusty yard it can catch the wind like a sail. Gaps between slats, or a screen of grasses, let air pass through and put less strain on posts. In a very sunny spot, plants with some shade tolerance may struggle, while sturdy fabric or wood holds up better.
Then decide what you’re really solving. Blocking a neighbor’s upstairs window calls for something overhead or taller, like a shade sail. Cutting wind or street noise usually calls for something denser.
Before you build anything permanent, check your HOA rules, local fence height limits, and property-line guidelines. A quick call to your city office can save you from tearing something down later.
Outdoor Privacy Screen FAQs
What is the cheapest way to add privacy outdoors?
Bamboo or reed roll fencing and outdoor curtains are usually the lowest-cost options, and both go up in an afternoon. Planter box screens can also be budget-friendly if you start with smaller plants and let them fill in.
What works for renters who can’t drill or build?
Outdoor curtains on tension rods, freestanding lattice panels, planter box screens, and folding screens all stay put without permanent fixtures. Weight or stake them so wind doesn’t send them wandering.
How tall should a privacy screen be?
Aim for about six feet if you want to block sight lines from a neighbor’s yard, though taller or shorter may suit your space. Local rules often cap fence height, so check before you build.
Do I need a permit for a privacy fence?
Often yes, especially for permanent fences or tall structures like pergolas. Your city, county, or HOA can tell you the height limits and property-line rules, so a quick call saves headaches later.
Once your screen is in place, think about how the space feels after dark. A few well-chosen lights can make your new retreat glow, and our guide to smart seasonal lighting has ideas that pair nicely with any of these privacy setups.
Whatever your budget, skill level, or lease, there’s a privacy screen here that fits. If you’re not sure where to begin, pick the one spot where you feel most watched, whether that’s your favorite chair, the hot tub corner, or the spot by the back fence.
Try one idea there first, like a pair of outdoor curtains, a planter box screen, or a folding divider you can shift around. Live with it for a few weeks and see how the light, wind, and mood of the space change. From there, you can add a trellis, a slatted panel, or a hedge as your confidence and yard grow.