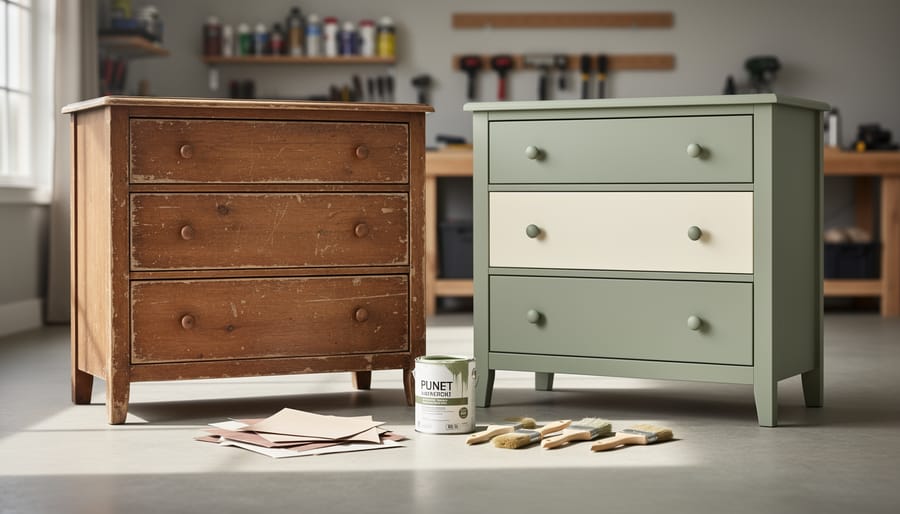
Upcycling furniture before and after delivers dramatic transformations that can turn tired, outdated pieces into stunning statement furniture for a fraction of the cost of buying new. The process typically takes one to three days per project (depending on drying time) and requires basic tools like sandpaper, primer, paint, and a vision for what the piece could become. Whether you’re rescuing a curb find or refreshing a hand-me-down, the same fundamental approach applies: assess the piece’s potential, prepare the surface properly, apply your chosen finish, and add any hardware or decorative updates.
The appeal of furniture upcycling goes beyond just saving money. You’re keeping pieces out of landfills, creating one-of-a-kind items that reflect your personal style, and gaining the satisfaction of bringing something back to life with your own hands. A dated dresser with good bones can become a chic bedroom focal point. That scratched coffee table? A few hours of work transforms it into a conversation starter.
The key to successful transformations lies in proper preparation and realistic expectations. Not every piece is worth saving, but when you spot quality construction beneath tired finishes, you’ve found a candidate worth your time. This guide walks you through the complete journey from selecting promising pieces to revealing finished results, with practical steps that work for beginners and experienced DIYers alike.
What You’ll Need: Tools and Materials for Furniture Upcycling
Basic Essentials Every Project Needs
Every successful furniture upcycling transformation starts with the same fundamental supplies. Stock your workspace with these essentials before beginning any project.
Sandpaper is your primary surface prep tool. Keep 80-grit for heavy stripping, 120-grit for smoothing, and 220-grit for final finishing. A sanding block helps maintain even pressure on flat surfaces.
Cleaning supplies remove decades of grime that obscure the before state. You’ll need degreasing dish soap, white vinegar, and lint-free cloths. For stubborn buildup, keep TSP (trisodium phosphate) substitute on hand.
Drop cloths or plastic sheeting protect your floor from drips and dust during the transformation process.
Painter’s tape creates clean lines and protects areas you don’t want to alter.
Quality brushes and foam rollers ensure smooth paint application. Invest in 2-inch angled brushes for detail work and 4-inch rollers for larger surfaces.
Protective finish seals your work. Polyurethane works for most painted pieces, while paste wax suits stained furniture.
Stir sticks, disposable gloves, and paint trays round out your basic kit. With these supplies ready, you’re equipped to tackle nearly any furniture upcycling before and after project.
Specialty Items for Advanced Transformations
Once you’ve mastered basic techniques, these specialty items unlock dramatic furniture transformations that truly showcase the power of before-and-after upcycling.
Wood filler is essential for repairing deep gouges, missing veneer, or damaged edges before painting. It sands smooth and creates an invisible repair that lets you salvage pieces others might discard. Opt for stainable varieties if you plan to refinish in natural wood tones.
Fabric adhesive and a staple gun transform seating projects. High-strength spray adhesive secures foam and batting, while a heavy-duty stapler attaches upholstery fabric for professional-looking reupholstered chairs and benches.
Stencils and painter’s tape create stunning decorative details. Use them for geometric patterns, intricate designs, or two-tone color blocking that elevates plain furniture into statement pieces.
Decorative hardware makes an outsized impact. Swapping dated knobs and pulls for vintage glass, modern brass, or ornate metal options instantly updates dressers and cabinets. Don’t overlook backplates, corner brackets, and furniture legs as transformation tools.
Glazing medium adds depth and dimension to painted finishes, while metallic wax creates subtle shimmer on details. These finishing touches separate amateur projects from professional-grade before-and-after results.
Safety First: Precautions and Workspace Preparation
Furniture upcycling involves chemicals, sharp tools, and airborne particles that demand serious attention to safety. Start by choosing your workspace carefully, ideally a garage, outdoor area, or organized workshop where you can contain mess and control airflow. Never work in enclosed living spaces where fumes can linger and affect your household.
Your ventilation setup should include open windows, doors, or fans that create cross-ventilation, pulling fresh air in and pushing fumes out. For chemical-heavy tasks like stripping or spraying, consider working outdoors on calm days to maximize natural airflow.
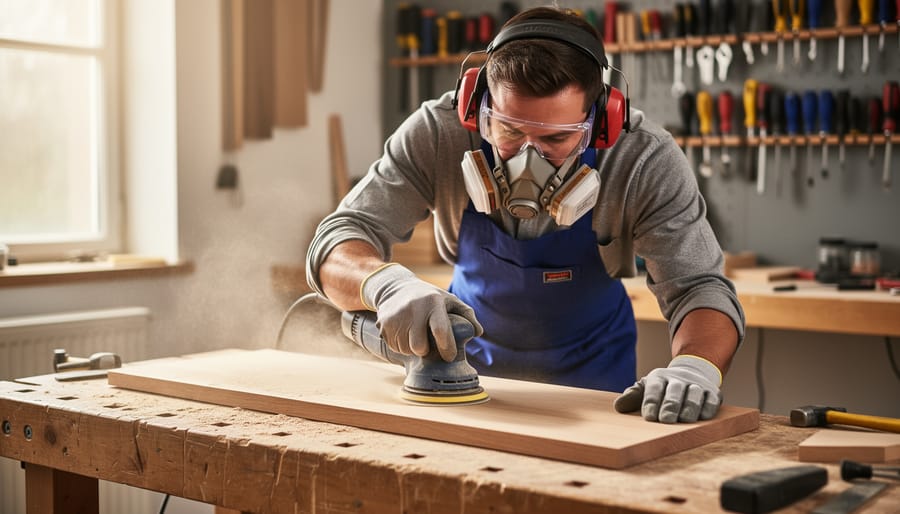
Protect yourself with essential safety gear. Wear safety glasses when sanding or using power tools to shield your eyes from flying debris. Nitrile gloves protect your skin from harsh chemicals and prevent paint from seeping into cuts. A dust mask handles sanding dust, but you’ll need a proper respirator for paint fumes, stains, and strippers, check the product label for the correct filter type.
Lay down drop cloths to protect your floor and contain spills. Keep a fire extinguisher nearby since many furniture finishing products are flammable. Store all chemicals in their original containers with labels intact, away from heat sources and out of reach of children and pets. Read product labels completely before opening anything, instructions vary widely, and mixing incompatible products can create dangerous reactions.
Clear your workspace of tripping hazards, keep a first aid kit accessible, and never rush through prep work to start the fun part. The most dramatic before-and-after transformations happen when you’re safe enough to enjoy the process.
Preparing Your Furniture: From ‘Before’ to Ready-to-Transform
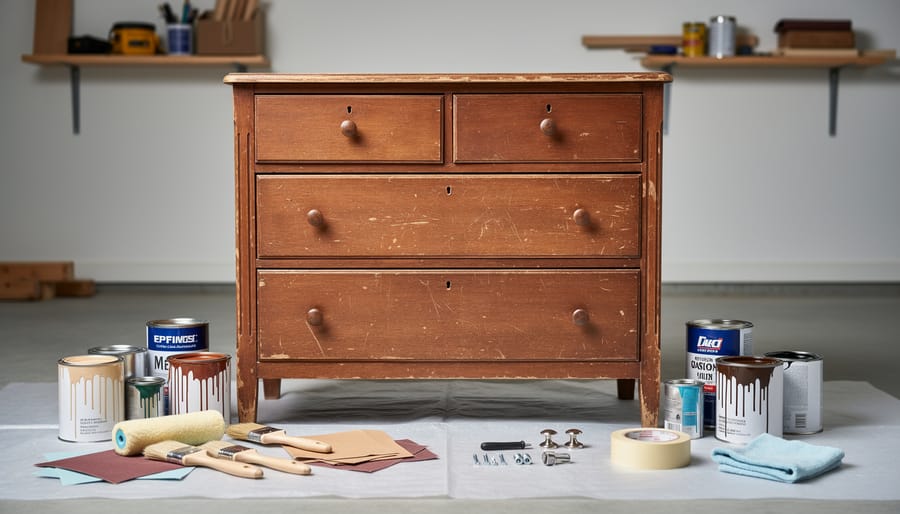
Assess the Condition and Plan Your Transformation
Start by examining the furniture piece from all angles. Check for structural soundness: wobbles, loose joints, or cracked wood can usually be fixed but require extra time. Run your hands along surfaces to detect rough spots, deep gouges, or veneer bubbling. Open drawers, test doors, and inspect the underside for hidden damage or water stains.
Consider whether the bones are worth the effort. Solid wood pieces almost always deserve a second life. Particleboard or heavily damaged laminate may not be worth your investment unless you’re planning a simple paint transformation that covers flaws.
Now envision the after. What style would complement your space? Modern painted finish? Distressed farmhouse look? Natural wood with fresh stain? Picture where it’ll live and what colors or hardware would work. Take photos of the before state so you can track your furniture upcycling transformation.
Decide if you can realistically achieve your vision with your skill level and available time. Be honest: ambitious first projects often stall. Choose something achievable that still excites you, and you’ll be more likely to see it through to that stunning after reveal.
Deep Clean and Strip Old Finishes
Start by wiping down the entire piece with a damp cloth and mild dish soap to remove surface dirt and decades of accumulated grime. This reveals the true condition of the finish underneath. For stubborn grease or sticky residue, use a degreaser or a mix of equal parts white vinegar and water.
Next, assess whether you need to strip the old finish completely. If the existing paint or varnish is chipping, peeling, or uneven, stripping creates the clean slate your upcycling project needs. Apply a chemical stripper with a brush in the direction of the wood grain, working in sections. Let it sit for the manufacturer’s recommended time, usually 15-30 minutes, until the finish bubbles and lifts.
Scrape away the softened finish with a plastic scraper, moving gently to avoid gouging the wood. For intricate details and carved areas, use an old toothbrush or steel wool. Wipe the surface with mineral spirits to remove residue, then sand lightly with 150-grit sandpaper once dry.
For less damaged finishes, liquid deglosser offers a faster alternative, roughing up the surface enough for new paint to adhere without full stripping. Either method prepares your furniture for its dramatic before-and-after transformation.
Make Necessary Repairs
Structural repairs form the foundation of any successful furniture transformation. Start by tightening loose joints, apply wood glue to wobbly connections, clamp them securely, and let dry completely. Fill nail holes, dents, and deep scratches with wood filler, slightly overfilling since it shrinks when dry. Once cured, sand flush with the surrounding surface.
Replace broken or missing hardware immediately. If you can’t find exact matches, fill old screw holes with wood filler and drill new pilot holes for replacement pieces. Check drawer runners and cabinet hinges, bent or broken components should be replaced now, not after painting. Test all moving parts to ensure smooth operation.
For veneer damage, reglue lifted edges with wood glue and weight them down overnight. Large missing veneer sections may need patching with new veneer or creative design solutions like decorative appliques that become part of your after vision.
Step-by-Step: Transforming Your Furniture from Before to After
Step 1: Sand the Surface Smooth
Start with 120-grit sandpaper to remove any remaining finish and smooth rough spots. Work in the direction of the wood grain using even pressure, circular motions create visible scratches that show through paint. For flat surfaces, wrap sandpaper around a sanding block for consistent results.
Once the surface feels uniformly rough, switch to 220-grit paper for your second pass. This finer grit creates the smooth base that makes the difference between amateur and professional-looking transformations. You’ll feel the surface become noticeably silkier.
Hand-sand carved details, spindles, and edges where power tools can’t reach. Fold your sandpaper into thirds for better control in tight spots. After sanding, wipe everything down with a tack cloth or damp rag to remove all dust, leftover particles create bumps in your finish that ruin the smooth after result you’re working toward.
Step 2: Prime for Success
Primer creates the bond between your furniture’s surface and the paint, preventing peeling and ensuring your before-and-after transformation lasts years. For bare wood or previously stained pieces, use an oil-based primer to seal tannins and prevent bleed-through. Laminate furniture needs a bonding primer specifically designed for slick surfaces. Apply primer with a foam roller for smooth coverage on flat areas, using a brush for corners and details. Work in thin, even coats rather than one thick layer, which can drip and pool. Let it dry completely, usually two to four hours, before lightly sanding with 220-grit paper to knock down any raised grain or brush marks. This step transforms your piece from rough preparation to a smooth canvas ready for its final finish.
Step 3: Apply Your Chosen Finish
With your surface prepped and primed, it’s time for the most dramatic part of the transformation. Whether you’re painting or staining, apply your chosen finish using long, even strokes in the direction of the wood grain. For paint, use a high-quality brush or foam roller to minimize brush marks. Foam rollers work brilliantly on flat surfaces like tabletops and dresser sides, while angled brushes handle detailed areas and edges.
Start with a thin first coat rather than trying to achieve full coverage immediately. Thick coats look tempting but they drip, show brush marks, and take forever to dry. Let your first coat dry completely (check the product label, but typically 4-6 hours for paint, 24 hours for stain). Lightly sand between coats with 220-grit sandpaper to knock down any raised grain or dust bumps.
Most projects need two to three coats for professional coverage. Each layer builds opacity and depth, creating that polished before-and-after difference. With stain, wipe off excess after 5-10 minutes for lighter tones, or leave it longer for richer color. Always test your finish on a hidden spot first to confirm you love the result.
Step 4: Add Decorative Details and Hardware
This is where your upcycling project truly transforms from ordinary to extraordinary. New hardware makes an immediate visual impact, swap outdated brass pulls for sleek matte black handles, or replace plain knobs with vintage glass ones. Measure and mark hole placements carefully before drilling to avoid mistakes.
Stenciling adds pattern and personality without requiring artistic skill. Tape your stencil firmly to prevent paint bleed, then dab (don’t brush) paint with a foam pouncer. Geometric designs work well on drawer fronts, while delicate patterns suit tabletops.
For a vintage look, distress edges after your paint has fully cured. Use fine-grit sandpaper to gently wear through paint where natural aging would occur, corners, edges, and areas around handles. Go slowly; you can always remove more, but you can’t add paint back easily.
Other decorative options include decorative molding, decoupage with patterned paper, or metallic wax rubbed onto raised details. Each element should enhance your vision for the after result, not compete with it.
Step 5: Seal and Protect Your Work
After your paint or stain dries completely, apply a protective topcoat to lock in your transformation and ensure it withstands daily use. Choose polyurethane for high-traffic pieces like tables and dressers, water-based dries clear and fast, while oil-based offers maximum durability but takes longer to cure. For chalk-painted furniture, use furniture wax or polycrylic instead. Apply thin, even coats with a quality brush or foam roller, working in the direction of the wood grain to prevent visible brush marks.
Let each coat dry for at least two hours before lightly sanding with 220-grit paper, then wipe away dust with a tack cloth. Two to three coats provide adequate protection for most upcycled pieces. Allow 24-48 hours before handling and a full week before heavy use, giving the sealant time to cure properly and harden into a durable finish that showcases your before-and-after results for years.
Step 6: Final Touches and Styling
Your furniture transformation is nearly complete, now it’s time to showcase the dramatic before-and-after change with those final details that make your upcycled piece look professionally finished. Start by reinstalling any hardware you removed earlier, ensuring screws are tight and knobs or pulls align perfectly. If your project includes fabric elements like cushioned seats or decorative upholstery, attach them securely using an appropriate adhesive or staple gun.
Step back and inspect your piece from multiple angles. Look for any drips, uneven spots, or areas that need touch-ups. Clean off any dust or fingerprints with a slightly damp cloth. Consider adding felt pads to the bottom of furniture legs to protect floors and allow smooth movement.
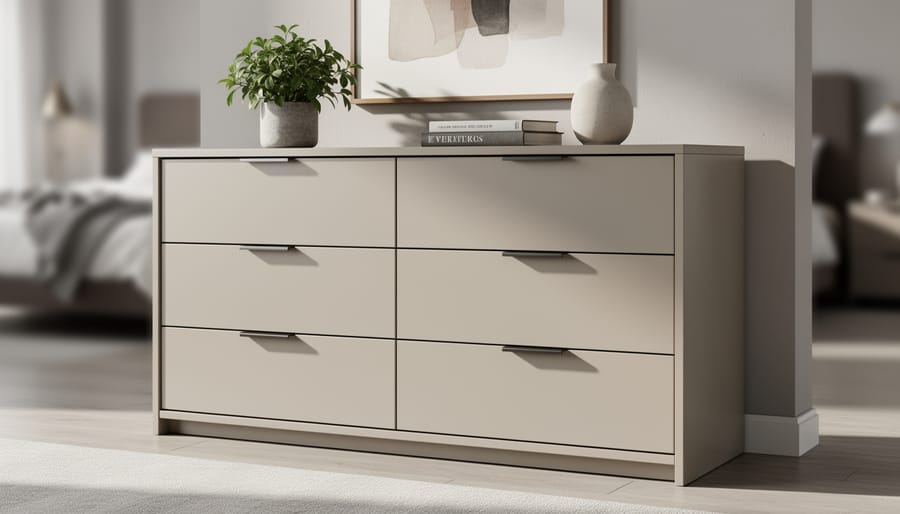
Finally, stage your transformed piece thoughtfully to highlight its journey. Place it where natural light shows off the finish, and add complementary decor items, a vase, books, or plants, that draw attention to your work. Take photos from the same angle as your “before” shots to capture the full transformation. These finishing touches turn a good upcycling project into a showstopper that demonstrates your skills and vision.
Verifying Your Results and Next Steps
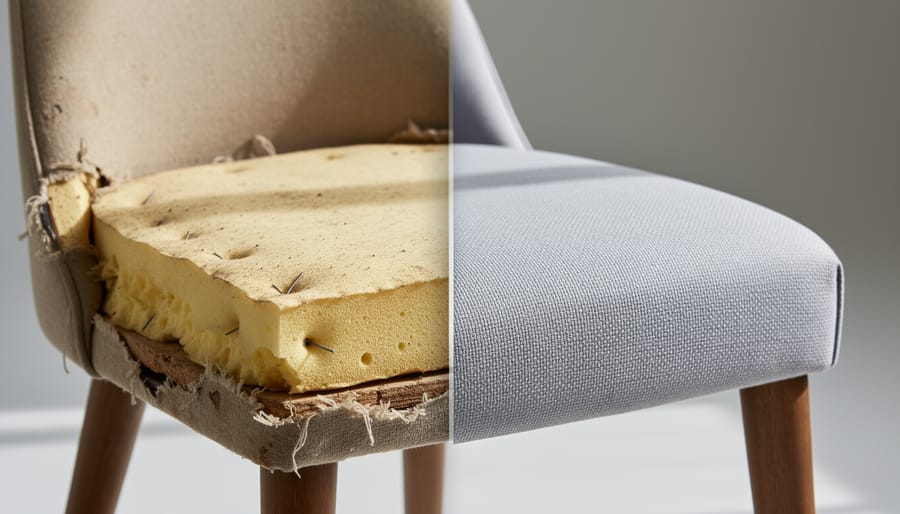
Step back and examine your upcycled piece in good lighting from multiple angles. Look for drips, brush marks, uneven coverage, or spots you missed. Run your hand gently over the surface, it should feel smooth and uniform, not tacky or rough. Check that all hardware sits flush and secure, and that drawers and doors operate smoothly without sticking.
Most finishes need 24 to 72 hours to cure fully, even if they feel dry to the touch after a few hours. Read your product’s label for specific curing times. During this period, avoid placing objects on the surface or using the furniture. Paint typically cures faster than polyurethane or wax finishes, which can take up to a week to reach maximum hardness.
If you spot imperfections, don’t panic. Light drips can be sanded smooth with fine-grit sandpaper once dry, then touched up with another thin coat. Uneven coverage usually needs a full additional coat after light sanding. Brush marks that show through might require wet-sanding with 400-grit sandpaper and a final topcoat for a flawless finish.
Test durability after the full cure time by gently pressing a fingernail into an inconspicuous spot. The finish shouldn’t dent or feel soft. Place a damp cloth on the surface for a few minutes, if it leaves a mark, you may need another protective coat.
Once cured, your before-and-after transformation is complete when the piece looks intentional, feels professional, functions as furniture should, and makes you proud enough to show it off. If something still bothers you, address it now rather than living with regret.
Inspiring Before-and-After Transformation Ideas
Painted Dressers and Cabinets
Dressers and cabinets offer dramatic canvases for before-and-after furniture upcycling projects. A dated oak dresser from the 1980s becomes a showpiece with two coats of navy blue paint and brass hardware. For two-tone designs, paint the dresser body in one color and drawer fronts in a contrasting shade, cream and sage green create fresh, modern appeal.
Distressed finishes deliver vintage charm: paint your piece, let it cure for 24 hours, then lightly sand edges and raised details with 220-grit paper to reveal wood beneath. Focus on areas that would naturally wear over time, corners, drawer pulls, and decorative trim. Seal with matte polyurethane to protect the finish while maintaining the aged look.
Bold colors like emerald green, charcoal gray, or terracotta transform dated brown furniture into statement pieces. Always clean, sand, and prime first, skipping prep leads to peeling paint and underwhelming results that don’t match inspiring before-and-after transformations you’ve seen online.
Reupholstered Seating
Reupholstering seating delivers some of the most dramatic furniture upcycling before-and-after transformations. A tired dining chair with torn fabric becomes a vibrant statement piece with fresh upholstery and painted legs. Start by removing the old fabric and batting, then assess whether the foam needs replacing, compressed cushions rob seating of comfort. Cut new foam to size, wrap it in batting, then pull your chosen fabric taut across the seat, stapling underneath from center to corners. For wooden frames, sand and paint them in a contrasting or complementary color before reattaching the refreshed cushion. Benches and ottomans follow the same process but often require more fabric yardage. The before-and-after difference is striking: what looked destined for the curb becomes custom seating that reflects your style, all for a fraction of buying new.
Refinished Wood Tables
Wood tables offer some of the most dramatic upcycling furniture before and after transformations. Start by assessing whether you want to strip and stain for a natural look or paint for bold color. For stripping, apply chemical remover following manufacturer instructions, then sand progressively from 80 to 220 grit to reveal the grain beneath old finishes. Apply wood stain in thin, even coats, wiping excess with the grain. Alternatively, chalk paint creates farmhouse charm without extensive prep, while high-gloss lacquer delivers contemporary elegance. For two-tone effects, paint the base while staining the top for contrast. Always seal with polyurethane or wax to protect high-traffic surfaces from spills and scratches.
Hardware Swaps for Instant Impact
Swapping out hardware delivers one of the quickest before-and-after transformations in furniture upcycling. A tired dresser with dated brass knobs becomes modern and fresh with sleek matte black pulls. Victorian-style glass knobs can give the same piece a vintage charm instead.
This simple change requires only a screwdriver and new hardware. Measure the existing hole spacing before shopping to ensure proper fit. If new pulls require different spacing, fill old holes with wood filler, sand smooth, and drill fresh holes. The transformation takes minutes but creates a striking before-and-after result that completely changes the furniture’s character.
Common Mistakes and How to Avoid Them
The difference between an inspiring before-and-after transformation and a disappointing one often comes down to avoiding a few critical errors. Here are the most common mistakes that can derail your furniture upcycling project:
- Skipping the prep work and jumping straight to painting or staining
- Using the wrong primer for your furniture material or finish type
- Rushing between coats without allowing proper drying time
- Working in poorly ventilated spaces with inadequate air circulation
- Not testing your chosen finish on a hidden area first
The biggest culprit is impatience. Many upcyclers get excited about the after vision and skip the tedious sanding, cleaning, and priming steps. This inevitably leads to paint that peels within weeks, uneven coverage that shows every imperfection, or stain that blotches instead of enhancing the wood grain. Take the time to sand thoroughly and remove all grease and grime, even if it feels excessive.
Another frequent mistake is applying thick coats of paint to speed up the process. This causes drips, an uneven texture, and significantly longer drying times. Thin coats always win. Apply two or three light layers rather than one heavy one, and resist the urge to touch the surface between coats to test if it’s dry.
Don’t forget proper workspace setup either. Working outdoors in direct sunlight can cause finishes to dry too quickly and crack, while humid basements prevent proper curing. Choose a well-ventilated, climate-controlled space when possible. If you’re creating storage solutions from old furniture, ensure adequate space around all sides for even application and drying.
Finally, changing your vision mid-project rarely works. If you decide halfway through that you want a different color or finish, you’ll need to start the prep work all over again. Commit to your plan, follow the steps in order, and trust the process.
Frequently Asked Questions About Furniture Upcycling Transformations
How long does a typical furniture upcycling before-and-after project take?
Most beginner projects take 2-4 days from start to finish, though the actual hands-on time is usually 6-10 hours spread across multiple days to allow for drying between coats. Complex pieces with extensive repairs or detailed painting techniques can take up to two weeks.
What’s the best furniture to start with for my first before-and-after transformation?
Small wooden pieces like nightstands, side tables, or simple chairs work best for beginners because they’re manageable in size and typically don’t require complex repairs. Look for solid wood construction rather than laminate or particle board, as real wood is much more forgiving and easier to refinish.
How much should I expect to spend on an upcycling project?
Basic transformations using paint and new hardware typically cost $30-$75 in materials, while more extensive projects with specialty finishes, reupholstery fabric, or multiple cans of paint might run $100-$200. You’ll save considerably compared to buying new furniture while creating a custom piece.
Should I use paint or stain for furniture upcycling before-and-after results?
Paint offers more dramatic transformations and hides imperfections, making it ideal for damaged pieces or bold style changes. Stain showcases natural wood grain and works best when the existing wood is attractive and you want a more subtle, natural-looking update.
After completing your first few projects, you’ll develop an instinct for which pieces have the best transformation potential and which techniques suit your style. Many people worry about making irreversible mistakes, but most furniture upcycling decisions can actually be undone or corrected with additional sanding and refinishing if needed.
The durability of your finished piece depends heavily on proper surface preparation and using quality topcoats. A well-sealed painted dresser can last decades with normal use, while skipping the protective finish will result in chipping and wear within months. Always apply at least two coats of polyurethane, polycrylic, or wax depending on your chosen finish.
If you’re considering selling upcycled furniture, understand that handmade pieces typically sell for 2-3 times your material costs when marketed properly through local platforms or craft fairs. Vintage pieces transformed with trendy colors and modern hardware tend to command higher prices than contemporary furniture makeovers.
Learning from common mistakes other DIYers have made will save you frustration and wasted materials. The most frequent issues include rushing between coats, inadequate sanding, and choosing the wrong primer for the furniture material, all of which can compromise your before-and-after results.
How to Check Your Work
A successful furniture transformation should look and function beautifully. Run your hand across all painted or stained surfaces, they should feel smooth without sticky spots, drips, or rough patches. The finish should appear even in natural daylight, with consistent color and no visible brush strokes unless you’ve intentionally chosen a textured effect.
Test the piece functionally. Open and close drawers and doors multiple times; they should glide smoothly without sticking. Sit on reupholstered chairs to ensure the padding feels comfortable and secure. Check that all hardware is tight and doesn’t wobble when used.
Look closely at corners, edges, and detailed areas where mistakes often hide. Any new fabric should sit taut without puckering or sagging. If you’ve applied a protective topcoat, it should be fully cured, hard to the touch with no tackiness, before the piece goes into regular use.
Stand back and view your work from different angles and lighting conditions. The transformation should enhance the furniture’s character rather than look amateurish or heavily patched.
Consider professional help if structural repairs exceed your skill level, if you’ve discovered hidden damage during the process, or if repeated attempts at finishing produce unsatisfactory results despite following proper techniques.
You’ve learned the tools, techniques, and safety practices to turn forgotten furniture into showpiece treasures. Now it’s time to hunt down that dated dresser gathering dust in your basement or that tired chair at the thrift store and create your own stunning before-and-after transformation.
Every spectacular furniture upcycling project you’ve admired started with someone holding a paintbrush and wondering if they could pull it off. Spoiler: they could, and you can too. Your first project won’t be perfect, and that’s completely fine. Each piece you transform teaches you something new about prep work, paint application, or problem-solving on the fly.
Beyond the satisfaction of creating something beautiful with your own hands, you’re keeping furniture out of landfills and giving it a second life that’s uniquely yours. That’s sustainable living with serious style.
Start small if you’re nervous, a side table or wooden tray makes an excellent first project. Or go bold with that piece you’ve been eyeing. Take photos of your before state, document your process, and celebrate your after reveal.
The best part? That before-and-after transformation sitting in your home will spark conversations, inspire others, and remind you that you built something remarkable from something ordinary. That worn-out furniture isn’t junk. It’s possibility waiting for your vision.