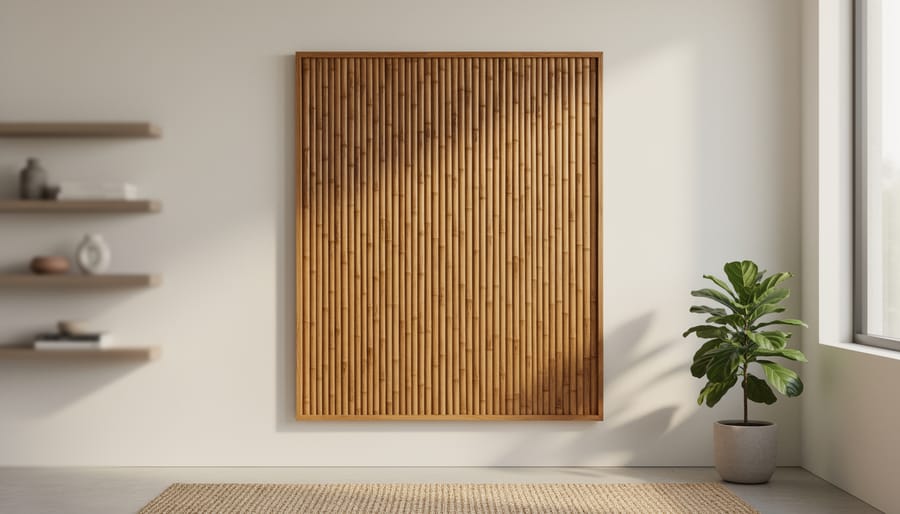
Bamboo DIY projects let you transform a fast-growing, renewable material into functional home decor, furniture, and garden features using basic tools and techniques you can learn in a single afternoon. This sustainable grass (yes, grass, not wood) offers surprising strength, natural water resistance, and a clean aesthetic that works equally well in modern minimalist spaces and bohemian retreats. Whether you’re building a simple planter box or tackling a room divider, bamboo costs significantly less than hardwood while delivering a distinctive look that instantly adds warmth and texture to any room.
The appeal goes beyond aesthetics. Bamboo reaches maturity in just three to five years compared to decades for traditional lumber, making it one of the most eco-friendly building materials available. You don’t need a full workshop to work with it, either. Most projects require nothing more than a saw, drill, sandpaper, and some basic fasteners. The hollow structure makes bamboo lightweight and easy to handle, though that same feature demands specific joining techniques that differ from standard woodworking.
In this guide, you’ll find six projects ranging from beginner-friendly accents to intermediate builds, each with complete materials lists, safety protocols, and detailed instructions. We’ll cover everything from selecting quality bamboo poles to finishing touches that protect your work and extend its lifespan. By the end, you’ll have the confidence to design your own bamboo creations tailored to your space and skill level.
Why Bamboo Is Perfect for DIY Home Decor
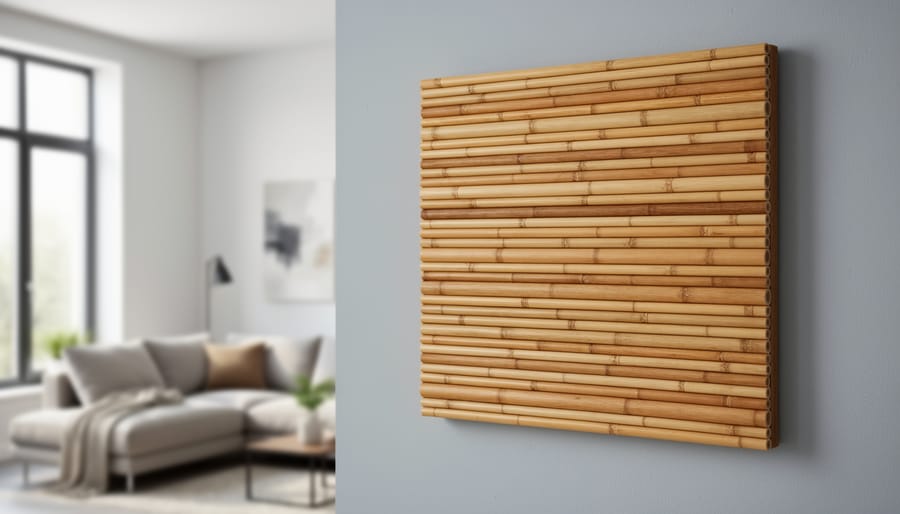
Bamboo stands apart from conventional crafting materials because it combines environmental responsibility with practical advantages that make DIY projects easier and more rewarding. While hardwoods can take 30-50 years to mature, bamboo grows in years reaching harvest maturity in just 3-5 years. This rapid growth cycle makes bamboo one of the most renewable resources available, regenerating naturally from its root system without replanting, a crucial benefit when you’re creating multiple home decor pieces.
The structural properties of bamboo give you serious working advantages. Its tensile strength rivals steel in certain applications, yet it remains light enough to handle comfortably and mount without specialized hardware. You’ll find bamboo exceptionally workable with standard hand tools: it cuts cleanly, drills without splintering when you use the right techniques, and accepts stains and finishes beautifully. Unlike softer woods that dent easily or harder woods that require power equipment, bamboo hits a sweet spot for home crafters.
Bamboo’s natural aesthetics bring warmth and texture that synthetic materials can’t replicate. The visible nodes create organic visual interest, while the honey-toned grain complements both modern minimalist spaces and traditional decor styles. You can showcase bamboo’s natural color or transform it with darker stains without losing that distinctive grain pattern. Its hollow structure also opens creative possibilities for projects like lamp shades and planters where you need lightweight construction with built-in drainage or ventilation.
Essential Tools and Materials for Bamboo Crafting
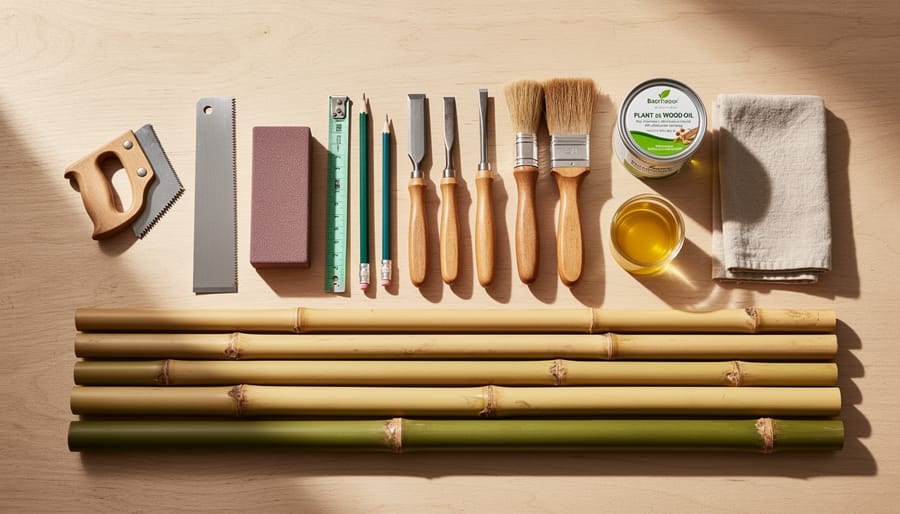
Working with bamboo requires specific tools that make cutting, shaping, and joining this unique material safe and efficient. While some projects can be completed with basic household items, having the right equipment ensures cleaner cuts, professional finishes, and safer crafting sessions.
Cutting Tools
A fine-tooth hand saw or Japanese pull saw works best for clean bamboo cuts without splintering. For larger projects requiring multiple precise cuts, a miter saw with a fine-tooth blade saves time and maintains consistency. Keep a sharp utility knife handy for trimming, scoring, and removing nodes.
Shaping and Finishing Equipment
Sandpaper in varying grits (80, 120, 220) smooths rough edges and prepares surfaces for finishing. A rasp or file helps shape bamboo ends and remove node bumps. An electric sander speeds up larger projects, though hand-sanding gives you more control on delicate work.
Essential Tools and Materials Checklist
- Hand saw or Japanese pull saw, for precise, splinter-free cuts
- Utility knife, for scoring, trimming, and detail work
- Sandpaper (80, 120, 220 grit), for smoothing edges and preparing surfaces
- Drill with small bits, for creating pilot holes and preventing splits
- Wood glue or bamboo-safe adhesive, for secure joins without hardware
- Natural jute or hemp rope, for lashing techniques and decorative binding
- Measuring tape and pencil, for accurate layout and marking
- Clamps, for holding pieces while glue dries
- Tung oil or bamboo sealer, for protecting finished projects
- Safety glasses and work gloves, essential protection from splinters and dust
Bamboo Material Selection
Choose bamboo poles 1-2 inches in diameter for furniture and structural projects. Smaller diameter canes (half-inch to one-inch) suit decorative items and intricate designs. Split bamboo strips work beautifully for weaving and covering flat surfaces. Always inspect bamboo for cracks, pest damage, or excessive dryness before purchasing, quality material prevents project failures midway through construction.
Safety Precautions and Bamboo Preparation
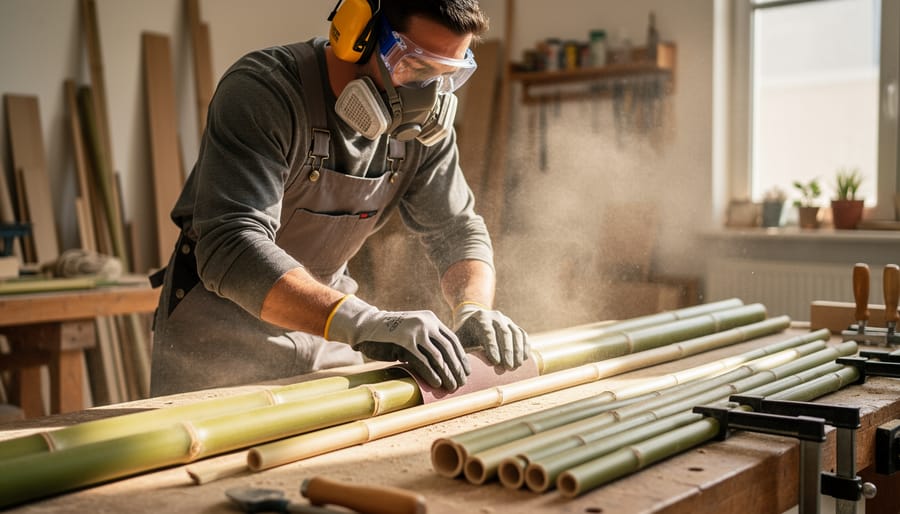
Before you start cutting or assembling bamboo, take a few minutes to set up safely. Bamboo splinters are sharp and can embed deeply in skin, so always wear thick work gloves, leather or heavy-duty cotton work best. Safety glasses protect your eyes from bamboo chips and dust when cutting or sanding, and a dust mask prevents inhalation of fine bamboo particles, which can irritate your lungs.
Use the right cutting technique to avoid dangerous kickback or uncontrolled breaks. Secure bamboo poles firmly in a vise or clamp before cutting, never hold them by hand. A fine-toothed saw works better than coarse blades, which can tear the fibers and create jagged edges. Cut slowly and steadily, rushing leads to splintering. Sand all cut edges immediately with medium-grit sandpaper to remove sharp fragments.
When applying finishes or sealants, work in a well-ventilated area or outdoors. Many bamboo-safe oils and stains release fumes that build up quickly in enclosed spaces. Open windows, use a fan, or take the project outside while finishes dry.
Proper bamboo preparation prevents future problems. Wipe down bamboo poles with a damp cloth to remove dirt and surface mold, then let them air-dry completely for 24 to 48 hours. Inspect for cracks or soft spots, discard any compromised pieces. To prevent insect damage, apply a borax solution (mix one cup borax with one gallon warm water) and let it soak in, or use a commercial bamboo preservative if you’re working with untreated poles. This step is especially important for bamboo used in humid areas or outdoor-adjacent spaces. Let treated bamboo dry thoroughly before cutting or finishing.
6 Beautiful Bamboo DIY Projects with Step-by-Step Instructions
Bamboo Wall Art Panel
Select six to eight bamboo poles in varying diameters (half-inch to two inches) and lengths from 12 to 36 inches. Clean them with a damp cloth and let them dry completely. For a modern geometric pattern, arrange the poles on a flat surface until you find a balanced composition, try staggering lengths horizontally or creating an asymmetric cluster. Mark your preferred layout with masking tape on the floor.
- Measure and mark each pole’s final length with a pencil, accounting for any adjustments needed after your test arrangement.
- Cut the poles using a fine-toothed saw, holding each piece steady in a miter box to prevent splitting. Sand the cut ends smooth with 120-grit sandpaper.
- Apply a thin coat of bamboo-safe wood glue to the back of each pole where it will contact the mounting board (a lightweight plywood or canvas backing cut to your design’s outer dimensions).
- Press each pole firmly onto the backing in your planned pattern, using small clamps or painter’s tape to hold pieces until the glue sets, about 30 minutes.
- Once fully dry, flip the panel over and attach two sawtooth hangers or D-rings to the backing’s top edge, spaced evenly for balance.
- Mark your wall position with a level, drill pilot holes if needed, and hang the panel on screws or picture hooks rated for the panel’s weight.
For extra dimension, paint some poles in matte earth tones or leave them natural for contrast. This project takes about two hours and creates a striking focal point that showcases bamboo’s clean lines.
Bamboo Planter Box
A tiered bamboo planter box brings vertical greenery to your space while maximizing limited square footage. This project uses 1-inch diameter poles for the frame and ½-inch slats for the box walls.
Start by cutting four 18-inch poles for corner posts and eight 12-inch poles for the box frames (four per tier). Sand all cut ends smooth to prevent splinters. For the walls, cut bamboo slats into 12-inch lengths, you’ll need about 20 slats per tier depending on spacing.
- Lash the four corner posts together at 8-inch intervals using waxed twine or zip ties, creating two tiers.
- Attach the 12-inch frame poles horizontally between posts at each tier level, securing with wood screws or bamboo nails.
- Weave or attach wall slats vertically around each frame, leaving ¼-inch gaps for drainage.
- Line each tier interior with landscape fabric, stapling it to the inside walls.
- Apply marine-grade sealant to all bamboo surfaces, paying extra attention to cut ends where moisture penetrates easily.
Drill three drainage holes in the fabric bottom of each tier. The gaps between slats provide additional airflow, preventing root rot. Let the sealant cure for 48 hours before adding soil. This design holds up to 15 pounds per tier when properly sealed and works beautifully on patios or balconies for herbs and small flowering plants.
Bamboo Room Divider Screen
A bamboo room divider creates instant privacy while allowing light to filter through, perfect for open-plan living spaces or studio apartments. This project requires minimal tools but demands patience with traditional rope lashing, the technique that gives the screen its authentic, handcrafted appeal.
Start by cutting eight vertical bamboo poles to your desired height (typically 6 feet for standard rooms) and four horizontal crossbars at 30 inches each to create three panels. Sand all cut ends smooth to prevent splinters. The frame uses a simple grid pattern: two verticals per panel connected by top and bottom crossbars.
- Lay two vertical poles parallel on your work surface, 30 inches apart. Position a horizontal crossbar 3 inches from the top.
- Using 3mm jute rope, begin a square lashing by wrapping the rope around both poles where they intersect, making four tight diagonal wraps followed by four perpendicular frapping wraps to tighten the joint.
- Secure the bottom crossbar 3 inches from the base using the same lashing technique. Repeat for all three panels.
- Fill each panel with evenly-spaced vertical bamboo slats, lashing each intersection point. Space slats 4-6 inches apart for privacy or wider for more light.
- Connect the three panels with rope hinges, allowing the screen to fold accordion-style for storage.
Test stability by gently shaking the frame, all joints should feel solid with no wobbling. Trim excess rope ends and apply clear furniture wax to protect the bamboo while maintaining its natural appearance.
Bamboo Pendant Light Shade
This project transforms split bamboo strips into an eye-catching light fixture that filters ambient light beautifully. You’ll need a wire lampshade ring (10-12 inches diameter), split bamboo strips or thin bamboo slats, jute twine or wire, wire cutters, and a drill with a small bit. Choose thin bamboo pieces that bend slightly without cracking, quarter-inch thickness works well.
- Attach the lampshade ring to your pendant cord fixture first, ensuring all electrical connections are secure and the power is off at the breaker before starting any work on the shade itself.
- Cut 20-24 bamboo strips to equal lengths, approximately 2 inches longer than the height you want for your shade (typically 8-10 inches for a standard pendant).
- Drill small holes near the top and bottom of each bamboo strip, about half an inch from each end, ensuring holes are large enough for your twine or wire to pass through twice.
- Thread twine through the top holes of all strips, spacing them evenly around the wire ring, then tie securely to create the upper attachment points.
- Repeat the threading process at the bottom, pulling gently to create your desired shade shape, cylindrical, tapered, or slightly flared, before tying off each strip.
- Add horizontal support bands by weaving thin twine around the vertical strips at mid-height, which prevents warping and adds decorative detail.
Apply a food-safe mineral oil finish to protect the bamboo from heat and dust. Never use this shade with bulbs exceeding 60 watts, and LED bulbs are strongly recommended since they produce minimal heat. The gaps between strips provide ventilation while creating striking shadow patterns on surrounding walls.
Bamboo Floating Shelf
Thick bamboo poles (3-4 inches in diameter) create striking floating shelves that bring natural texture to any room while supporting surprisingly heavy loads. Select culms with minimal taper and no visible cracks, thicker walls mean better weight capacity. For a 24-inch shelf, you’ll need one pole section cut to length, heavy-duty floating shelf brackets rated for at least 50 pounds, and matching wood screws.
- Cut your bamboo pole to the desired shelf length using a fine-toothed saw. Sand the cut ends smooth and seal them with wood glue to prevent splitting.
- Measure and mark the bracket positions on your wall, ensuring they’re level and hit wall studs for maximum support. Space brackets 16-24 inches apart depending on shelf length.
- Install the floating shelf brackets following manufacturer instructions, using a level to ensure perfect alignment. Tighten all screws completely.
- Drill pilot holes through the back of the bamboo pole where it will sit on each bracket rod. Make these holes slightly larger than the bracket diameter for easy sliding.
- Apply wood glue inside the pilot holes, then slide the bamboo pole onto the mounted brackets. The glue creates a permanent bond while the brackets bear the weight.
- Let the adhesive cure for 24 hours before loading the shelf.
Weight capacity varies with pole thickness and bracket quality, but expect 30-40 pounds for standard installations. Test with lighter items first, gradually increasing load. The hollow interior keeps shelves lightweight while the dense bamboo walls distribute weight evenly across mounting points.
Bamboo Utensil Holder and Organizer
This beginner-friendly project transforms bamboo culm sections into a practical kitchen organizer in under an hour. You’ll need bamboo poles with 2-3 inch diameters, a handsaw, sandpaper, wood glue, and optional felt pads for the base.
Start by measuring your drawer or counter space to determine the organizer’s footprint. Cut bamboo sections into 3-4 inch tall cylinders, these become individual compartments for utensils, gadgets, or cooking tools. For a countertop holder, aim for 5-7 sections; drawer organizers work best with 3-5 compartments depending on available width.
Sand the cut edges thoroughly to remove splinters and create smooth rims. Test each section by running your hand along the inside and outside surfaces, any rough spots will snag utensils or scratch countertops.
- Arrange bamboo sections in your desired configuration on a flat surface, grouping similar-sized cylinders together.
- Apply wood glue along the outer edges where sections touch, creating a connected cluster.
- Press sections firmly together and let the glue cure for 2-3 hours, checking alignment every 20 minutes.
- Once dry, apply felt pads to the bottom if using on countertops to prevent scratching.
For added stability in drawer organizers, glue the entire base to a thin bamboo plywood sheet cut to match your arrangement’s outline. This prevents the organizer from shifting when you open and close the drawer. Natural bamboo needs no finish for kitchen use, though a food-safe mineral oil coating adds subtle shine and extra moisture resistance.
Finishing and Sealing Your Bamboo Projects
Once your bamboo project is assembled, proper finishing protects it from moisture, UV damage, and everyday wear while enhancing its natural beauty. Start by sanding all surfaces with 220-grit sandpaper, working with the grain to smooth rough spots and remove any splinters. Wipe away dust with a slightly damp cloth before applying any finish.
Choose your finish based on the project’s location and use:
- Tung oil or linseed oil: Best for indoor pieces like shelves and wall art; apply thin coats with a cloth, allowing 24 hours between applications for a natural matte finish that deepens bamboo’s color
- Polyurethane sealant: Ideal for high-moisture areas like planters and bathroom organizers; provides a protective waterproof barrier with a slight sheen
- Natural beeswax: Perfect for utensil holders and items that contact food; buff on with a soft cloth for a subtle, food-safe finish
- Wood stain: Use on room dividers or furniture pieces when you want to darken the bamboo or match existing decor; always test on scrap pieces first
For outdoor bamboo projects exposed to weather, apply two coats of exterior-grade polyurethane or marine varnish, reapplying annually. Indoor pieces need minimal upkeep, dust regularly and clean with natural cleaning solutions rather than harsh chemicals. Treat bamboo decor as you would cleaning window blinds gently and without abrasive products. Reapply oil finishes every 12-18 months to maintain protection and luster.
How to Verify Quality and Troubleshoot Common Issues
Once your bamboo project is complete, inspect it carefully. Check all joints by gently applying pressure, they shouldn’t shift or creak. Run your hand along all surfaces to catch any rough spots or splinters that need sanding. If you used stain or finish, look for drips, pooling, or missed areas under good lighting.
Cracking often happens when bamboo dries too quickly after cutting. Store your projects away from direct heat and sunlight for the first week. If splits appear, work wood glue into the crack with a toothpick, then clamp or wrap tightly with painter’s tape until dry.
Loose joints signal insufficient adhesive or movement during drying. Disassemble if possible, clean old glue residue with fine sandpaper, apply fresh construction adhesive or epoxy, and clamp for the full cure time listed on the product.
Uneven staining results from inconsistent surface prep or applying too much product at once. Sand the affected area lightly with 220-grit paper, wipe clean, and apply thin coats, allowing each to dry completely. Keep your finished pieces dust-free, similar to maintaining any handcrafted decor, regular dusting and occasional smart home cleaning routines will preserve their appearance for years.
Frequently Asked Questions About Bamboo DIY Projects
How long do bamboo DIY projects last?
Properly treated and finished bamboo projects can last 10-15 years indoors and 5-7 years outdoors with regular maintenance. The key is applying a good sealant and keeping bamboo away from prolonged moisture exposure, which causes warping and mold.
Where can I find sustainably sourced bamboo?
Look for bamboo certified by the Forest Stewardship Council (FSC) at specialty lumber yards, online bamboo suppliers, or eco-focused home improvement stores. Avoid generic bamboo stakes from garden centers, as their sourcing is often unclear.
Is bamboo cheaper than wood for DIY projects?
Bamboo poles and sheets typically cost 20-40% less than comparable hardwood. A basic project using 6-8 bamboo poles might run $15-30 in materials, compared to $40-60 for similar hardwood lumber.
Are bamboo projects suitable for complete beginners?
Yes, projects like the utensil holder and wall art panel require only basic cutting and sanding skills. Start with smaller pieces to get comfortable with how bamboo cuts and handles before tackling larger builds like shelves or room dividers.
How do I maintain bamboo decor over time?
Dust weekly with a soft cloth and wipe with a damp cloth monthly, following the same principles as any cleaning guide for natural materials. Reapply oil or sealant annually for indoor pieces and twice yearly for outdoor items, using a simple maintenance checklist to track when treatments are due.
Can I use bamboo from my yard for projects?
Fresh-cut bamboo needs 6-12 weeks of curing in a dry, shaded area before use to prevent cracking. It must also be treated for insects and mold, making commercially prepared bamboo poles easier and more reliable for first-time crafters.
These answers address the most common concerns people have before starting their first bamboo project. Once you understand bamboo’s characteristics and care requirements, you’ll find it’s one of the most forgiving and rewarding materials for sustainable home crafting.
You’ve now seen how accessible and rewarding bamboo crafting can be for creating sustainable home decor. Each project we’ve covered transforms this renewable resource into functional art that reduces your environmental footprint while personalizing your space. Whether you tackle the simple utensil holder or challenge yourself with the pendant light shade, you’re making a tangible choice for the planet.
Starting small makes perfect sense. Pick the bamboo floating shelf or wall art panel as your first project, both require minimal tools and give you confidence with the material’s unique characteristics. As you gain experience, you’ll discover bamboo’s remarkable versatility and develop your own design ideas.
Every bamboo piece you create replaces products made from slower-growing hardwoods or synthetic materials. That matters. Your hands-on approach to sustainable living inspires others and proves that eco-conscious choices don’t mean sacrificing style or quality.
Grab some bamboo poles this weekend and begin. The combination of natural beauty, structural integrity, and environmental responsibility makes bamboo crafting one of the most satisfying ways to improve your home. Your first finished project will speak for itself.